Headspace · Volume 6
Measuring the Actual Number — The Feeler-Gauge Stack
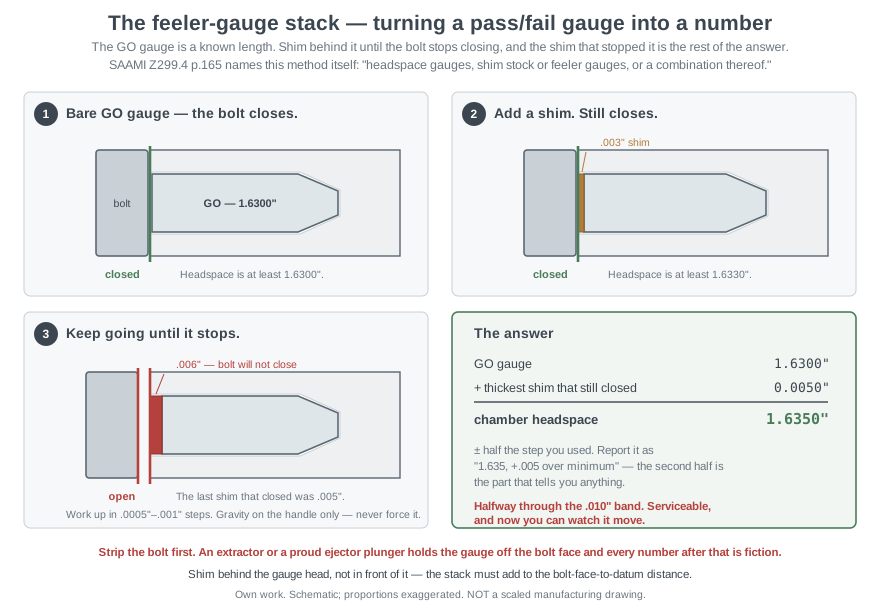
Everything so far has produced verdicts. This volume produces a number, using tools most people already own, by a method the standard itself names. If you read one volume in this series, read this one — it is the technique that turns “somewhere in a ten-thousandths band” into “1.6350 inches, plus five over minimum, measured on this date at this round count.”
6.1 The Idea
A GO gauge is a certified length. Forster hold theirs to ±0.00015 inches and inspect each one against NIST-traceable instruments;1 SAAMI specifies the tolerance one-sided so a GO gauge can only ever err long.2 Whatever else is uncertain on your bench, that plug of O6 steel is not.
The bolt closes on it, which tells you the chamber is at least that long. It does not tell you how much longer.
So make the gauge longer. Put a shim of known thickness behind its head, between the head and the bolt face, and the assembly is now GO plus the shim. Close the bolt. If it still closes, the chamber is at least GO plus the shim. Work up in small steps until the bolt refuses, and the last shim that closed is the answer.
Chamber headspace = GO gauge dimension + thickest shim on which the bolt still closes.
That is the entire method. Everything below is about doing it without lying to yourself.
6.2 It Is Not an Improvisation
ANSI/SAAMI Z299.4-2015, printed page 165, on mounting velocity-and-pressure test barrels:
“In mounting test barrels to Universal Receivers or test actions, a headspace not exceeding 0.003” (0.07 mm) over minimum should be maintained. This may be measured by headspace gauges, shim stock or feeler gauges, or a combination thereof whichever is most appropriate for the type of equipment being used.”3
Shim stock or feeler gauges, or a combination thereof. This is how SAAMI’s own laboratories set headspace on the barrels used to generate the pressure data in the rest of that document. The method in this volume is that method, applied to a rifle instead of a test fixture.
The same page gives you a benchmark: SAAMI’s labs hold no more than 0.003 inches over minimum. Keep that in your head when you get your own answer.
6.3 What You Need
- A GO gauge for the cartridge. Correct type, correct cartridge, and check the interchangeability chart before buying — one gauge covers a family (Vol 4).
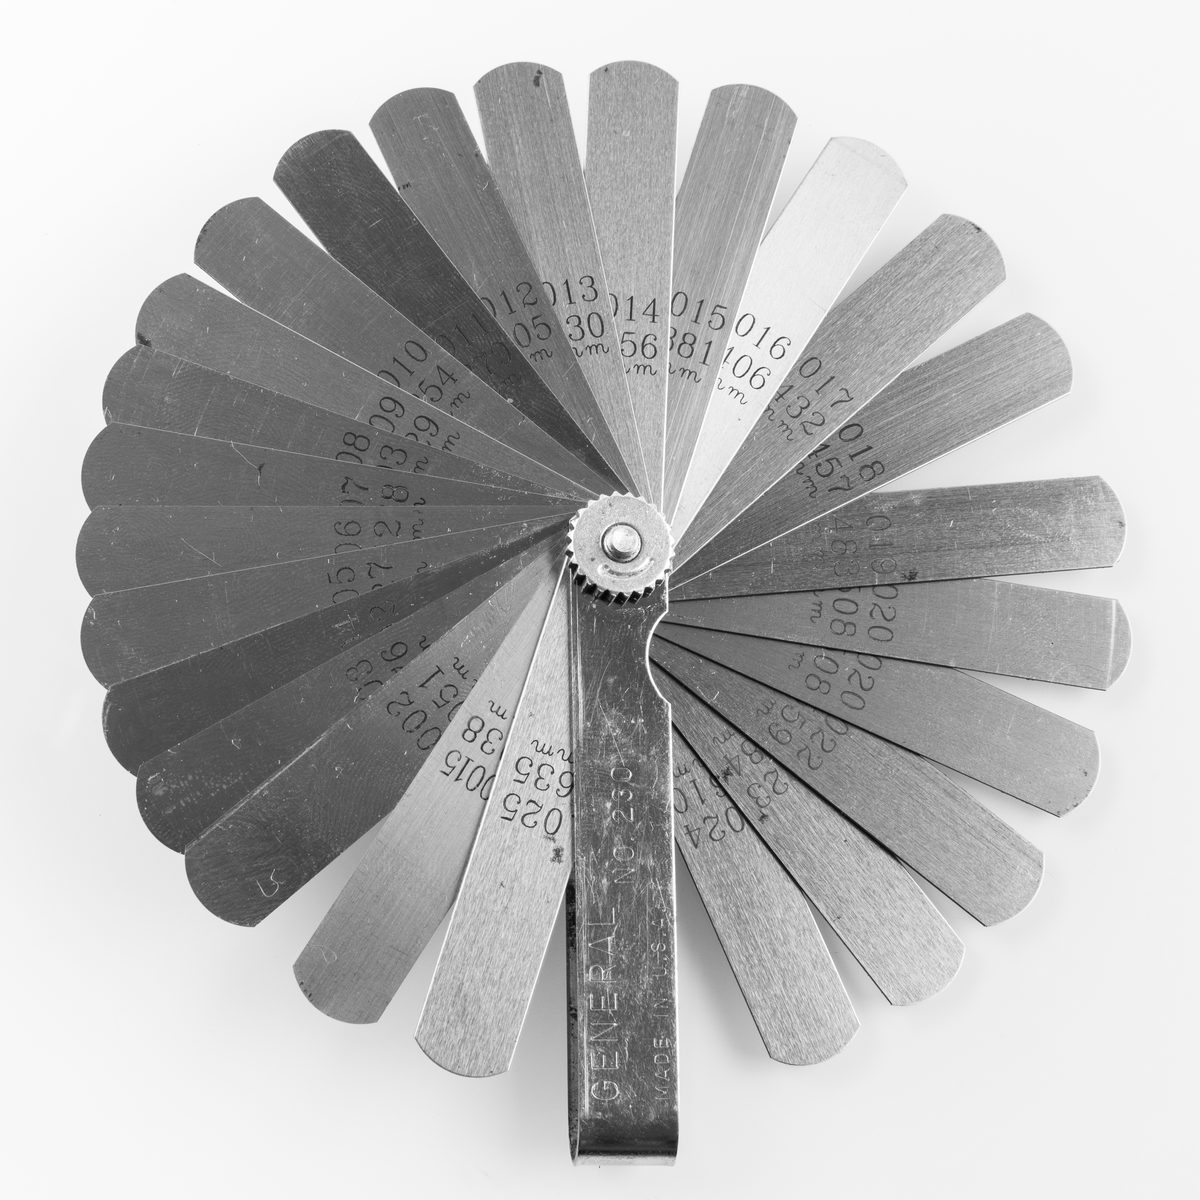
- A feeler gauge set, or shim stock. A good automotive feeler set runs from 0.0015 to 0.035 inches. For headspace work you want the fine end: 0.0015, 0.002, 0.003, 0.004, 0.005, 0.006, 0.008, 0.010. Brass or steel shim stock in 0.001-inch increments is better still because it is flat rather than slightly crowned, and it cuts with scissors.
- A micrometer. To verify the feelers. This is not optional and is covered below.
- Solvent, a chamber brush, patches, and a clean rag.
- A stripped bolt. Extractor out, ejector out. See below.
You do not need a NO-GO or FIELD gauge for this. That is part of the appeal: one gauge and a $12 feeler set out-resolve a $200 three-gauge set by a factor of ten.
6.4 Preparation, and Why Each Step Is There
Strip the bolt completely. Extractor out. Ejector out. This is where the method diverges from ordinary pass/fail gauging, and the reason is arithmetic. Manson defend leaving them in for a verdict, on the grounds that a tipped gauge still tells you the chamber is at least minimum.4 That logic is sound and it does not survive contact with a measurement. A gauge held off the bolt face by an extractor rim or a proud ejector plunger reads long by whatever that interference is, and your stack of shims will report a chamber that is tighter than it really is — an error in the dangerous direction.
Manson’s own later guidance agrees: “Headspace gages should always be used with a stripped bolt… Some extractors are also problematic. They can force the gage to the side, preventing the shoulder cone of the gage from seating properly in the shoulder cone of the barrel.”5
Check the ejector plunger before you put it away. Manson’s specific warning: make sure it can be pushed below the bolt face, because “it may be too long, or jammed with crud and protrude to give a false gauge reading.”6 If you are removing it anyway this is moot, but on an action where the ejector cannot easily come out it is the first thing to verify.
Clean the chamber properly, then dry it. Chamber brush, solvent, patches until they come out clean, then dry patches. A carbon ring at the shoulder is a false reading of several thousandths, which is most of your measurement range. Dry matters too: a film of oil between the gauge head and the bolt face is real thickness, and hydraulic effects in a blind chamber are worse.
Clean the bolt face. The extractor cut and the ejector hole trap crud, and a raised crumb of carbon under the gauge head tilts it.
Confirm the bolt runs freely in the receiver. Forster: “It is impossible to have the proper feel of a Headspace Gage if the bolt is tight, dirty, or sticky.”7 You are about to make a judgement on feel; the feel must be clean.
Measure your feeler gauges. Every one you intend to use, on a micrometer, at the point that will sit against the gauge head. Automotive feeler blades are marked to a nominal and are commonly a few ten-thousandths off, and worn blades are thinner at the tip where they get used. You are trying to resolve half a thousandth; a blade that is 0.0043 stamped 0.004 has eaten most of your resolution before you start. Write the measured values on masking tape on the blades. This step is what separates a measurement from a guess.
6.5 The Procedure
One. Establish the baseline. Bare GO gauge in the chamber, close the bolt on gravity alone. It should close. If it does not, stop — headspace is below minimum, no shim will help, and that is its own finding worth recording.
Two. Add the thinnest shim. Place it behind the gauge head, flat against the bolt face, and lower the bolt. Orientation matters and it is the one thing people get backwards: the stack has to lengthen the bolt-face-to-datum distance, so it belongs between the bolt face and the head of the gauge, not between the gauge shoulder and the chamber cone. A shim up front does something else entirely and tells you nothing.
Practically, on most turn-bolts, this means holding the shim against the bolt face as you feed the bolt forward, or taping it to the gauge head with the thinnest tape you can find and then subtracting the tape — which you have also measured. Tape is a legitimate error source; if you can hold the shim without it, do.
Three. Work up. Increase the stack in the smallest steps your feelers allow, closing the bolt each time on gravity. Feeler blades stack, so you can combine 0.002 + 0.0015 to get 0.0035; verify the combination on the micrometer rather than trusting the addition, because two blades never sit perfectly flat against each other.
Four. Find the transition. At some thickness the bolt handle will stop short of the closed position. Back down one step and confirm that thickness still closes, then go back up and confirm it still does not. You want the transition reproduced twice in each direction. A transition you can only find once is not a transition, it is a tolerance on your own hands.
Five. Do the arithmetic.
chamber headspace = GO dimension + thickest shim that closedSix. Record it. Not just the number — the number, the date, the round count, the gauge you used, the shim thickness measured rather than stamped, and the step size. In three years the second reading is what makes the first one valuable.
6.6 A Worked Example
A .308 Winchester, gauged with a Forster GO at 1.6300 inches.
Table 1 — A Worked Example
| Stack | Measured | Bolt |
|---|---|---|
| bare gauge | 0.0000 | closes freely |
| 0.002 blade | 0.0021 | closes |
| 0.003 blade | 0.0029 | closes |
| 0.004 blade | 0.0041 | closes |
| 0.005 blade | 0.0048 | closes, slight resistance at the last few degrees |
| 0.006 blade | 0.0061 | will not close |
| 0.005 blade again | 0.0048 | closes — confirmed |
| 0.006 blade again | 0.0061 | will not close — confirmed |
Chamber headspace: 1.6300 + 0.0048 = 1.6348 inches, which is +0.0048 over minimum, with an uncertainty of about ±0.0007 set by the gap between the 0.0048 and 0.0061 blades.
What that means, from Vol 2’s table: the SAAMI band for .308 Winchester runs 1.6300 to 1.6400. This rifle sits a little under halfway up it. It is comfortably in spec, it is about 60 percent looser than SAAMI would tolerate in one of its own test barrels, and — the actually useful part — a reading of 1.6362 in two years’ time would tell you something a gauge set never could.
Record it as “1.6348 / +.0048 / 2026-07-29 / 3,400 rds / Forster GO 1.6300 / .0005 steps.” That line is worth more than any pass/fail result you will ever write down.
6.7 Where the Error Actually Lives
Take the sources of error in order of how much damage they do.
Feeler blade tolerance — up to 0.0005 inches, easily. Eliminated by measuring the blades. This is the single highest-value five minutes in the procedure.
A dirty chamber or bolt face — 0.001 to 0.005 inches, in the unsafe direction. Eliminated by cleaning. Note the direction: crud makes the rifle read tighter than it is.
Extractor or ejector interference — 0.001 to 0.010 inches, also in the unsafe direction. Eliminated by stripping the bolt.
Tipping. A gauge that is not square to the bore reads long. On a stripped bolt with a clean chamber this largely takes care of itself, because the chamber’s shoulder cone centres the gauge as the bolt closes — Manson’s description of the mechanism.4 Rotating the gauge a third of a turn between readings and confirming you get the same transition is a cheap check on it.
Your own hands. The difference between “closes” and “closes with a little help” is the whole measurement. Gravity on the bolt handle is the standard,5 and if you find yourself deciding whether something counted, it did not.
Lug seating. On a rifle whose bolt lugs bear unevenly, the bolt will close a little further with a little more force, and there is no shim thickness that makes this go away. If the transition is mushy across two or three thousandths rather than crisp within one, you have probably found a lug-contact problem rather than a measurement problem, and that is a real finding. Vol 9 covers it.
The gauge itself. Everything rests on it. It is a certified length from a reputable maker, held to ±0.00015 inches, so this is the smallest error in the list — but it is worth confirming the gauge is the right cartridge and the right type before you build a number on it.
6.8 Variations
On an AR-15, do it on the bare barrel. Gauge in the chamber, shims held against the bolt face, bolt inserted into the barrel extension and rotated by hand. This is actually a better feel than a turn-bolt gives you, because you are rotating the bolt directly rather than reading through a handle and a cam. There is no gravity standard here — use light finger pressure and be consistent.
On rimmed cartridges, the gauge is a disc and the shim sits behind it exactly the same way. The numbers are two decimal places further right — a .30-30 runs 0.0630 to 0.0700 — so you want thinner shim stock and finer steps. Brass shim stock in 0.0005 increments earns its keep here.
On belted cases, likewise: the band is 0.007 inches on most, 0.004 on the Weatherbys, so 0.001-inch steps give you only four to seven bins. Half-thousandth shim stock is worth having.
On mouth-breeching cases, the gauge is a plain cylinder and the shim goes behind it as usual. On a pistol, the “close the bolt” step becomes “does the barrel lock up,” per Manson’s procedure in Vol 5.
If you do not own a GO gauge, you can run the same method against a fired case whose head-to-datum length you have measured on a comparator — but read Vol 7 first, because a comparator’s datum diameter may not be SAAMI’s, and brass springs back. That gives you a repeatable number for that rifle. It does not give you a SAAMI number, and you should not write it down as one.
6.9 What This Method Cannot Do
It gives you one number: the total distance from bolt face to datum. It does not tell you which link in the chain produced it — a set-back lug abutness, a bolt face cut too deep, a chamber reamed long, or a barrel a sixtieth of a turn shy. Vol 9 is about separating those.
It also measures the rifle at rest, under gravity on the bolt handle. A rifle that measures 1.6348 static can behave like a longer chamber under 60,000 psi if the lugs are bearing on one side and the bolt cams back. That is why Vol 12 exists: the fired brass is the only witness to what happens under pressure, and when the brass and the gauge disagree, the brass is right.
6.10 Bibliography
Footnotes
-
Forster Products, Gunsmithing Tools catalogue, “Headspace Gages” features list — ±.00015” headspace tolerance, NIST-certified inspection. https://www.forsterproducts.com/wp-content/uploads/2024/08/Gunsmithing_Headspace_Gages_Cat82_38-42.pdf ↩
-
ANSI/SAAMI Z299.4-2015, Section III, Figure I, printed pp. 212-215. The
F + .0002 MIN / F - .0002 MAXtolerance callout appears on the drawing. ↩ -
ANSI/SAAMI Z299.4-2015, Section II, “VELOCITY & PRESSURE BARRELS: MOUNTING IN RECEIVERS”, printed p. 165. Emphasis added. Held in the project Reference Library. ↩
-
Manson Precision Reamers, “Ejector/Extractor Relief on Headspace Gauges.” https://mansonreamers.com/ejector-extractor-relief-on-headspace-gauges/ ↩ ↩2
-
Ray Gross, Manson Precision Reamers, “Headspacing Pre-fit Barrels,” August 2024. https://mansonreamers.com/headspacing-pre-fit-barrels/ ↩ ↩2
-
Manson Precision Reamers, “Instructions for Using Manson Headspace Gauges.” https://mansonreamers.com/using-manson-headspace-gauges/ ↩
-
Forster Products, User Instructions for Headspace Gages, Issue 4, § 4.0. https://www.forsterproducts.com/wp-content/uploads/2024/08/Headspace_Gage_Instructions.pdf ↩
Comments (0)