Headspace · Volume 5
Using the Gauges — The Physical Procedure, Action by Action
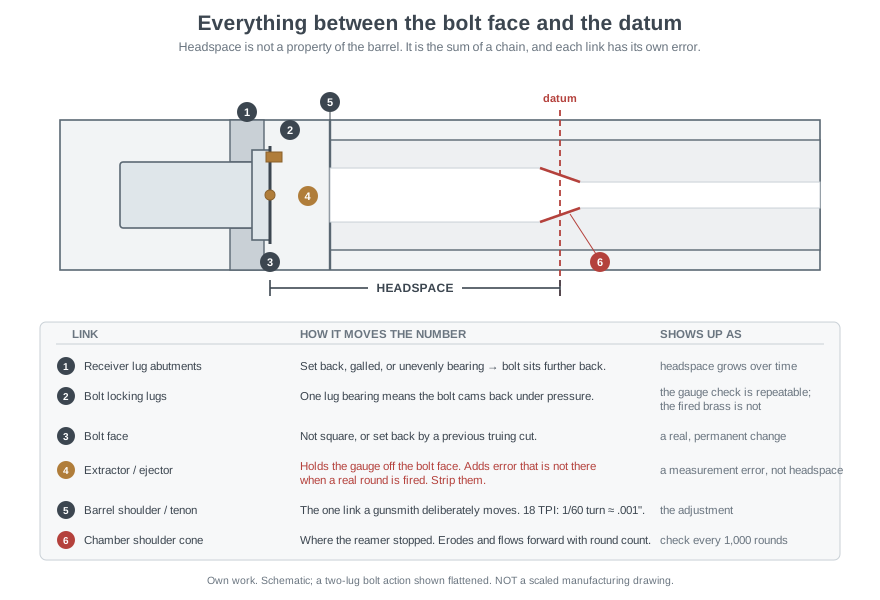
Gauging a rifle takes about ninety seconds and roughly half the people who do it get a wrong answer, because the gauge is only reporting the truth if the bolt face and the gauge head are in genuine contact and nothing is holding them apart. This volume is the mechanics: what to strip, how hard to push, and how each action type differs. It is also where the two major gauge makers disagree with each other in print, which is worth understanding rather than picking a side on.
Every procedure below assumes the firearm has been verified unloaded — chamber and magazine, visually and by feel — and that you are wearing eye protection. Forster’s safety block is two lines long and both of them are this.1
5.1 The Universal Preparation
Forster’s four steps, verbatim:1
- “Slide the bolt out of the action. The bolt must work freely in the receiver. It is impossible to have the proper feel of a Headspace Gage if the bolt is tight, dirty, or sticky.”
- “Remove the extractor from the bolt, if they are not riveted together, and the ejector if a spring-loaded plunger type.”
- “Clean the chamber and the bolt face.”
- “Gently attempt to close the bolt on the Headspace Gage.”
Step 3 is not housekeeping. A carbon ring at the chamber shoulder, or lacquer and crud in the extractor cut on the bolt face, will hold a gauge off its seat by more than the entire measurement band you are trying to resolve. Clean means a chamber brush and solvent, then dry — and dry matters, because a film of oil between the gauge head and the bolt face is a real, if small, error, and because oil in a chamber is its own hazard when you go back to shooting.
Step 1’s “must work freely” is equally load-bearing. A gritty bolt has a feel of its own, and you cannot tell that feel from the feel of a gauge contacting. If the bolt drags, clean and lubricate the raceways before you gauge anything.
5.2 The Force Question
This is where most bad readings come from, and the best statement of the answer is Ray Gross’s for Manson:
“The bolt should never be forced closed on a headspace gage. Gravity on the bolt handle is the correct amount of force.”2
Gravity on the handle. Not a push, not a nudge, and absolutely not a tap. Turn the rifle so the bolt handle falls under its own weight and see whether it goes.
Gross also answers the question everyone actually has:
“What if the bolt handle closes on halfway on the GO gage? Technically, it is a little shy of minimum headspace, functionally it is close enough. You are less than a few .0001’s from fully closing.”2
That is a useful calibration for your own hands. A bolt that comes most of the way down on GO and stops is a few ten-thousandths short. A bolt that stops at 45 degrees is a different animal.
And the rule that protects the rifle:
“IMPORTANT: Never tighten the barrel or barrel nut with the bolt closed on a headspace gage! The headspace gage is hardened tool steel. It is not going to give. At best, you may make it impossible to open the bolt. At worst, you will damage the bolt lugs, action lug abutments, and/or the barrel.”2
5.3 The Extractor and Ejector Disagreement
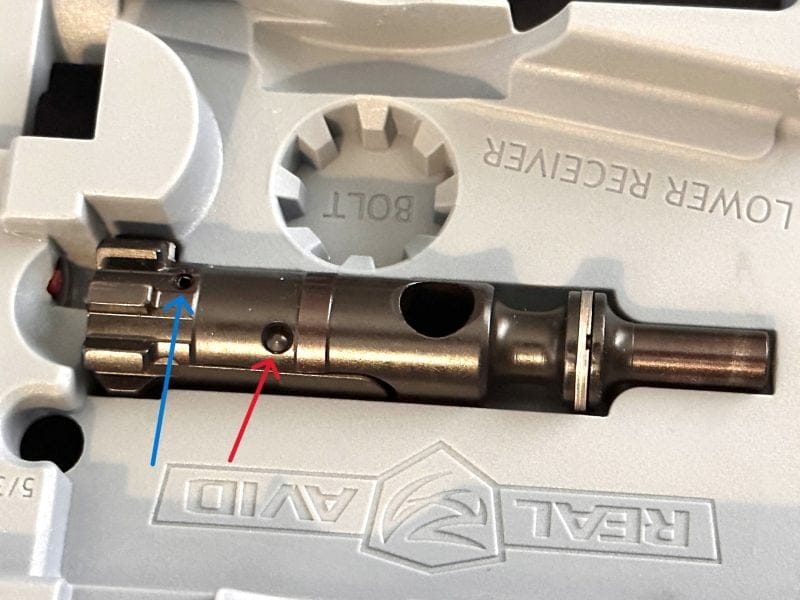
Forster say remove them. Manson say you usually do not have to, and explain at length why their gauges are designed so you do not.
Forster’s position: remove the extractor if it is not riveted to the bolt, and remove a spring-loaded plunger ejector.1 Some Forster gauge sets are made “with the rim removed and a notch to help avoid the need to remove either the extractor or ejector.”3
Manson’s position, on why they do not cut extractor or ejector relief into standard gauges:4
“Our gauges are made with full-circumference rims that are no larger or thicker than the rims of the cartridge you’re shooting. If the cartridge rim will slip under the extractor, the rim of the gauge will also. Having a full-diameter head, our gauges will locate against the bolt face more consistently than will gauges with one-third or one-half of the head cut away.”
On plunger ejectors, they argue the plunger gets compressed as a matter of course: the gauge is hooked under the extractor, pivoted into the chamber, and “as the action is closed, the gauge centers up against the shoulder of the chamber, which forces the gauge straight within the chamber and the gauge head against the bolt face.”4
And then they state the limit of their own argument, which is the honest and useful part:
“If there’s more than minimum headspace, the minimum gauge may remain slightly tipped — but you know you have at least minimum headspace. If the action won’t close on the maximum gauge, the gauge will be straight within the chamber and flat against the bolt face — and you know headspace is less than maximum.”4
Read that carefully. Manson are saying a tipped gauge still gives a correct pass/fail verdict, because the inequality only ever goes one way. They are not saying a tipped gauge gives a correct measurement.
So the resolution for this series is: for a pass/fail check, either approach works, and Manson’s reasoning is sound. For the numeric measurement in Vol 6, strip the bolt. A tipped gauge and a stack of feelers produce a number that is confidently wrong, which is worse than no number.
Manson’s own pre-fit-barrel guidance, written a decade later than the relief-cut piece, comes down on the same side: “Headspace gages should always be used with a stripped bolt. A spring-loaded ejector will make it much more difficult to take reliable readings with your headspace gages. Some extractors are also problematic. They can force the gage to the side, preventing the shoulder cone of the gage from seating properly in the shoulder cone of the barrel. This also will cause unreliable or incorrect headspace readings.”2
One specific check Manson flag that nobody else does: with a plunger ejector, make sure the plunger can actually be pushed below the bolt face. “It may be too long, or jammed with crud and protrude to give a false gauge reading.”5 A seized ejector plunger standing proud is a fixed error on every reading you take, and it is invisible unless you look for it.
5.4 Turn-Bolt Rifles
The base case. Strip the bolt of extractor and ejector, clean chamber and bolt face, insert the gauge, close on gravity.
- Closes on GO, does not close on NO-GO: correct headspace.
- Closes on GO and NO-GO, not on FIELD: serviceable by Forster’s definition, in spec by Manson’s. Worth measuring properly.
- Does not close on GO: headspace is under minimum. The rifle may still function with commercial ammunition, but it will not accept a maximum-length cartridge, and that is a real problem with military surplus or with your own brass after a firing or two.
- Closes on FIELD: stop. Do not fire it.1
5.5 Break-Open Rifles and Shotguns
Manson’s warning here is the most emphatic in their whole instruction set, and it is about the gun rather than the reading:
“If you’re checking a break-open rifle or shotgun, the gauge is placed in the chamber and then the action slowly closed. DO NOT FORCE a break-open action closed. There is tremendous leverage here and your gun could be damaged by the hardened gauge if forced shut.”5
A break-action’s closing leverage is enormous and the barrels will lever a hardened gauge into the standing breech with force no bolt handle can generate. Close it with fingertips and let it stop where it stops.
5.6 The AR-15 and Its Relatives
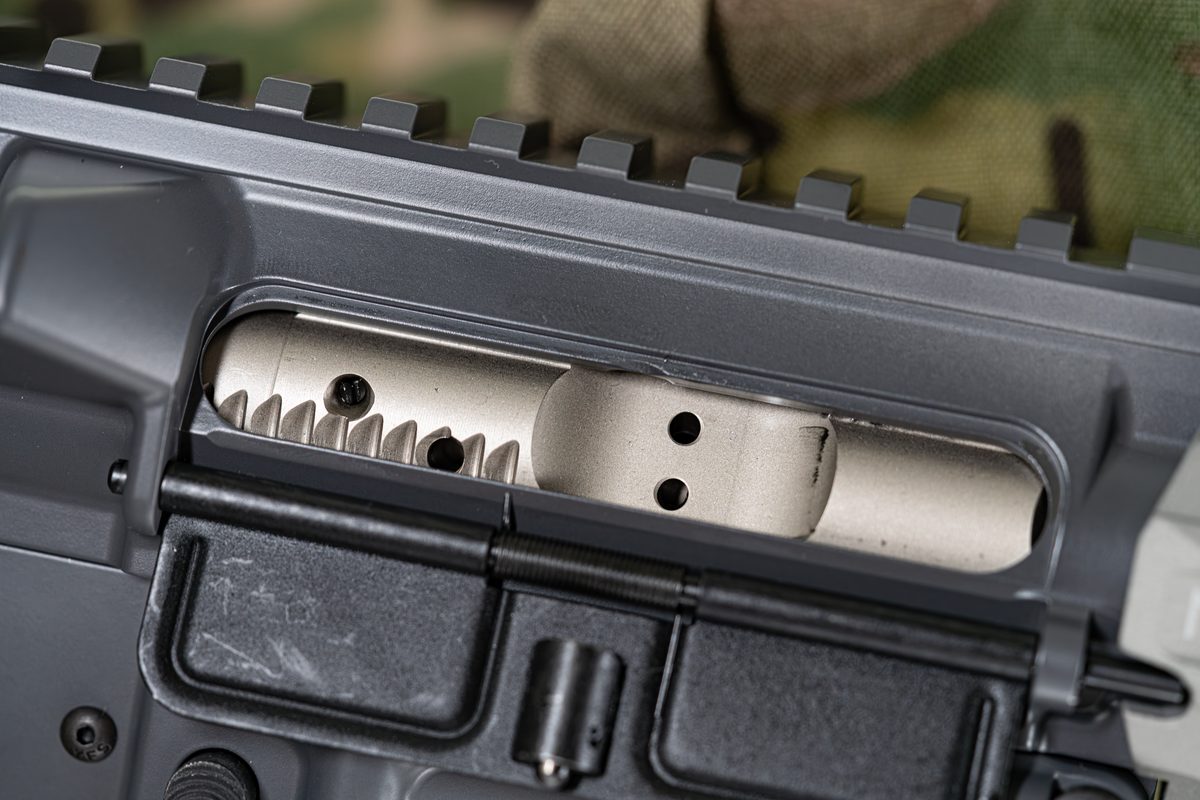
The AR family is different in a structurally important way: headspace is set by the bolt and the barrel extension, and the receiver is not in the chain at all. The bolt lugs lock into the barrel extension, which is threaded onto the barrel. The upper receiver just holds the assembly in alignment.
This means the check can be done on the barrel alone, which is the cleanest way to do it.
- Strip the bolt: remove the extractor and the ejector. On a standard AR bolt both are retained by roll pins and both must come out for a numeric measurement. (For a quick pass/fail some builders leave them in; the same caveat as above applies.)
- Place the gauge in the chamber.
- Insert the bolt into the barrel extension behind it and rotate it. The bolt should turn fully into battery on the GO gauge and should not turn on the NO-GO.
Doing it this way removes the buffer spring, the carrier, and the receiver from the equation entirely, and gives you a genuinely tactile result rather than a guess about whether the carrier bottomed.
If you check it assembled instead, Forster note the practical hazard: “When checking AR-style firearms, you may need to engage the forward assist to assure full bolt closure.”1 That is true, and it is also exactly the situation where a marginal reading gets pushed into a false pass. If you find yourself on the forward assist, take the barrel off the receiver and do it properly.
Which gauges: a chamber marked 5.56 NATO should be checked with 5.56 NATO gauges, and a chamber marked .223 Remington with .223 gauges. Per Vol 4, Forster’s 5.56 minimum gauge is the same part as the .223 GO, so in practice the GO check is identical; the maximum gauges differ. And regardless of headspace: do not fire 5.56 in a .223-marked chamber.6
5.7 Locked-Breech Semi-Auto Pistols
Manson, verbatim:5
“If possible, headspace is best checked with the barrel and slide off the frame and any recoil spring removed. Turn the slide upside down and fit the gauge under the extractor. Slide the barrel back toward the breech face and center the gauge within the chamber. Push the barrel toward the breech face while attempting to get the barrel to lock in its engagement surfaces. The barrel should lock up with the ‘GO’ gauge in the chamber, but not lock on the ‘NO GO’ or ‘FIELD’ gauge.”
“These instructions apply only to locked-breech, not blow-back, semi-auto pistols.”
Almost all of these are mouth-breeching cartridges, so the gauge is a plain cylinder of a defined length and the stop is the step at the front of the chamber. Manson use a two-gauge system for rimless pistol cases — GO at the industry minimum, NO-GO at the maximum, no FIELD.7
5.8 Revolvers
“Place the headspace gauge in a chamber as you would a cartridge and try to rotate the cylinder past the recoil shield. The ‘GO’ gauge should rotate past the recoil shield; the ‘NO GO’ and ‘FIELD’ gauges should not.”5
Revolver cartridges are rim-breeching, so this is checking the rim recess depth in the cylinder. Do every chamber, not one — cylinders are drilled and counterbored individually and they are not always alike.
5.9 Pre-Fit Barrels
Pre-fit barrels are where a lot of people meet headspace gauges for the first time, and they come in two kinds that behave completely differently.2
Shouldered pre-fits are cut for a specific action or family. The maker sets headspace by controlling the relationship between the external barrel shoulder — the face that lands on the receiver — and the internal chamber shoulder. There is no user adjustment. You fit the recoil lug if the action takes a washer type, thread it in, torque to the maker’s spec, and then check. Manson’s summary: “As long as the chambering and threading has been done accurately AND you have the correct action for the barrel AND the action is in good condition, your headspace should fall between the GO- and NO-GO gages.”
Barrel-nut pre-fits are a fitting job, and Manson are blunt about it: “To be honest, I am not sure a barrel nut type barrel should be called a ‘prefit’. It is already chambered and threaded, but you are going to do all of the fitting.”
The rule that makes barrel-nut fitting tractable is a number worth memorising:
“With an 18 TPI barrel, if you rotate the barrel about as far the minute hand moves in one minute on a clockface (1/60th of a turn), you will change the headspace about .001”. It will not take much rotation to change headspace significantly.”2
The arithmetic checks: at 18 threads per inch, one full turn advances 0.0556 inches, so a sixtieth of a turn is 0.00093 inches. Close enough to a thousandth to work with, and the clockface image makes it usable at the bench.
The procedure, condensed from Manson’s account:
- Assemble the barrel nut onto the barrel. Position the recoil lug (pinned to the action, or located by a cutout in the vice, if you are lucky).
- Use the GO gauge to snug the barrel to the action by hand, not with a wrench, then snug the nut.
- Open the bolt and remove the gauge. If the bolt was tight to open, back the barrel out a little.
- Confirm the bolt closes easily on GO and does not close on NO-GO.
- Remove the gauge, torque the nut properly, and recheck.
Step 5 is where it gets interesting, because torquing the nut moves things:
- If the bolt now will not close on GO, the barrel rotated inward with the nut. Either immobilise the barrel better while torquing, or “give the barrel a little more clearance on the GO gage before tightening. The barrel will probably rotate about the same amount each time you tighten the nut, so you should be able to time that rotation and bring the barrel into proper headspace with one or two tries.”
- If the bolt now closes on NO-GO, the opposite is happening: “as the barrel nut is tightened, it is drawing the barrel out of the action slightly, increasing the headspace. The solution is to set the barrel a little tighter than GO to begin with.”
Both are learnable per-action behaviours, which is the encouraging part — you are timing a repeatable rotation, not fighting randomness.
5.10 After Use
Forster’s one-line maintenance instruction: “Store lightly oiled Headspace Gages in a cool, dry location.”1
A rusted or dinged gauge is not a gauge any more, and a gauge with a burr on its head reads long by exactly the height of the burr. Keep them in the plastic sleeve they arrive in, wipe them before and after, and do not put them loose in a drawer with taps.
5.11 Bibliography
Footnotes
-
Forster Products, User Instructions for Headspace Gages, Issue 4, §§ 2.0, 4.0, 5.0 and the § 3.4 warning block. https://www.forsterproducts.com/wp-content/uploads/2024/08/Headspace_Gage_Instructions.pdf ↩ ↩2 ↩3 ↩4 ↩5 ↩6
-
Ray Gross, Manson Precision Reamers, “Headspacing Pre-fit Barrels,” August 2024. Emphasis in the quoted passages added. https://mansonreamers.com/headspacing-pre-fit-barrels/ ↩ ↩2 ↩3 ↩4 ↩5 ↩6
-
Forster Products, headspace gage product pages, on gauge sets supplied with the rim removed and a notch to avoid extractor and ejector removal. https://www.forsterproducts.com/product-category/gunsmithing/headspace-gages/ ↩
-
Manson Precision Reamers, “Ejector/Extractor Relief on Headspace Gauges.” Emphasis added. https://mansonreamers.com/ejector-extractor-relief-on-headspace-gauges/ ↩ ↩2 ↩3
-
Manson Precision Reamers, “Instructions for Using Manson Headspace Gauges.” https://mansonreamers.com/using-manson-headspace-gauges/ ↩ ↩2 ↩3 ↩4
-
Manson Precision Reamers, “Why Does Firing 5.56 Ammo in a 223 Rem Chamber Result in Higher-Than-Normal Pressures?” https://mansonreamers.com/why-does-firing-5-56-ammo-in-a-223-rem-chamber-result-in-higher-than-normal-pressures/ ↩
-
Manson Precision Reamers, “Dimensions and Tolerances of Manson Headspace Gauges.” https://mansonreamers.com/dimensions-and-tolerances-of-manson-headspace-gauges/ ↩
Comments (0)