Headspace · Volume 10
Headspace for Reloading — Case Headspace and Shoulder Bump
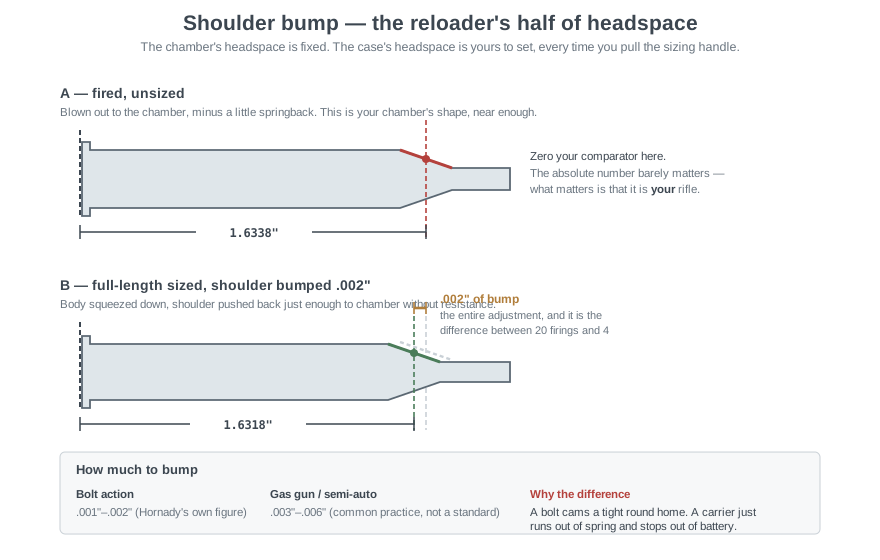
Your chamber’s headspace is fixed by the rifle. Your cartridge’s headspace is set fresh every time you pull the sizing handle, and it is the single adjustment that most determines how many times you get to reload that piece of brass. This volume is the reloading half of the subject: what case headspace is, how to measure your own, how to set a die by it, and how much clearance to leave.
Forster’s instruction sheet makes the distinction that everything here rests on. In popular speech, “headspace” is used for three related things: the dimensions of the cartridge, the dimensions of the chamber, and — “properly speaking, and for safety purposes” — the difference between the length of a standard cartridge as represented by a gauge and the gun’s actual chamber length.1 Vols 1 through 9 were the chamber. This is the cartridge.
10.1 Case Headspace
A rimless bottleneck case has a headspace dimension of its own: case head to the shoulder datum, exactly the same measurement the chamber has, taken on the case instead of the chamber. It is a little shorter than the chamber’s, and the difference is the clearance the round has to move forward before the shoulder stops it.
That clearance is what you are setting when you adjust a full-length sizing die. Too much and the case stretches on every firing. Too little and it will not chamber, or it chambers with the bolt crushing it into the shoulder.
The remarkable thing is how small the useful range is. On a bolt-action rifle it is one to two thousandths of an inch, and getting it right is the difference between four reloads and twenty.
10.2 Fire-Forming, and Why Your Own Brass Is the Reference
A new case is made small enough to chamber in the tightest rifle its maker expects to meet. Fire it, and it expands to your chamber and springs back slightly. It is now a physical record of your chamber’s dimensions, and it is a better reference for your die than any published number.
This is why Hornady’s instructions tell you to zero the comparator on your brass rather than on a table: “Most handloaders prefer to carefully ‘zero’ the caliper’s indicator on the longest (fire-formed) case. This allows them to gauge the headspace variations from this fire-formed (maximum) case dimension.”2
The longest, not the average. You are looking for the case that most completely filled the chamber, because it is the best proxy for the chamber itself.
Two conditions have to hold for the fired case to be a good reference:
It must have been fired at working pressure. A reduced load may not have expanded the case fully, and a case that never touched the chamber shoulder tells you nothing about where that shoulder is.
It must not have been through a sizing die since. Obvious, and easy to muddle when you are working through a batch. Segregate fired-unsized brass physically.
10.3 Measuring It
Both instruments from Vol 7 do this job, and this — not chamber measurement — is what they are actually built for.
With a Hornady Lock-N-Load: pick the bushing from the chart, mount it on the caliper blade with the body aligned by closing the jaws before tightening, then “open the caliper and center the case shoulder into the Bushing. Bring the caliper blade to rest on the case head and rotate the case as you remove slack, then take a reading. Be consistent.”2
With a Manson Cartridge Comparator: the procedure in Vol 7, zeroed against a headspace gauge if you want an absolute number, or against a fired case if you only care about the difference.
Measure ten cases, not one. Fired brass varies, and you need to know the spread before you can interpret a single reading. If your ten fired cases span three thousandths, that spread is now part of your die setting problem and no amount of care at the press will remove it.
For reloading, the absolute number does not matter and the datum-diameter warning of Vol 7 does not bite. You are comparing brass to brass through the same bushing, so a bushing that is not at the SAAMI datum introduces an offset that cancels out. The moment you write the number down as your chamber’s headspace, it bites.
10.4 Setting the Die
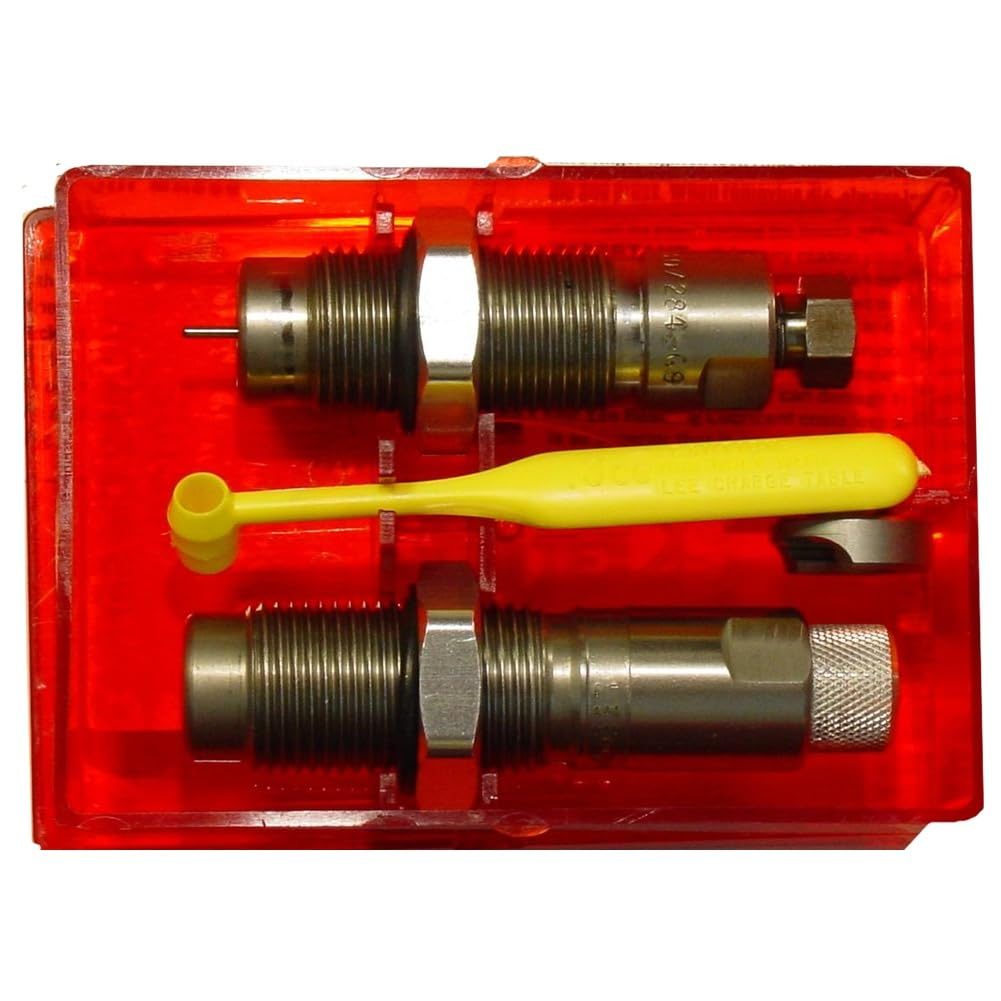
The procedure, in the order that wastes the least brass:
- Measure ten fired, unsized cases. Record the longest. Call it F.
- Back the sizing die well off the shell holder so it cannot possibly touch the shoulder.
- Size one case, lubricated exactly as you intend to lubricate the rest. Measure it. It will read at or near F because the die has not reached the shoulder yet.
- Lower the die a small increment — an eighth of a turn on a 7/8-14 die is about 0.009 inches of die travel, so work in sixteenths or less as you get close.
- Size and measure again. Repeat until the reading is F minus your target bump.
- Lock the die ring. Then size three more cases and measure all three, because a locking ring can move a die as you tighten it.
- Chamber one of them in the rifle, on a stripped bolt if you can, and confirm it closes with no resistance at all.
Hornady’s own instruction on increments: “Always adjust re-sizing dies in small increments to achieve the desired results.”2
10.5 How Much to Bump
Bolt action: 0.001 to 0.002 inches. This is Hornady’s own figure, stated twice in their instructions: “Typically, when full-length resizing, the die should be adjusted to set the shoulder back .001” to .002”. This will provide a proper (minimal) clearance with the firearm’s chamber. A proper headspace will minimize case stretching, reduce work hardening, extend case life, improve accuracy, and increase safety.”3
Gas gun or semi-auto: 0.003 to 0.006 inches is common practice. This is not a standard and this series does not present it as one — it is widely-repeated handloading practice, not a published specification.
The reason for the difference is mechanical and worth understanding rather than memorising. A turn-bolt gives you enormous camming leverage; a slightly tight round is felt in the handle and can be closed anyway. A semi-auto has a carrier, a spring, and no leverage. A round that needs a few pounds of extra push to seat does not get it — the bolt stops out of battery, and on many designs that is a malfunction requiring a tool to clear. The extra clearance buys reliability at the cost of case life, and on a gas gun that is the correct trade.
Body diameter matters alongside shoulder position and is often the actual cause of a hard-chambering round. Common practice is to size the body 0.003 to 0.005 inches under fired diameter so the walls spring clear of the chamber. Also secondary-sourced. A round that will not chamber despite a correct shoulder bump usually has a fat body or a fat case head, not a headspace problem — check with a case gauge before you chase the shoulder further back.
10.6 The Variables That Will Move Your Setting
Hornady list these and they are the real-world reasons a die setting drifts:2
“Different lots of fire-formed brass may measure differently due to alloy and temper variations in the brass. Also, work-hardening, which results from re-sizing and firing, will have an effect. The type and amount of lubrication applied to the cases can have an effect on the re-sized dimensions. A variation in your lube technique can and will be detected by the gauge.”
That last one surprises people. Lube is a hydraulic medium. Too much of it, or too much in the wrong place, and the case cannot fully enter the die — you get less bump than the die setting implies, and in the extreme you get a hydraulic dent in the shoulder. Too little and you get a stuck case. The lube must be the same when you set the die as when you run the batch, which in practice means set the die with the same lube, the same applicator, and the same number of cases on the pad.
Work-hardening is the slower one. Brass that has been through six cycles springs back more than new brass, so an identical die setting produces less bump. This is why a die set in year one can quietly drift out of specification by year three, and why re-measuring after annealing or after several cycles is worth the five minutes.
10.7 Neck Sizing, Partial Sizing, and Their Trap
If you shoot one rifle and full-length sizing feels like unnecessary work on the brass, neck-only or partial sizing keeps the fire-formed body and shoulder and works only the neck. Case life goes up. Concentricity often improves.
The trap: your cases are now sized to that specific chamber, and the shoulder is not being controlled at all. Over several cycles the shoulder can creep forward — brass flows during firing — and eventually you have cases that need real force to chamber. If you have two rifles in the cartridge, neck-sized brass from one may not go in the other.
The discipline that makes it safe is to keep measuring on the comparator. When the reading has crept up a thousandth or two, run the batch through a full-length die set to a light bump and start again. Neck sizing is not a way to stop measuring; it is a way to measure less often.
10.8 Belted Magnums
The belted magnum is where the headspace theory and the reloading practice come apart, and it is worth its own section.
The chamber headspaces on the belt, per Vol 2 — 0.220 to 0.227 inches on the common Winchester and Remington belted cases.4 But the belt counterbore in the chamber is a wide, shallow feature, and while the belt is a positive stop it is not a precise one. A belted case can rattle around forward of the belt while the belt itself is perfectly located.
The result: belted brass is famous for short case life, and the cause is exactly what Vol 12 describes. On the first firing the case is located by the belt only, and the body and shoulder blow forward to fill the chamber, stretching the web. That is not excess headspace by any gauge. It is a design consequence.
What experienced belted-magnum reloaders do is headspace the brass on the shoulder anyway. After the first firing, set the die to bump the fire-formed shoulder one or two thousandths, exactly as for a rimless case, and let the belt do nothing. The case now locates on its shoulder the way a .308 does, the stretch stops, and case life goes from four firings to something respectable.
Manson note that their Cartridge Comparator handles this — “This is also true of shouldered rimmed and belted cases and the Cartridge Comparator provides a means of setting your dies to achieve minimal resizing.”5 The belted case gets measured on its shoulder, on the appropriate bushing or datum block, exactly like a rimless one.
This does not change the rifle’s headspace and does not make a belted rifle safe if the belt counterbore is out of spec. Gauge the rifle on the belt as Vol 5 describes. Then reload for the shoulder.
10.9 What Good Looks Like
A rifle and a batch of brass in good agreement gives you:
- Ten fired cases spanning less than 0.0015 inches head-to-datum.
- A sizing die producing a bump within a half thousandth of target, batch after batch.
- Sized rounds that chamber on a stripped bolt with no perceptible resistance.
- Primers that seat below flush, and stay there after firing.
- No bright ring at the web after ten cycles.
If the fired cases span three or four thousandths, something upstream is wrong — inconsistent lug bearing (Vol 9), mixed brass lots, or loads varying enough in pressure to expand cases differently. Fix that before blaming the die.
10.10 Bibliography
Footnotes
-
Forster Products, User Instructions for Headspace Gages, Issue 4, § 3.3, “Terminology: Headspace Clarification”. https://www.forsterproducts.com/wp-content/uploads/2024/08/Headspace_Gage_Instructions.pdf ↩
-
Hornady Manufacturing, Lock-N-Load Headspace Bushings instruction sheet. Emphasis added in the lubrication passage. https://static.hornady.media/presscenter/docs/1410991969-Headspace-Bushing-Instructions1613061381.pdf ↩ ↩2 ↩3 ↩4
-
Hornady Manufacturing, Lock-N-Load Headspace Comparator Kit instruction sheet (item HK66). https://static.hornady.media/presscenter/docs/1410996170-Lock-N-Load-Headspace-Comparator-Kit-Instructions1674495305.pdf ↩
-
ANSI/SAAMI Z299.4-2015, Section III, Figure II, “BELT-BREECHING CENTERFIRE RIFLE HEADSPACE GAUGES”, printed pp. 216-217. Held in the project Reference Library. ↩
-
Manson Precision Reamers, “Instructions for the Manson Cartridge Comparator.” https://mansonreamers.com/instructions-for-the-manson-cartridge-comparator/ ↩
Comments (0)