Hand Mortars · Volume 12
Building The Rifle Shoppe 819
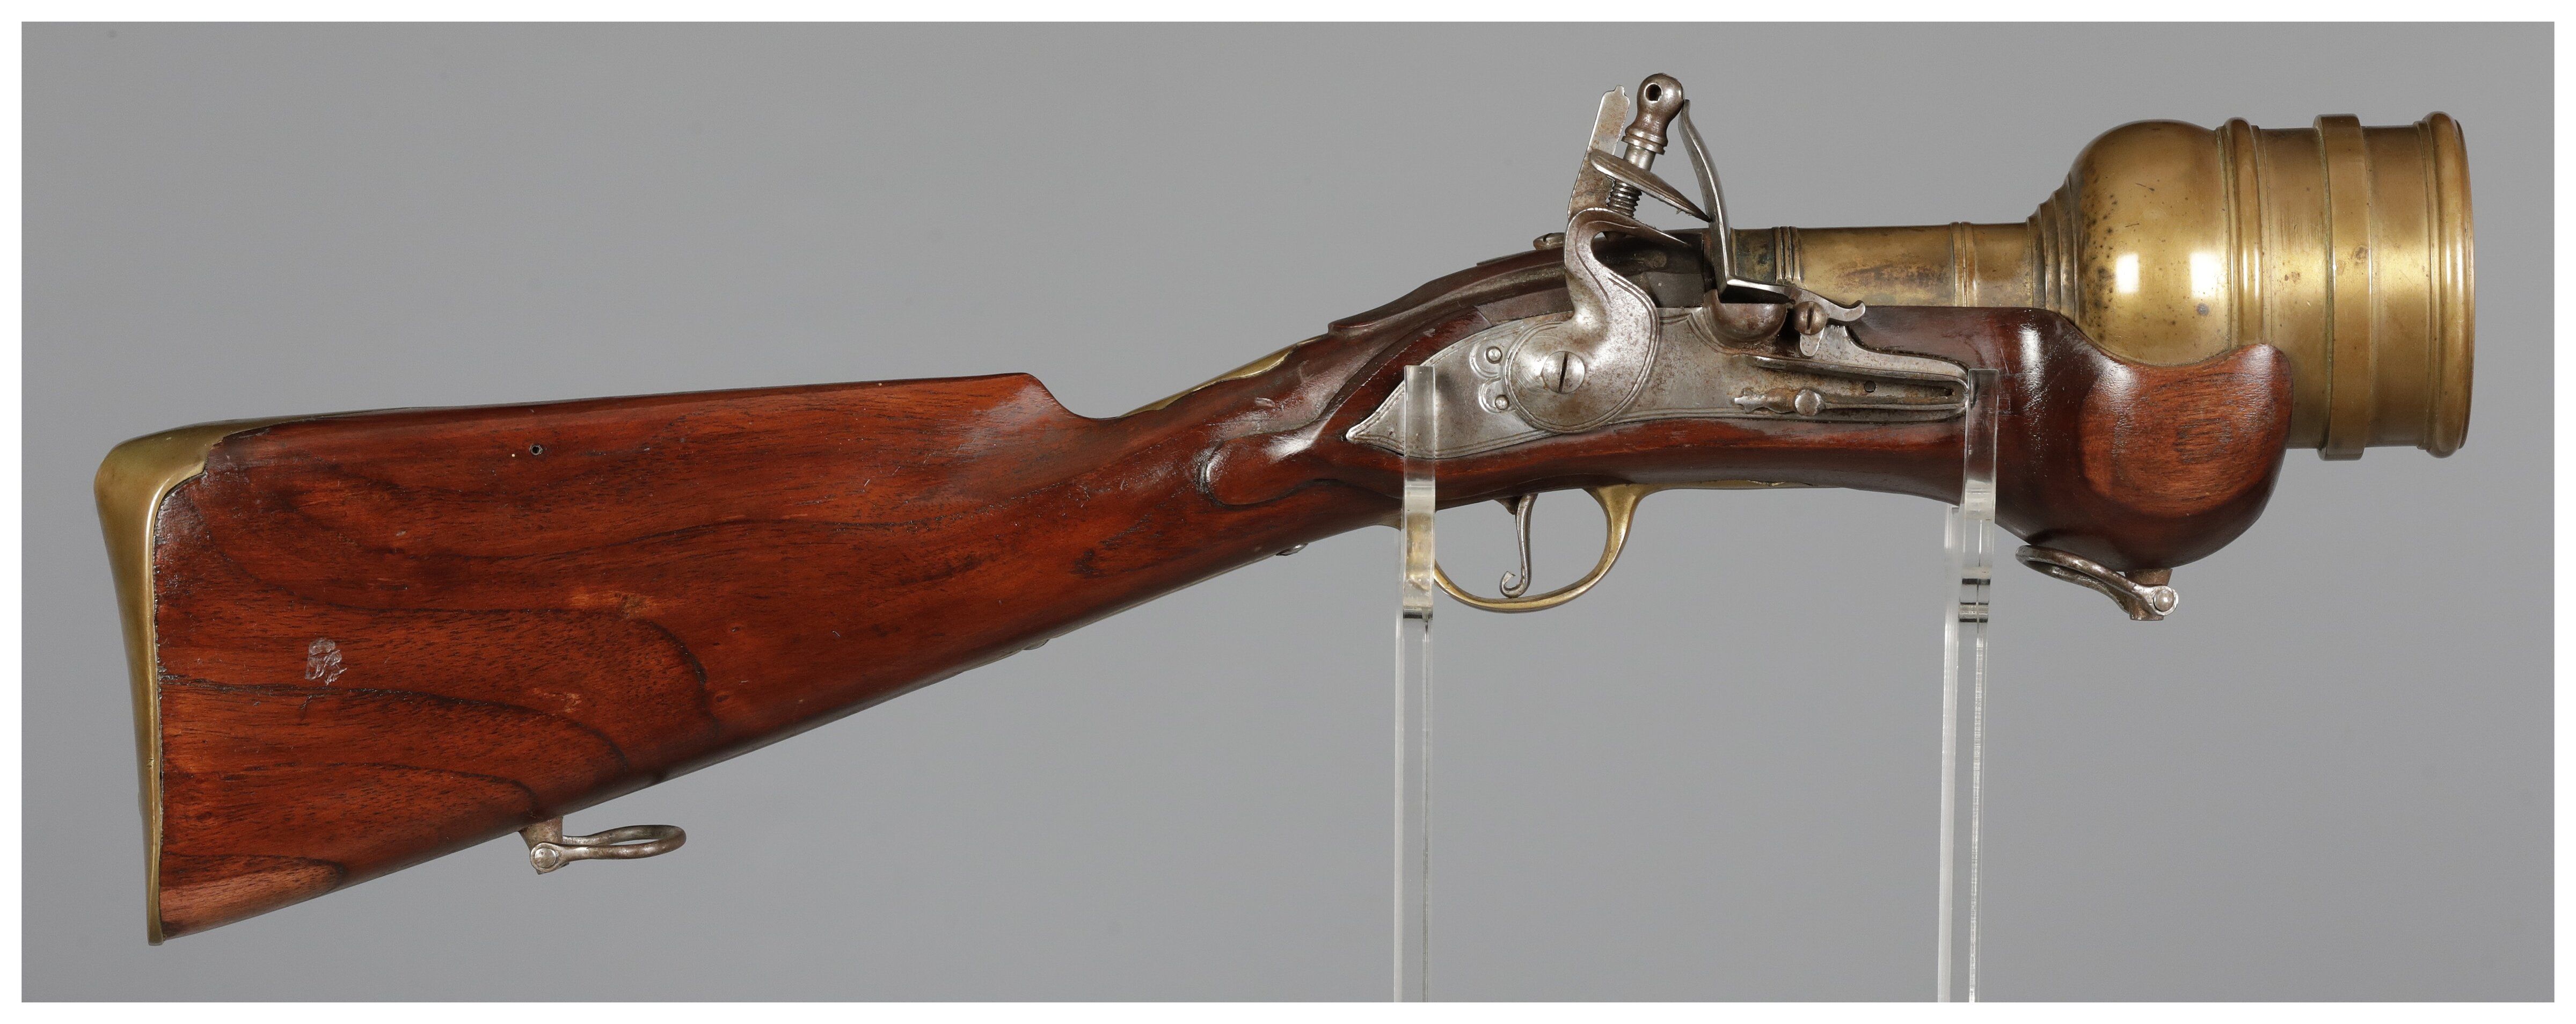
The Rifle Shoppe 819 is a parts set, not a kit. Nothing drops in. What arrives is a bronze barrel with its breech plug already fitted, a stock, and a box of investment castings in the rough - and it becomes a gun only after you have cleaned up every one of them, assembled a lock from loose components, and inlet the whole thing into wood.
That is the honest framing, and it is why Col. Batguano looked at the same product and passed. It is also entirely within reach of a bench with a full gunsmithing toolset, which is the situation here.
12.1 What arrives, and what has already been done for you
Two things in the 819 set are genuinely done and they are the two that would otherwise stop an amateur:
The breech plug is fitted to the barrel. Threading and fitting a breech plug on a stepped-chamber bronze barrel is a lathe job with real consequences if it is wrong. TRS has done it. Do not disturb it beyond a witness-marked removal for cleaning, and if you do remove it, mark the clocking first.
The barrel is bronze and already stepped. The high-low chamber geometry from Volume 4 - a .75-ish chamber feeding a 2½ inch bore over an 8 inch overall length - is cast and machined in. This is the safety-critical dimension of the whole gun and you are not being asked to create it.
Everything else is yours.
12.2 The lock decision, first
Decide this before you order, because it changes the price by $300 and the project by a month.
- 819 PARTS, $975 — parts set with a set of lock castings. Plate, cock, top jaw, frizzen, frizzen spring, pan, tumbler, bridle, sear, sear spring, mainspring, all as raw investment castings.
- 819 PARTSAS, $1,275 — the same set with the lock assembled.
Building a flintlock from castings is a real skill: filing the plate flat and true, fitting the tumbler and bridle so the sear engagement is crisp at both half and full cock, tempering the frizzen so it throws sparks without wearing flat, and setting mainspring and frizzen-spring geometry so the cock strikes and the pan opens with the right timing. It is satisfying and it is a project in itself.
The recommendation for a first hand mortar: take the assembled lock. The interesting part of this build is the barrel-to-stock relationship and the finishing, not re-learning lock work on a $150 casting set. Build a lock from castings on a project where the lock is the point.
12.3 The sequence
12.3.1 Inventory and inspect
Lay everything out against the parts list and check it against the catalog. Investment castings arrive with sprue stubs, parting lines and a sandy surface. Photograph the set before you touch it - Volume 11’s figure slot exists because nobody has.
12.3.2 Clean up the castings
Files and stones, not a grinder. The goal is to remove the parting line and the sprue witness without losing the cast form - these are copies of originals and the shape is the fidelity. Brass and iron furniture both.
Leave final surface finishing until after fitting. You will be filing these again once they are on the wood.
12.3.3 Barrel into the stock
This is the operation that defines the gun. The 819 stock is a shaped blank, not a precision precarve, and the barrel has to sit at the right depth, on centre, with the tang bedded and the fastening points aligned.
The fastening arrangement to aim for is the one Rock Island describes on the original lot 1173: the tang screw, the rear lock screw, and a screw up through the bottom of the stock. Three fasteners, no pins, no wedges. Get all three located and clearanced before you cut anything final.
Two things to hold in your head while you inlet:
- The recoil path is the whole point. This gun is fired with the butt on the ground. Recoil is going straight down the axis into the breech, through the tang and the bottom screw, into the wood, and out through the butt plate into the earth. Bed the tang and the breech so they bear on wood, not on a screw in shear.
- The butt is a bearing surface. Do not slim it. Do not round it for looks. Whatever the blank gives you in butt width and flatness, keep.
12.3.4 Lock inletting
Standard flintlock inletting, with one hand-mortar-specific note: the lock sits high and forward, close to the breech, because the chamber is short and the touch hole has to reach it. Check the touch hole location against the actual chamber, with a rod down the bore, before you commit the lock mortise.
If the touch hole is not drilled, drill it into the chamber, not into the step or the bore. Set it so that it enters at or slightly above the top of the powder column with a working charge.
12.3.5 Furniture
Butt plate, trigger guard, side plate, trigger plate, trigger, thumb piece, and both sets of sling swivels and bases. All of it is cast and all of it needs fitting to the wood. The sling swivels are not decoration - the original this is copied from has them, these guns were carried, and a hand mortar with a sling is a great deal easier to get to a firing point than one without.
12.3.6 Finishing
Standard practice from the blunderbuss dives applies to the wood and the ironwork - the bluing and browning treatment in Traditions Blunderbuss Kits covers the iron parts here without repeating. Two things are specific to this gun:
The bronze barrel does not get blued or browned. Bronze and brass take a chemical patina, not a rust finish. Decide early which look you want: bright polished, as on the TRS product photo and the Rock Island reproduction above, or aged brown-green to match an original. Bright is period-plausible for a new arsenal piece; aged reads better next to a genuine antique.
Match the metal finish to the claimed period. If you are building the 819 as an early-eighteenth-century British piece, the iron furniture and lock should look like early-eighteenth-century British iron, not like modern rust blue.
12.4 What it will actually cost and take
Table 1 — What it will actually cost and take
| Parts set with assembled lock | $1,275 |
| Parts set with lock castings | $975 |
| Finishing supplies, fasteners, consumables | budget $75-150 |
| Lead time | call - TRS is call-to-order and slow |
| Bench time, assembled-lock route | a serious multi-weekend project |
| Bench time, casting-lock route | add a lock build |
For comparison: a finished custom build with a Ben Coogle bronze barrel and TRS parts was offered at $1,400 as the seller’s actual cost. That is the number to beat and the number to remember - the 819 route is not a way to save money against a good finished gun. It is a way to have built it.
12.5 The alternative worth naming
There is a fourth path that this hub is unusually well-placed for. The critical dimensions of a hand mortar - the stepped bronze barrel, the breech plug, the touch hole - are a lathe and mill job, and the stock is a CNC or hand-carving job from a blank. Nothing about this gun requires investment castings except the lock and the fidelity of the furniture.
A from-scratch hand mortar, with a bought or built lock and a barrel turned and bored in the shop, is genuinely on the table. The parts that would have to be right are the chamber-to-bore step, the wall thickness at the muzzle, and the breech plug thread - and a piece designed for inert projectiles and commercial pyrotechnics only does not need to survive a two-and-a-half-pound iron sphere. Take the pressure numbers seriously, work up loads from low, and proof it before it goes near a person.
Sources
The Rifle Shoppe catalog page 819; Rock Island Auction lots 5014/485 and 1173; the Muzzleloading Forum threads 113282 and 113803 (Grenadier1758, Col. Batguano, Glenn Osborne); Forgotten Weapons, “Flintlock Hand Mortar”; the Traditions Blunderbuss Kits dive in this section for the bluing and browning treatment.
Comments (0)