MP7 Light Gun: Machined Aluminum · Volume 1
Why Machine It — When an Aluminium MP7 Is Worth the Work
The third and last MP7 light gun: what a milled aluminium shell buys over the printed one (the real gun's weight with no ballast, a stiff mount for the IMU and the kick, a body that survives being dropped), what it costs in money, machine hours and legal exposure, why it comes after the printed gun and not instead of it, and which sibling dive owns each part of the problem
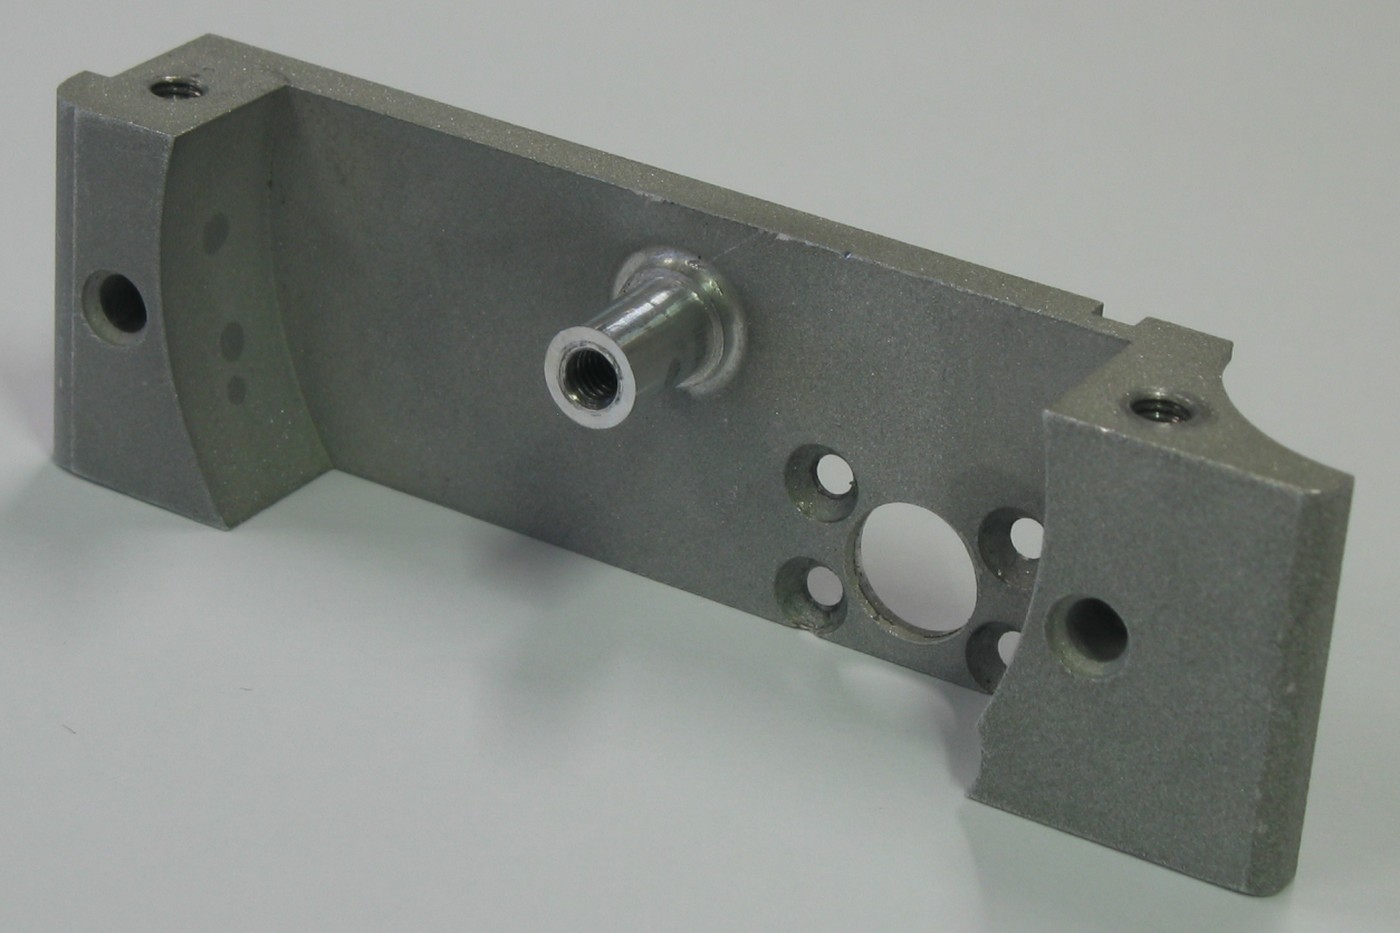
1.1 The third gun
The category plan named three MP7-form builds: a converted airsoft donor, a printed shell and, last, “the advanced build: material and stock, fixturing, CNC operations, anodise/Cerakote, cost and time; designed so it can never be a firearm”. Decision D35 (19 October 2026) made the printed gun the first build, and D47 kept the airsoft donors for later. The machined aluminium gun is therefore the third of the three, and nothing in this dive is meant to happen until the printed gun works.
That order matters for what this dive contains. The MP7 Printed Build owns the starter CAD file, the internal layout, the camera positions, the kick module, the magazine as cable exit and every reference dimension. Its last volume says what carries forward to the metal gun: “the skeleton of datums, the internal layout and the kick module, which belonged to the builders from the start; the measured weight and balance target; and the lessons of the printed joints, which become machined ones” (Vol 7 §7.10). This dive takes those as given and covers only what changes when the shell is cut from aluminium: the legal design rules a metal look-alike needs, the alloy and the stock, how the parts are split and held for machining in this shop, threads and mechanisms in metal, the finish and the orange marking, what a conductive shell does to the electronics, and the cost and time.
The owner and his son Michael build the light guns together: the owner draws the electronics in Altium and the CAD in Fusion 360, Michael builds. Nothing here has been cut, finished or weighed.
1.2 The real gun is plastic
It is easy to assume that an aluminium copy is “more like the real thing” than a printed one. It is not. H&K’s own description of the PDW that became the MP7 is a “one-piece polymer housing”, and its manuals group the gun into a receiver “with barrel, grip, safety and trigger mechanism”, a backplate with the stock, a bolt, a magazine and a front cover. The receiver is polymer; the barrel, bolt and rails are steel and aluminium (HK MP7 Vol 5, “The main assemblies”).
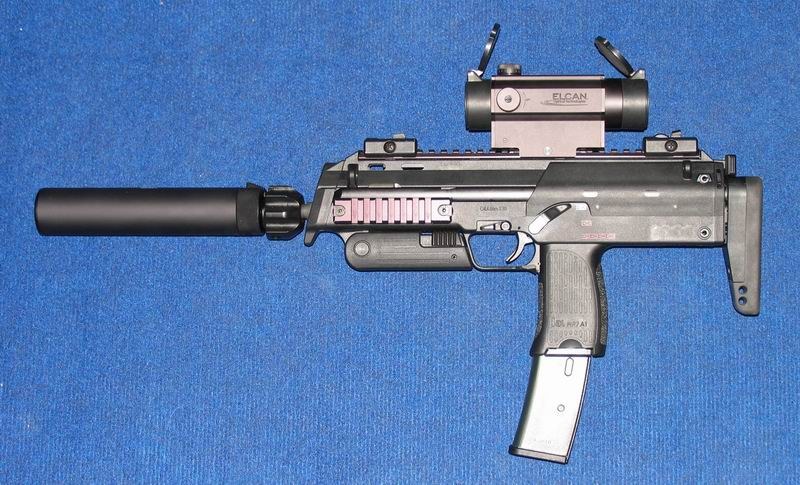
So the case for aluminium is not authenticity of material. A printed PETG shell is closer to the real gun’s surface and warmth. The case is about what the metal does: weight, stiffness and durability, set out next.
1.3 What aluminium actually buys
The real gun’s weight with no ballast. The printed gun is estimated at 0.9 to 1.3 kg against the real MP7A1’s 1.9 kg plus about 0.15 kg for an empty 30-round magazine; the 0.75 to 1.1 kg gap is filled with steel or tungsten in removable pockets (MP7 Printed Build Vol 7 §7.3). Run the same estimate for aluminium. Over the same roughly 1,600 cm² of outside surface, a 2.4 mm wall is about 384 cm³; at 6061’s 2.70 g/cm³ that is about 1.04 kg of shell. A 3.0 mm wall is about 1.30 kg. Add the printed build’s 0.4 to 0.65 kg of internals (rails, kick module, rods, carrier, camera, cable) and the aluminium gun lands between about 1.4 and 2.0 kg: on top of the real figure, with no ballast at all.
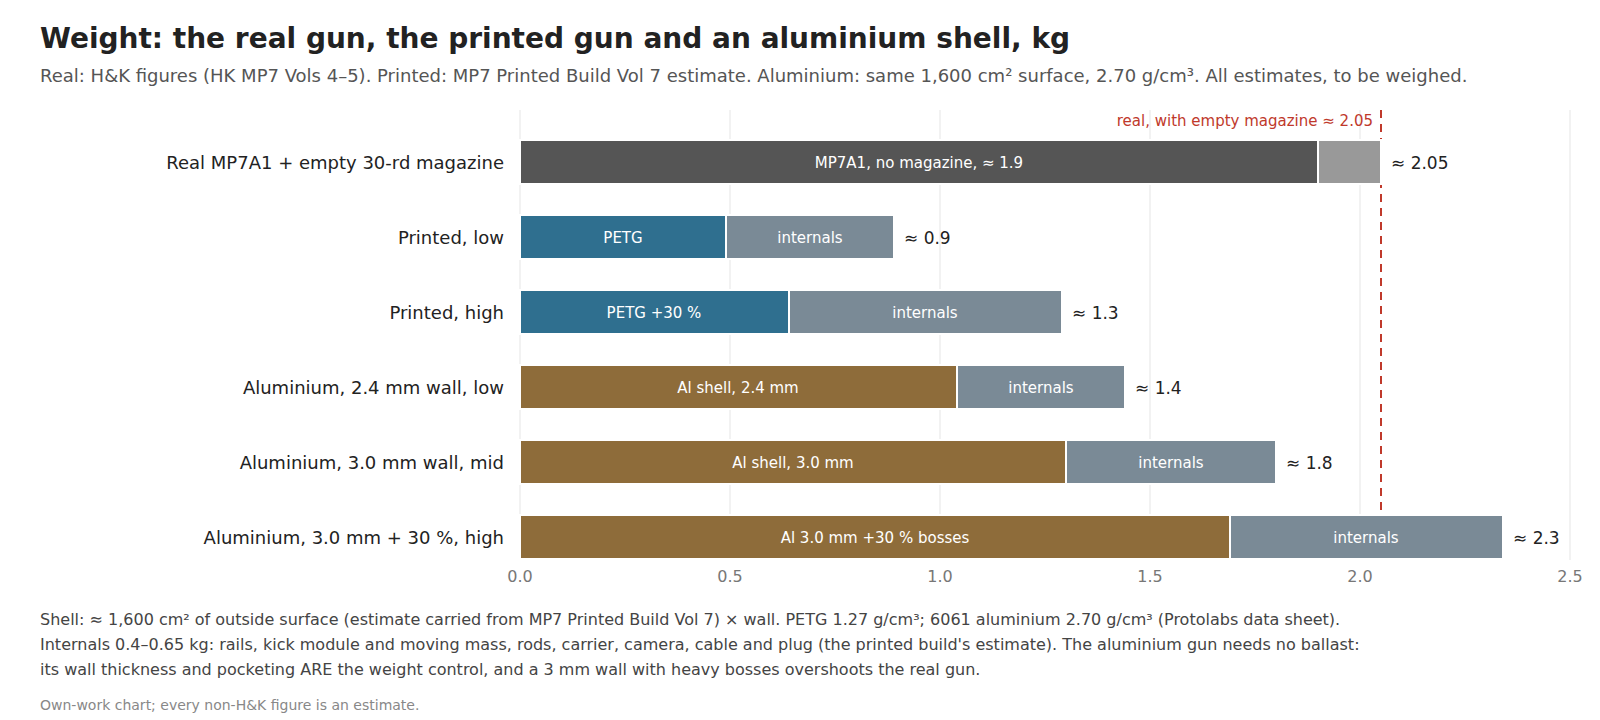
Two consequences follow, and both shape later volumes. First, the wall thickness is the weight control. In the printed gun the shell is light and ballast is added; in the metal gun the shell is the ballast, and the pockets milled out of it decide where the mass sits. A 3 mm wall with generous bosses overshoots the real gun by a quarter of a kilogram, which matters because the same solenoid impulse kicks a heavier gun less (Solenoid Recoil Vol 5). Volume 3 proposes the wall and Volume 7 returns to the balance. Second, the mass is spread through the shell, not concentrated in pockets, so the balance comes out close to the real gun’s distribution without the ballast experiments the printed gun needs.
Stiffness for the IMU and the kick. The printed gun mounts its kick module on an aluminium plate because “a printed boss taking that load directly will creep and its insert will loosen” (MP7 Printed Build Vol 5 §5.4), and the IMU on the carrier has to be “rigid to the receiver” (Positional and Inertial Vol 6). 6061-T6 has a modulus of about 68 GPa (Protolabs’ data sheet); printed PETG is in the low single gigapascals. A metal receiver is the plate, everywhere: the kick bolts straight to the shell, the carrier sits on machined bosses that will not creep, and the camera mount stays square to the bore after a thousand shots.
Durability. A printed shell cracks if dropped on a hard floor and wears at its joints. A machined shell dents. For a gun that will be handed round at a games night this is the least technical argument and probably the strongest.
Heat. Solenoid heat sinks into the whole receiver rather than a plate, and aluminium conducts it at 167 W/m·K (Protolabs). Solenoid Recoil Vol 7 owns coil heating; Volume 7 here covers what a conductive shell changes, including the hand on a warm receiver.
1.4 What it costs
Money. Stock for two receiver halves and the smaller parts is several hundred dollars at a metal supplier’s listed prices on 24 October 2026 (1¼ in 6061-T651 plate at $338.81 for a 12 × 18 in piece, Speedy Metals), plus tooling, inserts and a finish. Volume 7 adds it up. The printed shell costs a few dollars of filament.
Machine hours. About nine-tenths of each receiver blank ends up as chips or offcut, and about 2 litres of it has to be cut away as chips (Volume 4 gives the arithmetic), and the only machine in the shop with the travel for a receiver half is the Shapeoko 3 XXL router, which takes aluminium in light, fast passes. Each half is a two-sided job of most of a working day of machine time, before the smaller parts. A failed half costs a plate and a day, where a failed print costs a spool-hour.
Iteration. Everything the printed gun exists to settle (the camera position, the solenoid bay, the board outline, the magazine) must be settled before the first plate is cut. Changing a pocket in a finished aluminium half is a fixturing problem; changing it in a print is an overnight reprint. That is the reason the printed gun goes first.
Skill. The owner is an experienced machinist and gunsmith, so the volumes that follow skip the basics. What is genuinely difficult here is not any single operation but holding a 315 mm, two-sided, thin-walled part on a belt-driven router while keeping it flat and square.
Legal exposure. A metal, full-size, correctly proportioned MP7 is the most realistic object in the whole category. That does not change its legal character as an imitation, but it raises the stakes on two separate fronts that Volume 2 takes in turn. It must be designed so that nobody could mistake its parts for, or complete them into, a firearm’s frame or receiver; and it is subject to every look-alike rule the Imitation Firearm Law dive sets out, with the house rule (D29) for any trip out of the house.
1.5 When it is worth it
The aluminium gun earns its cost when all of these are true:
Table 1 — The aluminium gun earns its cost when all of these are true
| Condition | Why |
|---|---|
| The printed gun works and has been played | Its measured layout, weight and kick are the inputs; nothing is guessed in metal |
| The camera mount (D43), solenoid (D1, D15 bench) and carrier outline (D44) are fixed | Each is a pocket in the metal; a change after cutting means a new half |
| The printed gun’s shortcomings are the ones metal fixes | Too light even with ballast, flexing or cracking, a kick module working loose, or simply wear |
| Machine time is available on the Shapeoko for several days | The receiver halves can only be cut there (Volume 4) |
| It stays a private gun in the house in Ovid | Volume 2; a metal shell is the strongest case for never being a kit (Licensing, IP and Kits) |
If the printed gun already feels right, the honest answer is that the metal gun is a luxury, and the money buys more as a second printed gun for Michael. If it is too light, flexes, or keeps loosening, the metal gun fixes all three at once.
1.6 A hybrid, not a solid block
The proposal throughout this dive is not an all-aluminium gun. It is aluminium where metal earns its place and polymer where polymer is better:
- Aluminium: the two receiver halves, the backplate, the front cover’s structure, the stock’s butt plate, the kick-module plate and the foregrip’s hinge block. These carry the weight, the stiffness and the kick.
- Steel: the stock rails, the hinge and pivot pins, the dowels, the moving mass and its guide rods, and the screws. These wear or take impact.
- Polymer (printed): the grip panels with H&K-style texture (which a 3-axis machine cuts badly and a printer reproduces from the model), the magazine (the cable exit and a possible battery bay, which also has to let a radio out), the camera housing and front sight block, any radio window, and the orange muzzle sleeve.
The reasons are spread through the volumes: texture and the magazine in Volume 3, the radio window and the shell as an electrical conductor in Volume 7, and the orange sleeve in Volume 6. A plastic grip on a metal receiver is also exactly what the real gun is: polymer where the hand is.
1.7 The order of work
- Finish and play the printed gun. Weigh every part (Printed Build Vol 7 §7.3), settle the camera, solenoid and carrier, and note what fails.
- Rule on the design rules in Volume 2 and record them in the CAD as fixed features: solid barrel, no bore, no bolt raceway, no fire-control pocket.
- Re-split the printed design for machining (Volume 3): the receiver as two halves cut from plate, each with its fixture tabs, plus the smaller parts.
- Cut coupons first (Volume 4): a feeds-and-speeds test in the chosen plate on the Shapeoko, a thread and insert test (Volume 5), and a finish test (Volume 6).
- Machine the small parts on the Nomad and the mini mill, then the receiver halves on the Shapeoko, two operations each.
- Fit, finish, assemble. Fit the electronics, check the electrical bonding (Volume 7), apply the finish and the orange sleeve, weigh, play.
1.8 Who owns what
Table 2 — 1.8 Who owns what
| Topic | Owner |
|---|---|
| Starter CAD, internal layout, camera mounts, kick module, magazine, reference dimensions | MP7 Printed Build |
| Airsoft donors and the conversion route | MP7 Donor Build |
| The real gun’s dimensions and mechanism | HK MP7 (dimensions only here) |
| Look-alike law, the orange marking, Michigan and Ovid | Imitation Firearm Law; house rule D29 in MP7 Donor Build Vol 3 |
| H&K’s marks and trade dress, kits | Licensing, IP and Kits |
| Solenoid physics, heat and kick | Solenoid Recoil |
| The moving ejection port | Moving Ejection Port |
| The camera and its alignment | Reference Electronics Vol 3, IR Point Tracking |
| The cable, grounding and the radio | Fully Wired, Fully Wireless |
| What this dive adds | The never-a-firearm rules, the alloy, machining in this shop, threads in metal, finish, a metal shell’s electrical effects, cost and time |
1.9 Why this, and why not the others
Table 3 — 1.9 Why this, and why not the others
| Option | Status | Reason |
|---|---|---|
| Machined aluminium hybrid after the printed gun works | Proposed (MA-1) | Gets the real gun’s weight without ballast, a stiff mount for the kick, camera and IMU, and a durable body, using inputs the printed gun has already measured |
| Machined aluminium first, instead of printing | Rejected | D35; every pocket would be a guess, and each mistake costs a plate and a day |
| All-aluminium, grip and magazine included | Rejected | Grip texture is poor on a 3-axis machine; a metal magazine blocks a radio and is a needless second conductor at the cable exit; the real grip is polymer |
| A printed gun with more ballast | Kept as the alternative | Cheap and fast; the right answer if the printed gun’s only fault is weight |
| Outsourced CNC (an online machining service) | Rejected for the shell | Xometry’s published policy refuses “any look-alike weapons, including those which are fully solid or cannot function by design” (Volume 4); and D12 keeps the CAD private |
| Cast or 3D-printed metal | Not pursued | No foundry or metal printer in the lab; outsourcing meets the same look-alike refusals and D12 |
Sources
- Category plan,
docs/superpowers/plans/2026-10-18-light-guns-plan.md, §7 Actual Builds; Light GunsDECISIONS.md(D1, D12, D15, D29, D35, D43, D44, D47). - MP7 Printed Build Vols 5 (§5.4) and 7 (§§7.3, 7.10).
- HK MP7 Vol 4 (dimensions, weight) and Vol 5 (“The main assemblies”, quoting H&K Inc.’s 2000 presentation and H&K’s manuals).
- Protolabs, Aluminum 6061-T651/T6 CNC material data sheet (2026), density 2.70 Mg/m³, modulus 68.3 GPa, thermal conductivity 167 W/m·K, https://www.protolabs.com/media/h54d0gnp/2026-026-cnc-material-data-sheet_aluminum-6061-t651_t6.pdf, read 24 October 2026.
- Speedy Metals, “1-1/4” 6061-T651 Aluminum Plate”, 12 × 18 in $338.81, https://speedymetals.com/p-2416-1-14-6061-t651-aluminum-plate.aspx, read 24 October 2026.
- Xometry, Xometry’s Firearm Policy, last updated 9 June 2022, linked from https://www.xometry.com/legal/, read 24 October 2026.
- Wikimedia Commons, “CAD model and CNC machined part.PNG”, Mike1024, 24 November 2009, public domain; “Heckler & Koch MP7A1.jpg”, Remigiusz Wilk, CC BY-SA 2.5.
Comments (0)