Solenoid Recoil · Volume 1
Why Solenoids — Recoil in Arcade Guns and the DIY Revival
How Namco, Sega and the home-built light guns that followed them made a plastic pistol kick, what the service manuals show inside, and what the modern kits ask of their power supplies

A light gun does not need to kick. The Nintendo Zapper did not, and neither did most of the guns that followed it into living rooms. The kick is an addition, made by an electromagnet that throws a piece of steel against a stop inside the shell, and it has been made the same way for thirty years: in Namco’s arcade cabinets in the 1990s, in Sega’s in the 2000s, and in the home-built guns that the open-source firmware projects now drive. This dive is about that electromagnet: what it is, why its kick is so hard to make consistent, how to drive it without cooking it, how to place it so that the kick reads as recoil in a long gun, and how to measure the result on the bench.
This first volume sets the scene from primary evidence: the operator manuals of the arcade cabinets, the makers’ own pages for the commercial and kit guns, and the source code of the open firmware. The physics starts in Volume 2.
1.1 The dive in one table
Table 1 — The dive in one table
| Volume | Subject | What it settles |
|---|---|---|
| 1 | History and the hardware in use | Where solenoid recoil came from and what current kits require |
| 2 | Physics | Why force climbs steeply at the end of the stroke; why a “12 V” solenoid is really a duty-cycle rating |
| 3 | The parts actually used | What the common open-frame units are, why two “identical” ones kick differently, how to characterise one |
| 4 | Driving it | Pulse width, repetition, heat, overdrive, peak-and-hold, current regulation, flyback clamps |
| 5 | Mechanical design | Moving mass, stops, springs, dampers, noise, and placement in a long gun |
| 6 | Measuring kick | Current capture, accelerometers, and a repeatable rig for the lab |
| 7 | Selection, purchase and upkeep | A decision table, dated prices from the sellers’ pages, failure modes and repair |
The circuit that actually drives the solenoid on the board is designed in the sibling dive Reference Electronics, and the wall supply, boost converter and pulse capacitor bank are sized in Power Supplies. This dive gives the theory both of them rest on and does not repeat their designs.
1.2 What a solenoid kick is, and what it is not
A solenoid in a light gun is a coil of copper wire wound on a bobbin inside a steel frame, with a loose steel plunger in the middle. Energise the coil and the plunger is pulled into it; a spring pushes it back out when the current stops. The plunger, or a slide or striker attached to it, hits a stop at the end of its travel, and that impact is what the hand feels.
The arithmetic is worth having before any history, because it frames every design decision that follows. A small solenoid of the kind used in home-built guns moves a few grams to a few tens of grams of steel about 10 mm in roughly 10 to 25 ms, arriving at one to four metres per second. The momentum it delivers to the stop is of the order of 0.02 to 0.1 kg·m/s (Volume 5 derives these figures from a model). A 9×19 mm pistol cartridge gives its gun something like a hundred times that. A solenoid kick is not recoil in the firearm sense; it is a sharp tap with the right timing, and the craft lies in making that tap feel like more than it is. Three things decide whether it does: how sharp the impact is, which direction it arrives from, and whether it is the same on the five-hundredth shot as on the first.
1.3 Namco’s blowback guns: Point Blank to Time Crisis
The earliest Namco evidence found for this dive is the UK operator’s manual for Point Blank, part number 90500078, dated 1994 and distributed by Brent Leisure. Its output test menu has entries for “1P/2P Blowback”, in which the gun “recoils each time 2 player start switch is pressed”, and “Auto Blowback”, in which “both guns recoil constantly” until the button is pressed again.1 Namco’s word for the effect, in this manual and the later ones, is blowback, borrowed from the firearm action in which the breech is pushed back by the cartridge.
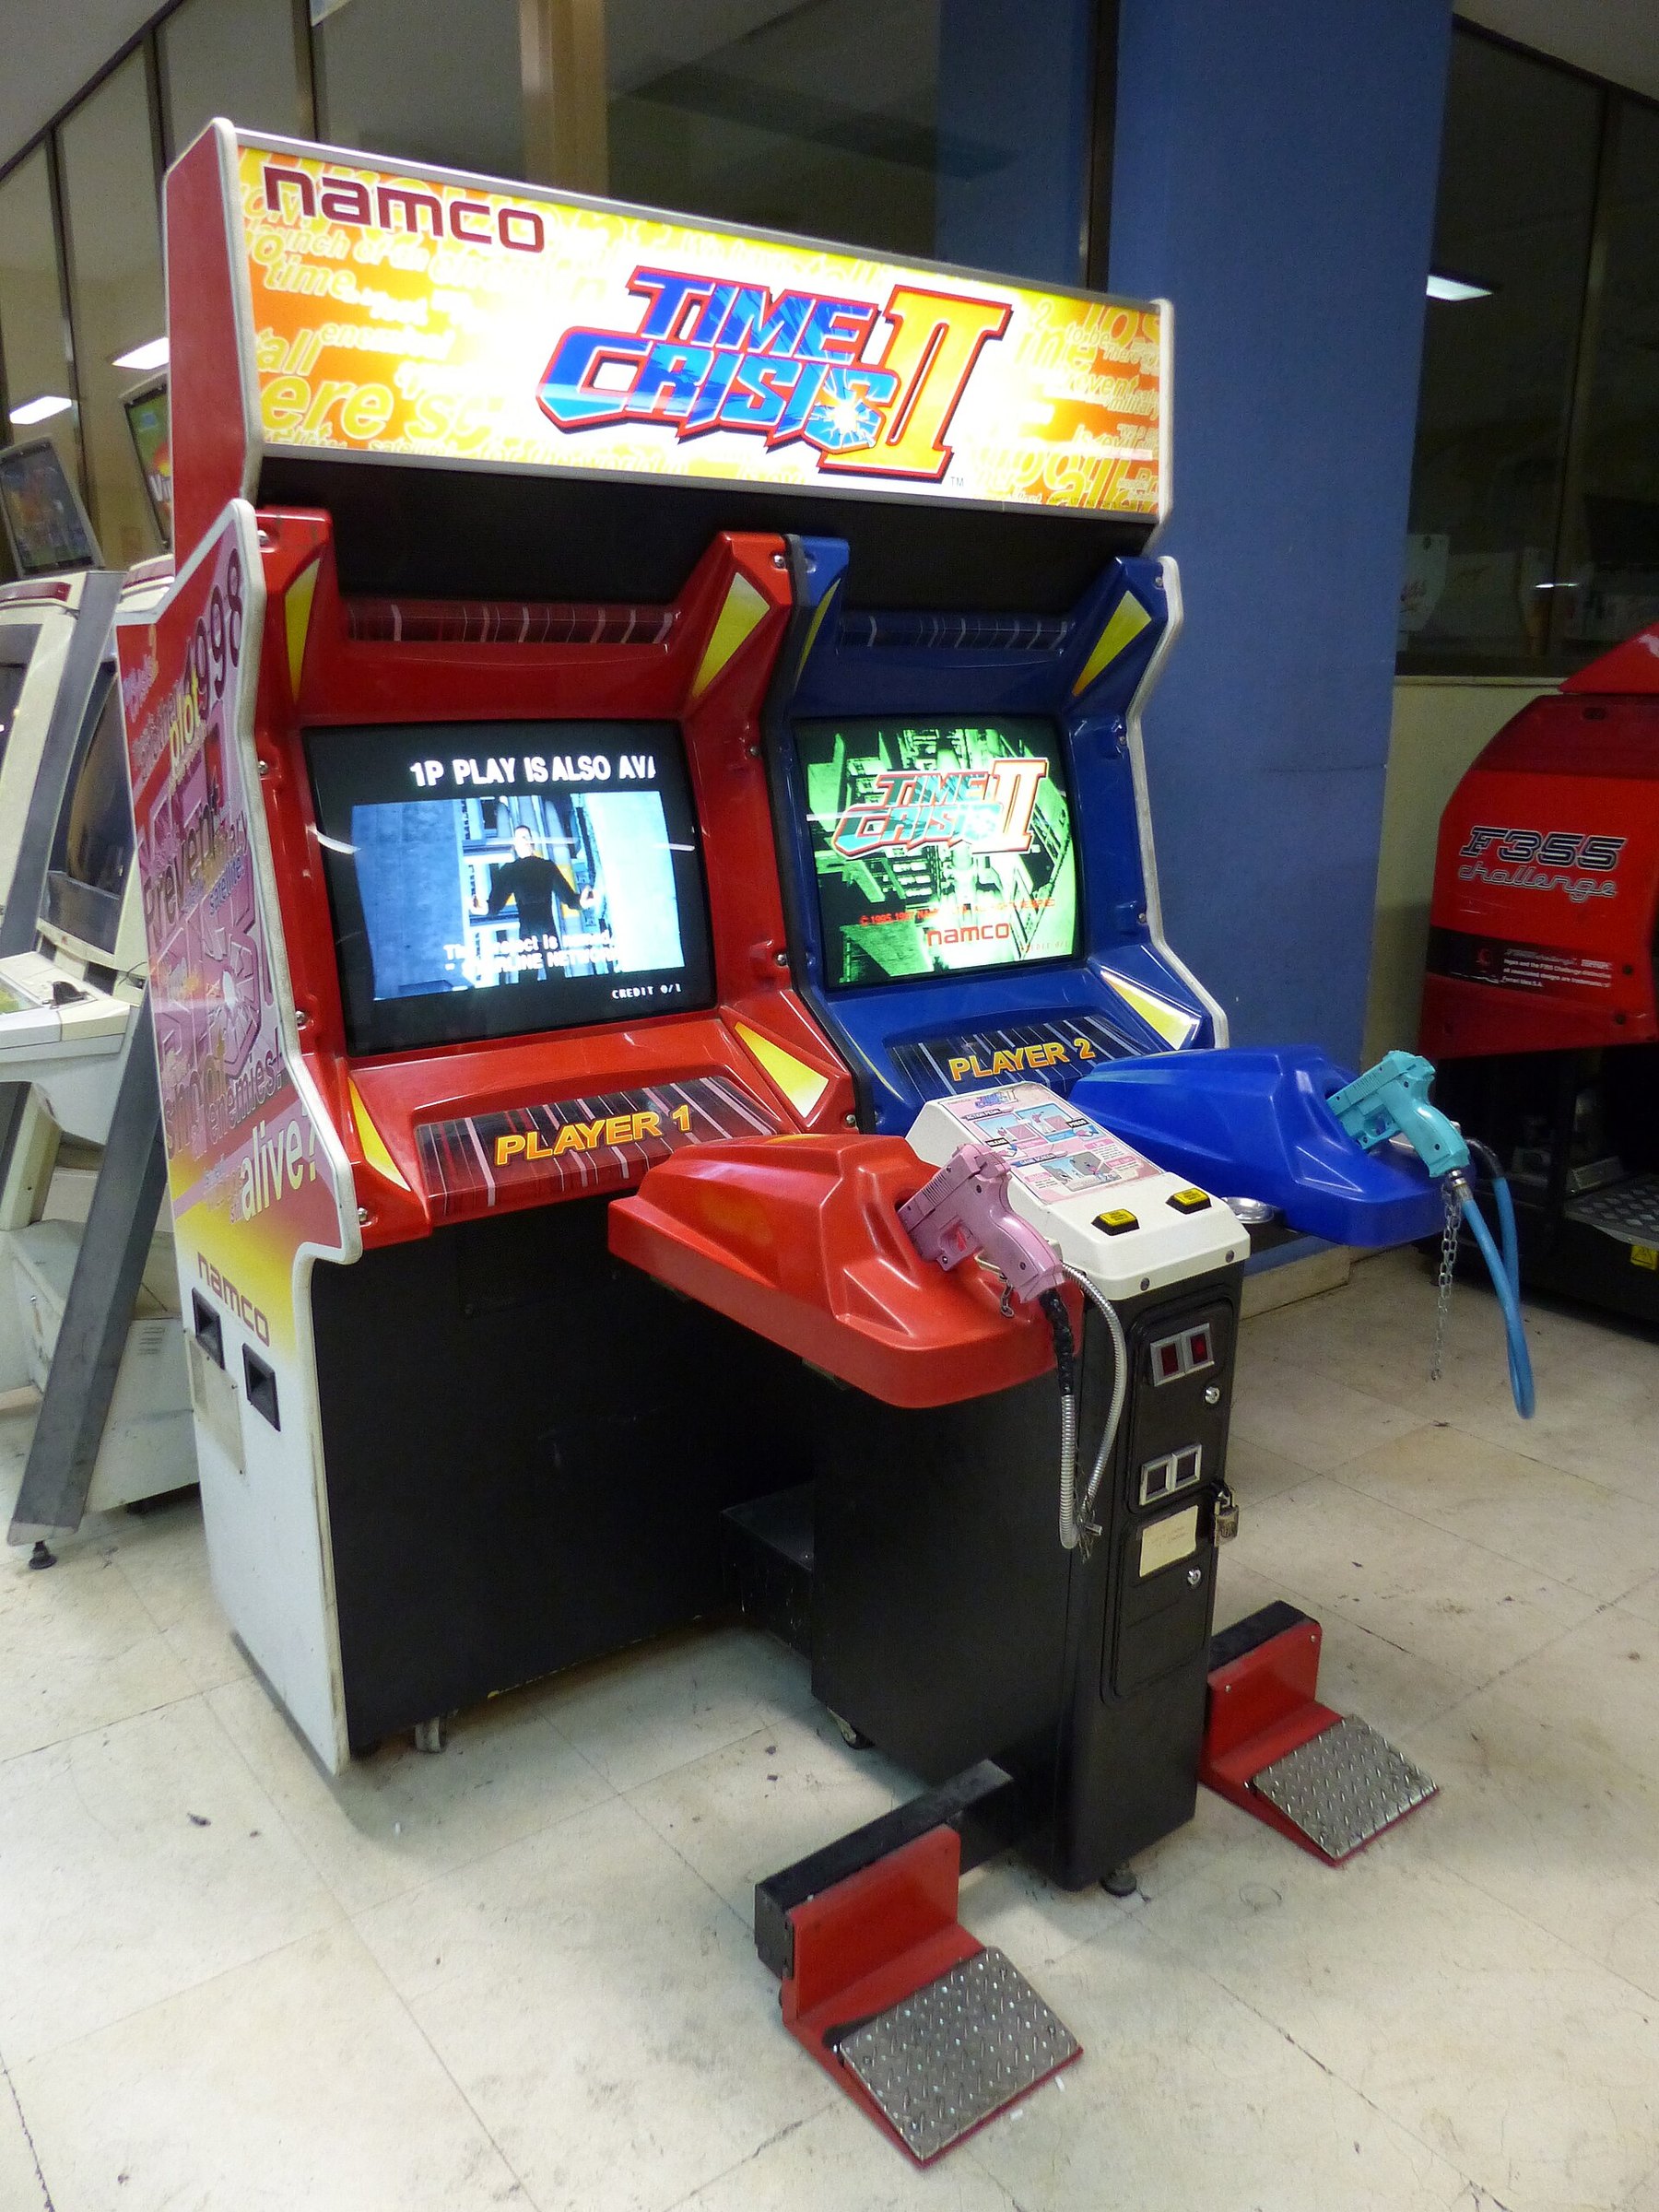
Time Crisis followed in 1995, then Time Crisis II in 1997, Time Crisis 3 in 2003, Time Crisis 4 in 2006 and Time Crisis 5 in 2015.2 The Time Crisis guns carry a separate upper slide, and every operator’s manual for the series checked for this dive has a solenoid test in its service menu. The Time Crisis II manual describes it plainly: “This function tests the blow-back mechanism of the gun. … Pull the gun trigger to activate the gun’s blow-back mechanism.”3
1.4 Inside the Time Crisis gun
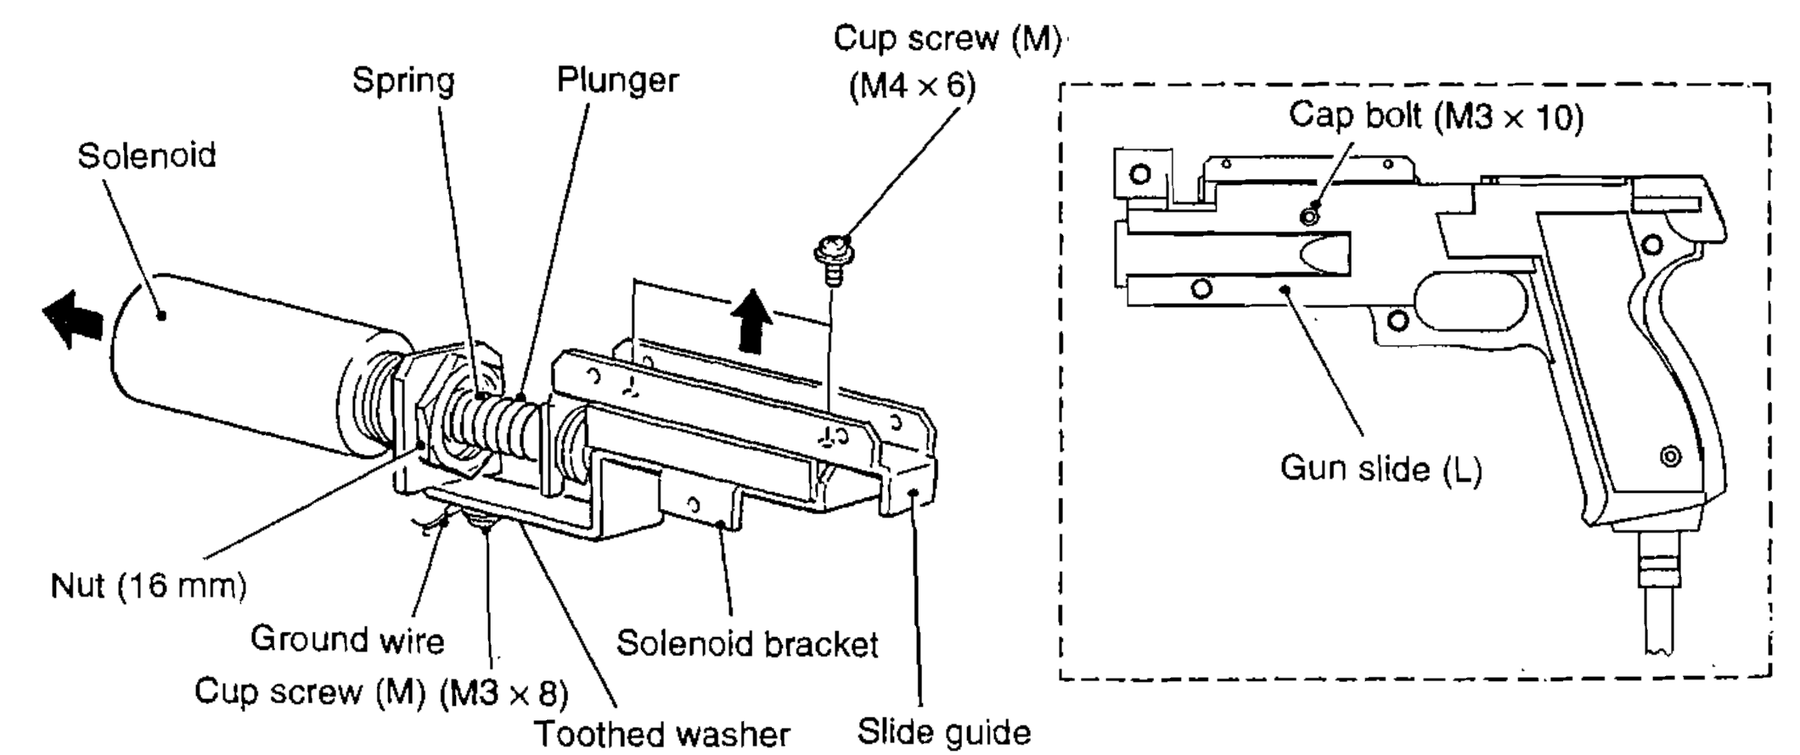
The operation manual for the Time Crisis SD cabinet gives the clearest picture of the mechanism. Its gun assembly parts list includes two gun slides (left and right halves), a solenoid bracket, a slide guide, a back spring, a “Silencer rubber”, and a solenoid identified only as ST-0860A2.4 The same solenoid number appears in the gun parts list of the Time Crisis II manual.3 No manufacturer for ST-0860A2 could be identified.
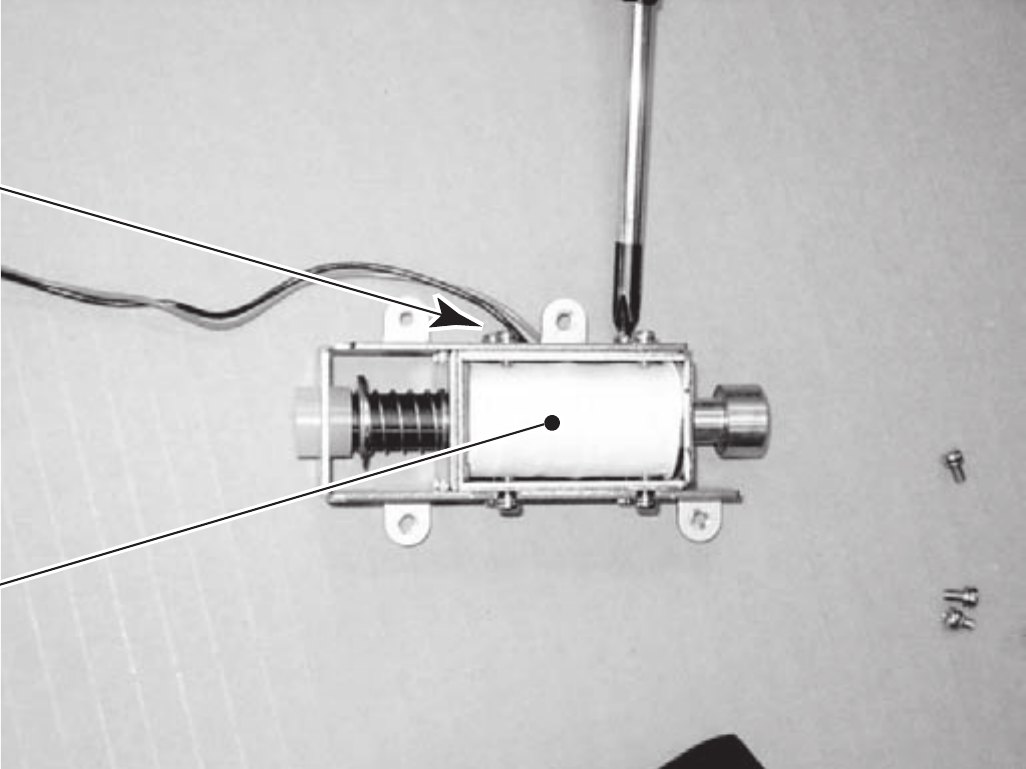
The replacement procedure shows how the parts go together. The solenoid is held by “the nut (16 mm)” — that is, it is a tubular solenoid with a threaded mounting boss, clamped through a single hole in a steel bracket. Behind the bracket, two slide guides carry the slide, and removing the solenoid plunger requires care “not to lose the spring”. On reassembly the technician is told to “be careful of the order of the E-type snap ring and spacer”.4
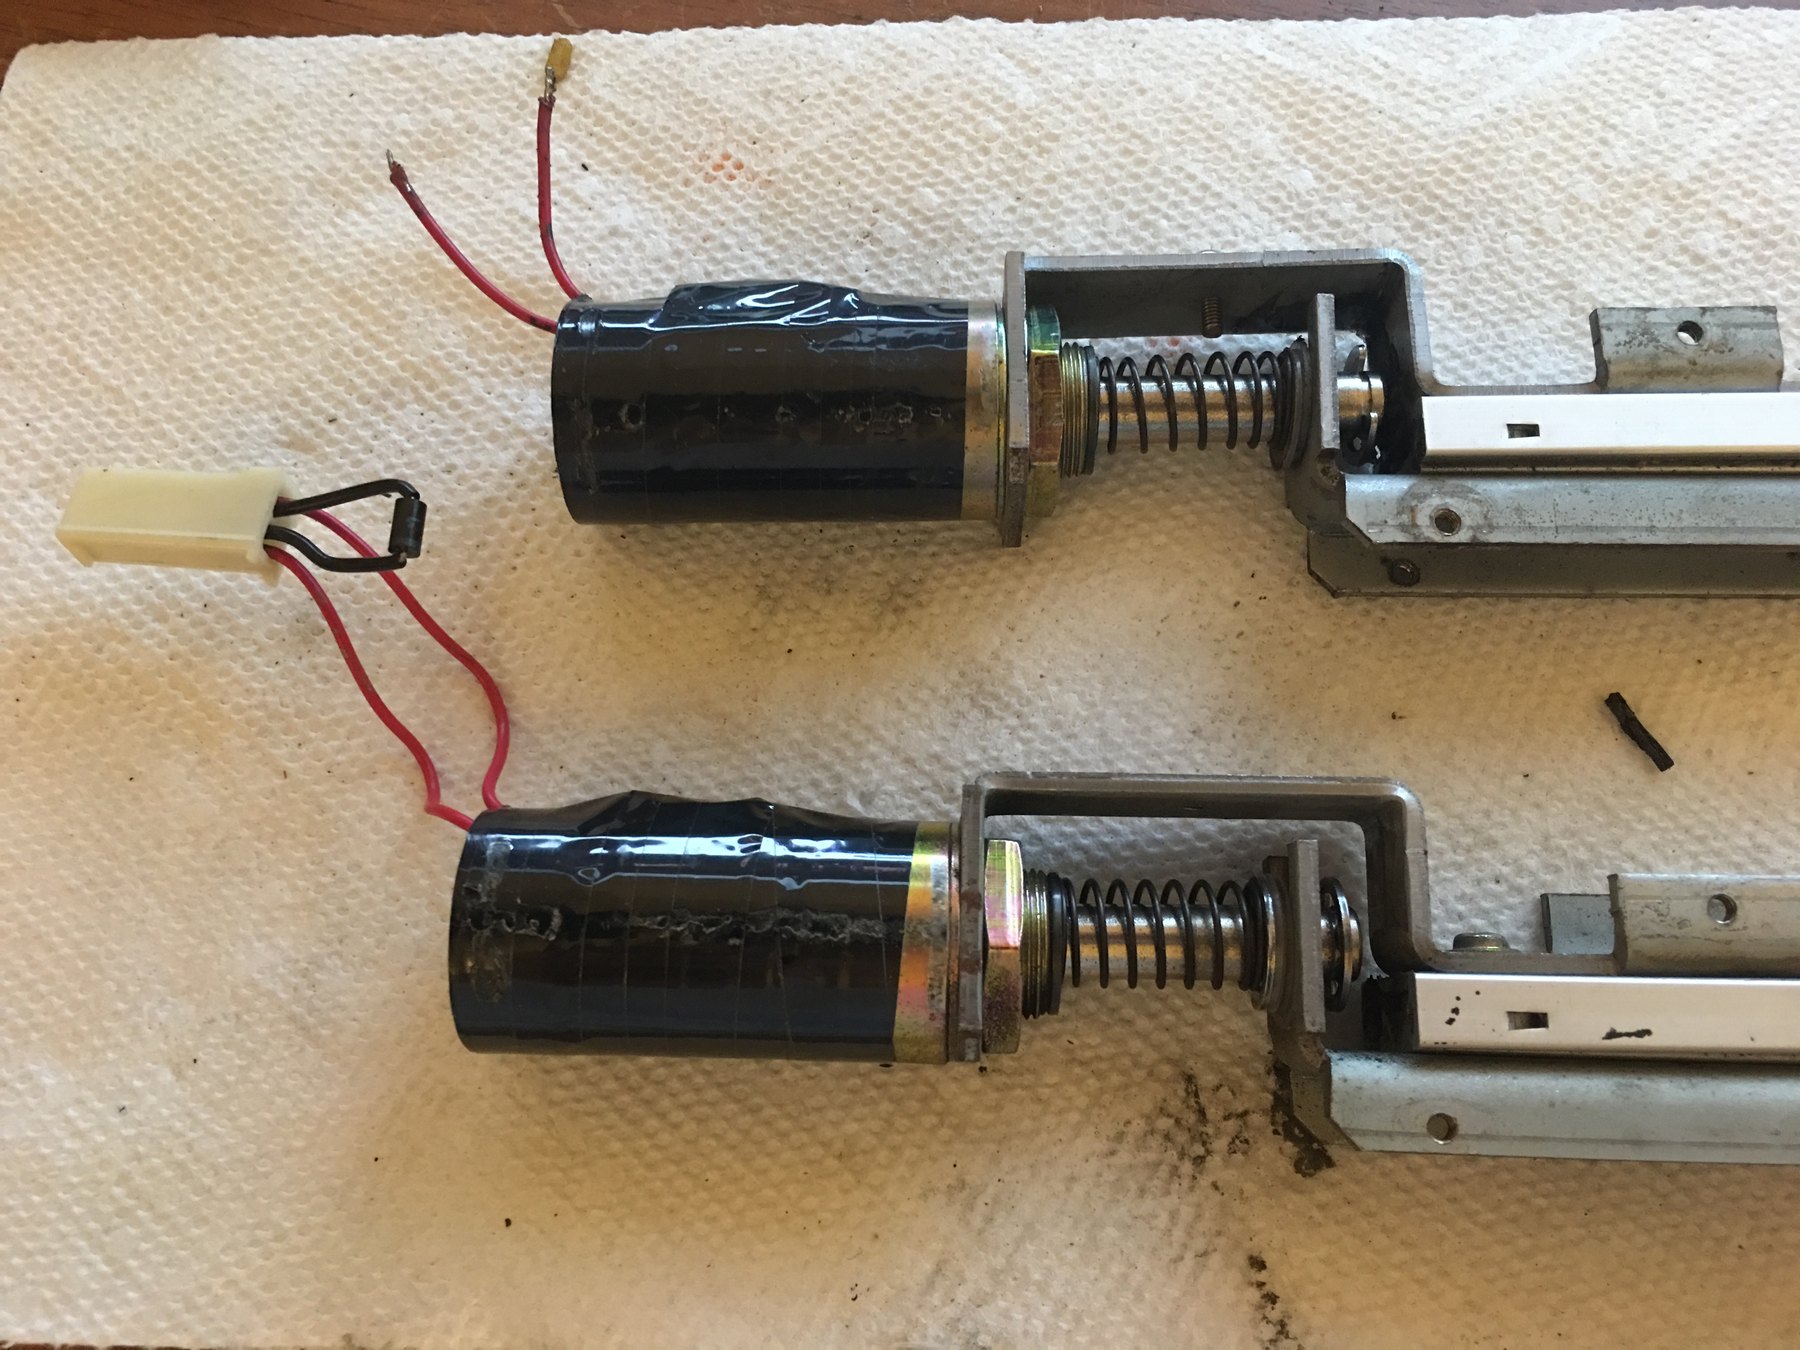
A photograph posted to the KLOV arcade forum in January 2019 by a collector repairing Time Crisis II guns shows two of these assemblies out of their shells. The black-taped tubular coils, the coaxial springs, the steel brackets and the slide rails match the manual drawing exactly.5
The same thread is the only source found that puts numbers on the coil. The poster measured 24 V reaching the gun and about 15 Ω across a working donor solenoid. Those two numbers alone say a great deal: 24 V across 15 Ω is 1.6 A, or about 38 W while the coil is on, which no coil of that size could dissipate continuously. Another member reported a thermal fuse under the black tape on the coil, and two members identified the recoil driver on the gun I/O board as an SLA4060, whose failure stops the recoil with a good solenoid. Distributor listings describe the SLA4060 as a Sanken array of four NPN Darlington transistors rated 120 V and 5 A in a 12-pin SIP, now obsolete; Sanken’s own datasheet was not retrieved.6 The original harness carries a diode across the solenoid leads inside the connector.5
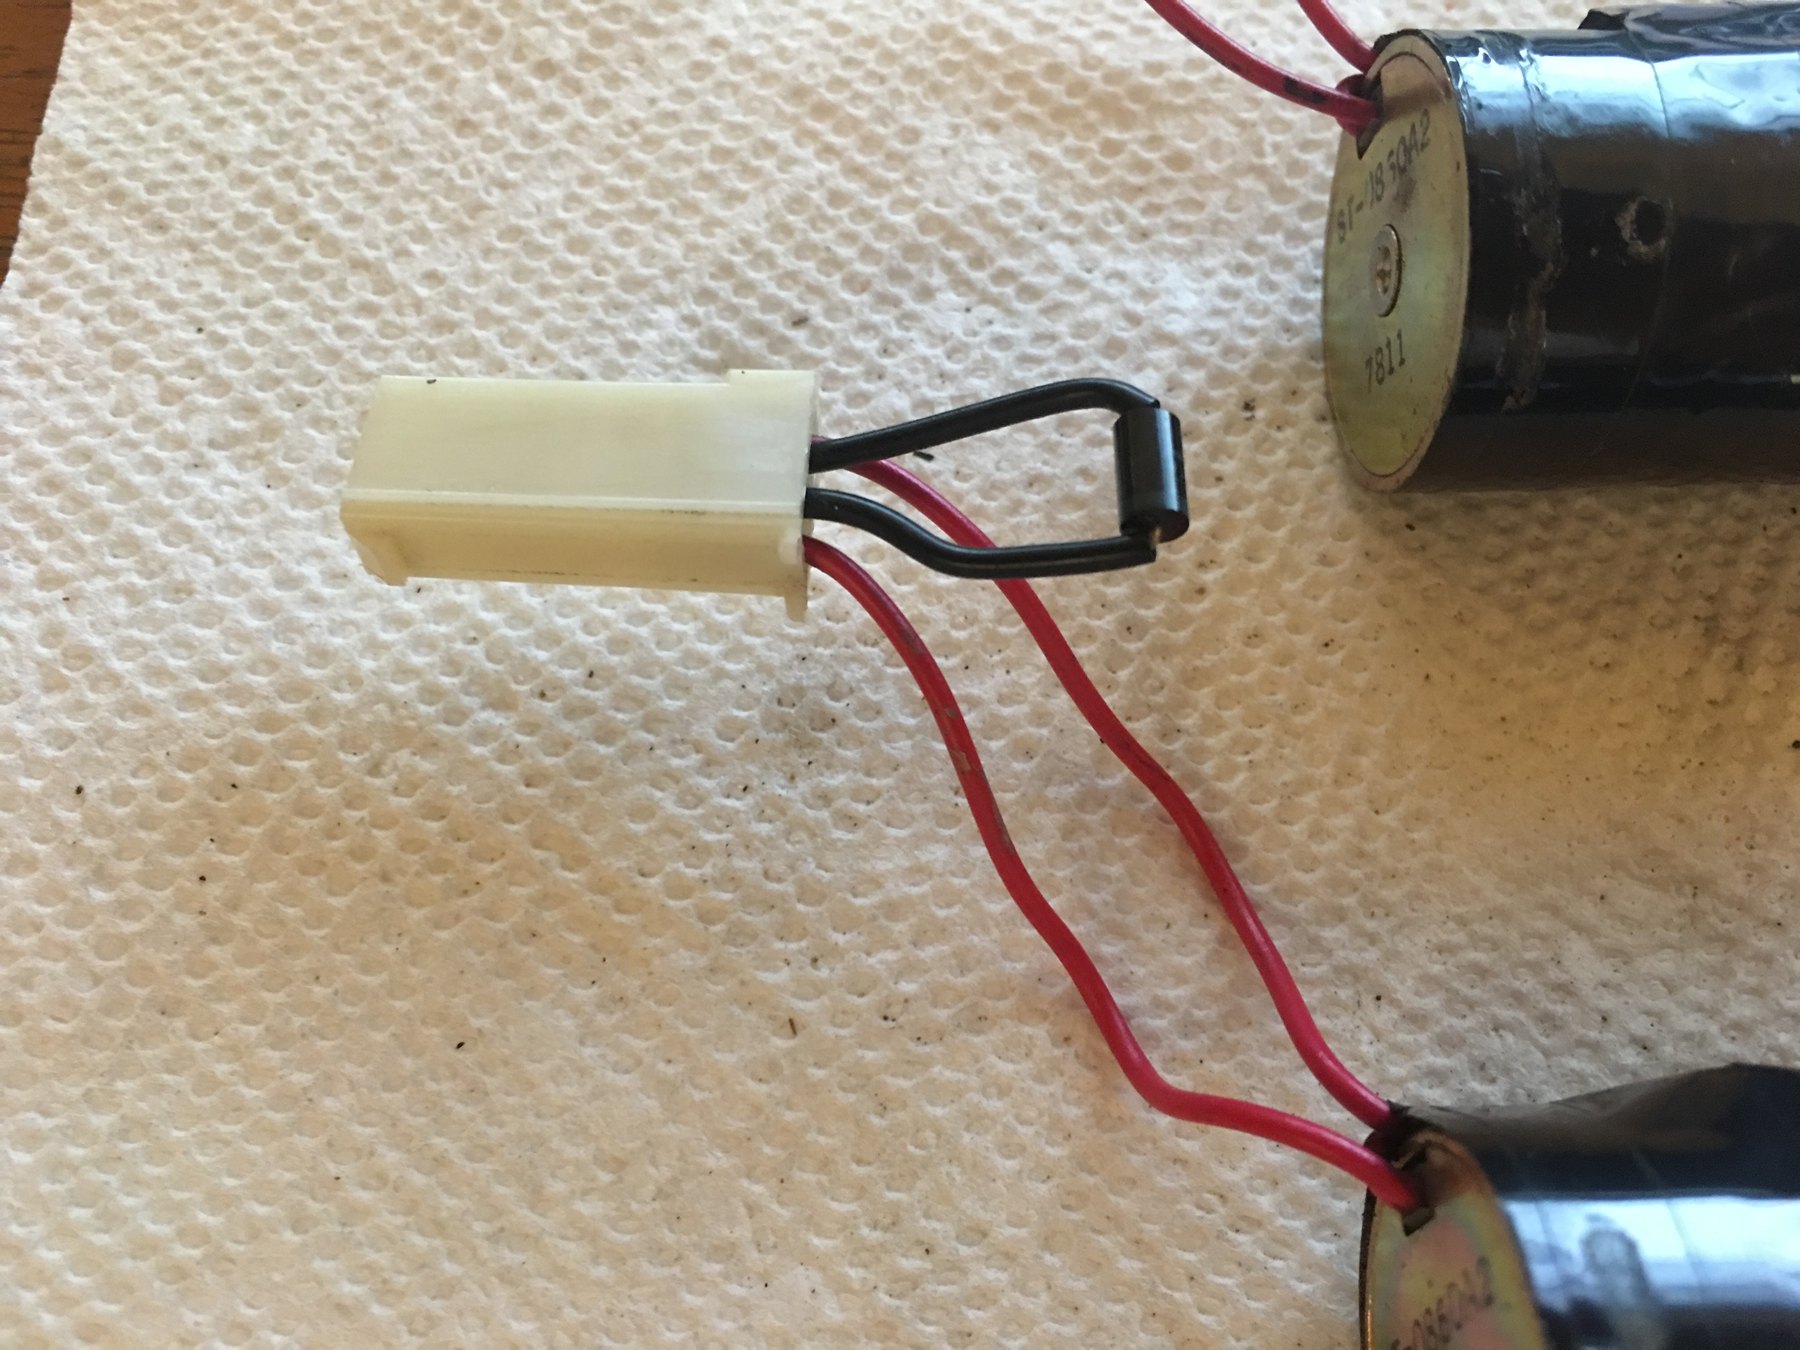
Those four details — an overdriven coil, a thermal fuse on it, a flyback diode at the coil, and a Darlington switch on the board — are each a design decision that the home-built guns either repeat or have to rediscover. Volume 4 takes up the heat and the diode; Volume 7 takes up the thermal fuse.
1.5 Time Crisis 4: a box-frame unit and a rubber spacer
By Time Crisis 4 the gun had changed. The TC4 DX manual’s replacement procedure describes a rectangular “Solenoid Unit” held by four M3 cap screws, a separate slide bracket, and a rubber spacer fitted with the spring: “Remove the Rubber Spacer from the Solenoid Unit. Take care not to lose the spring while removing the Rubber Spacer.” The reassembly note asks for attention to “the installing order of the E-type Stop Ring and Rubber Spacer and the direction of the Spring”. The cabinet wiring diagram labels the gun’s supply “+24V … SOLENOID”.7
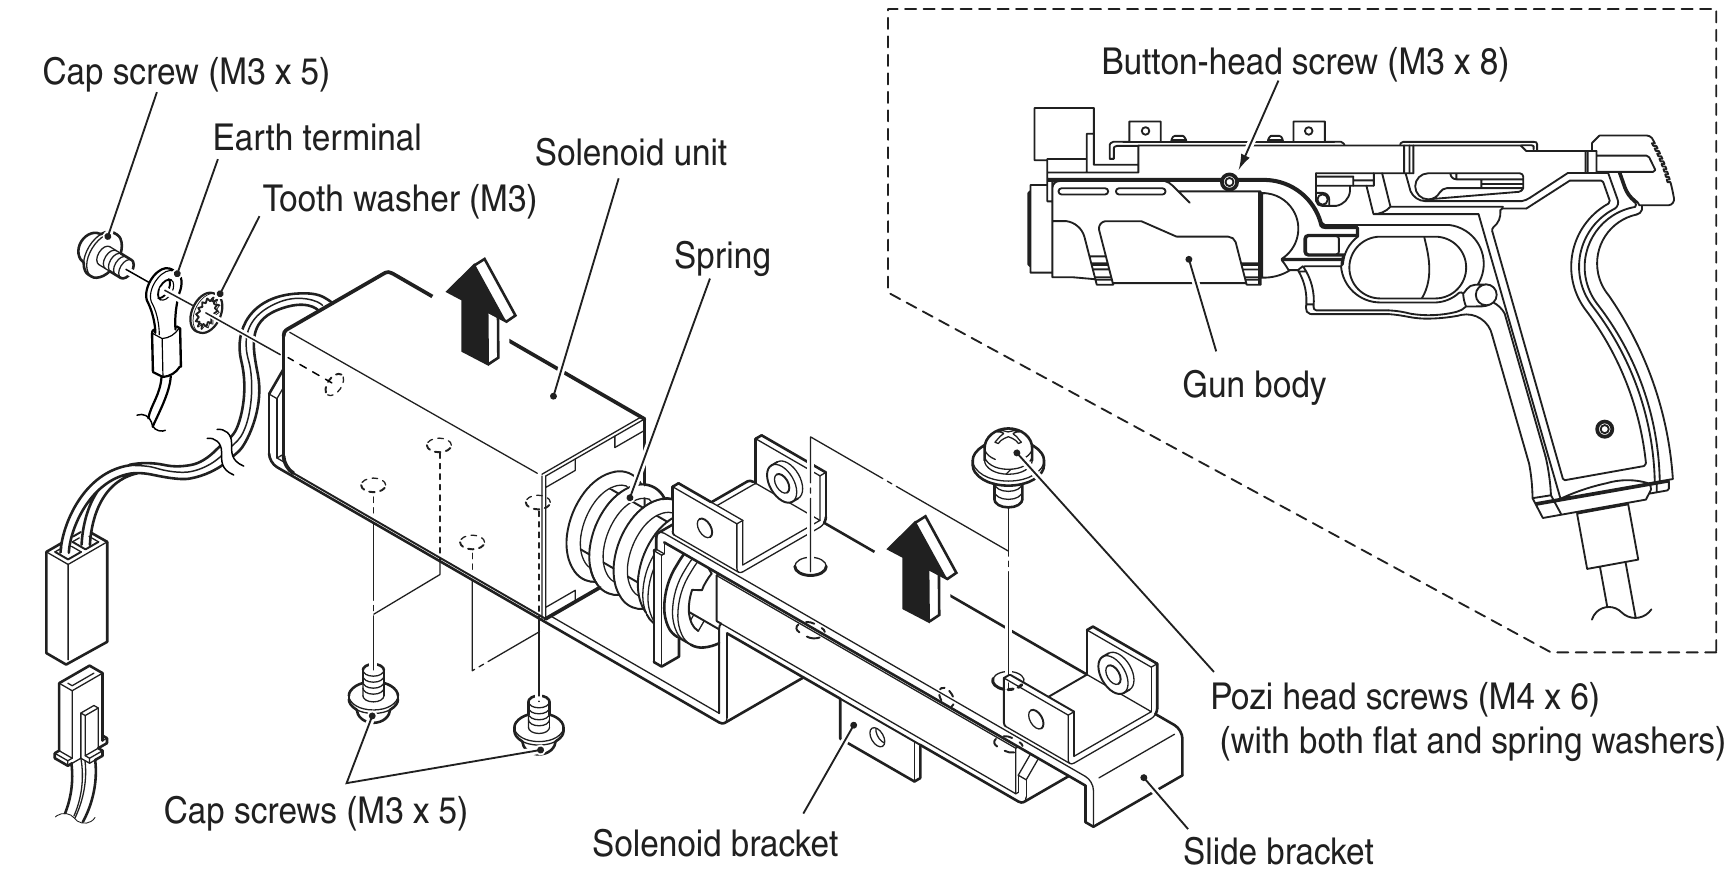
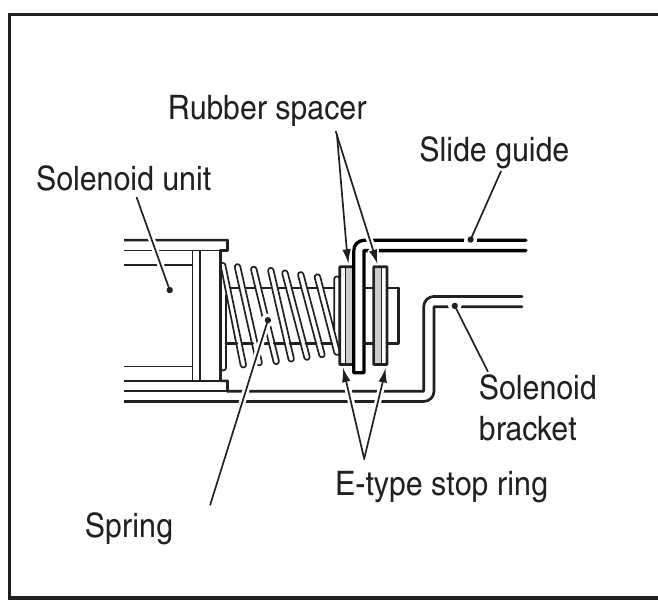
A silencer rubber in the Time Crisis SD gun and a rubber spacer in the Time Crisis 4 gun show that Namco was managing noise and impact at the stops from the start. Volume 5 explains what a damper at each end of the stroke does to the feel, and why the forward stop can be softened at almost no cost while the rear stop cannot.
1.6 Sega’s Ghost Squad: a “reaction” that is a solenoid
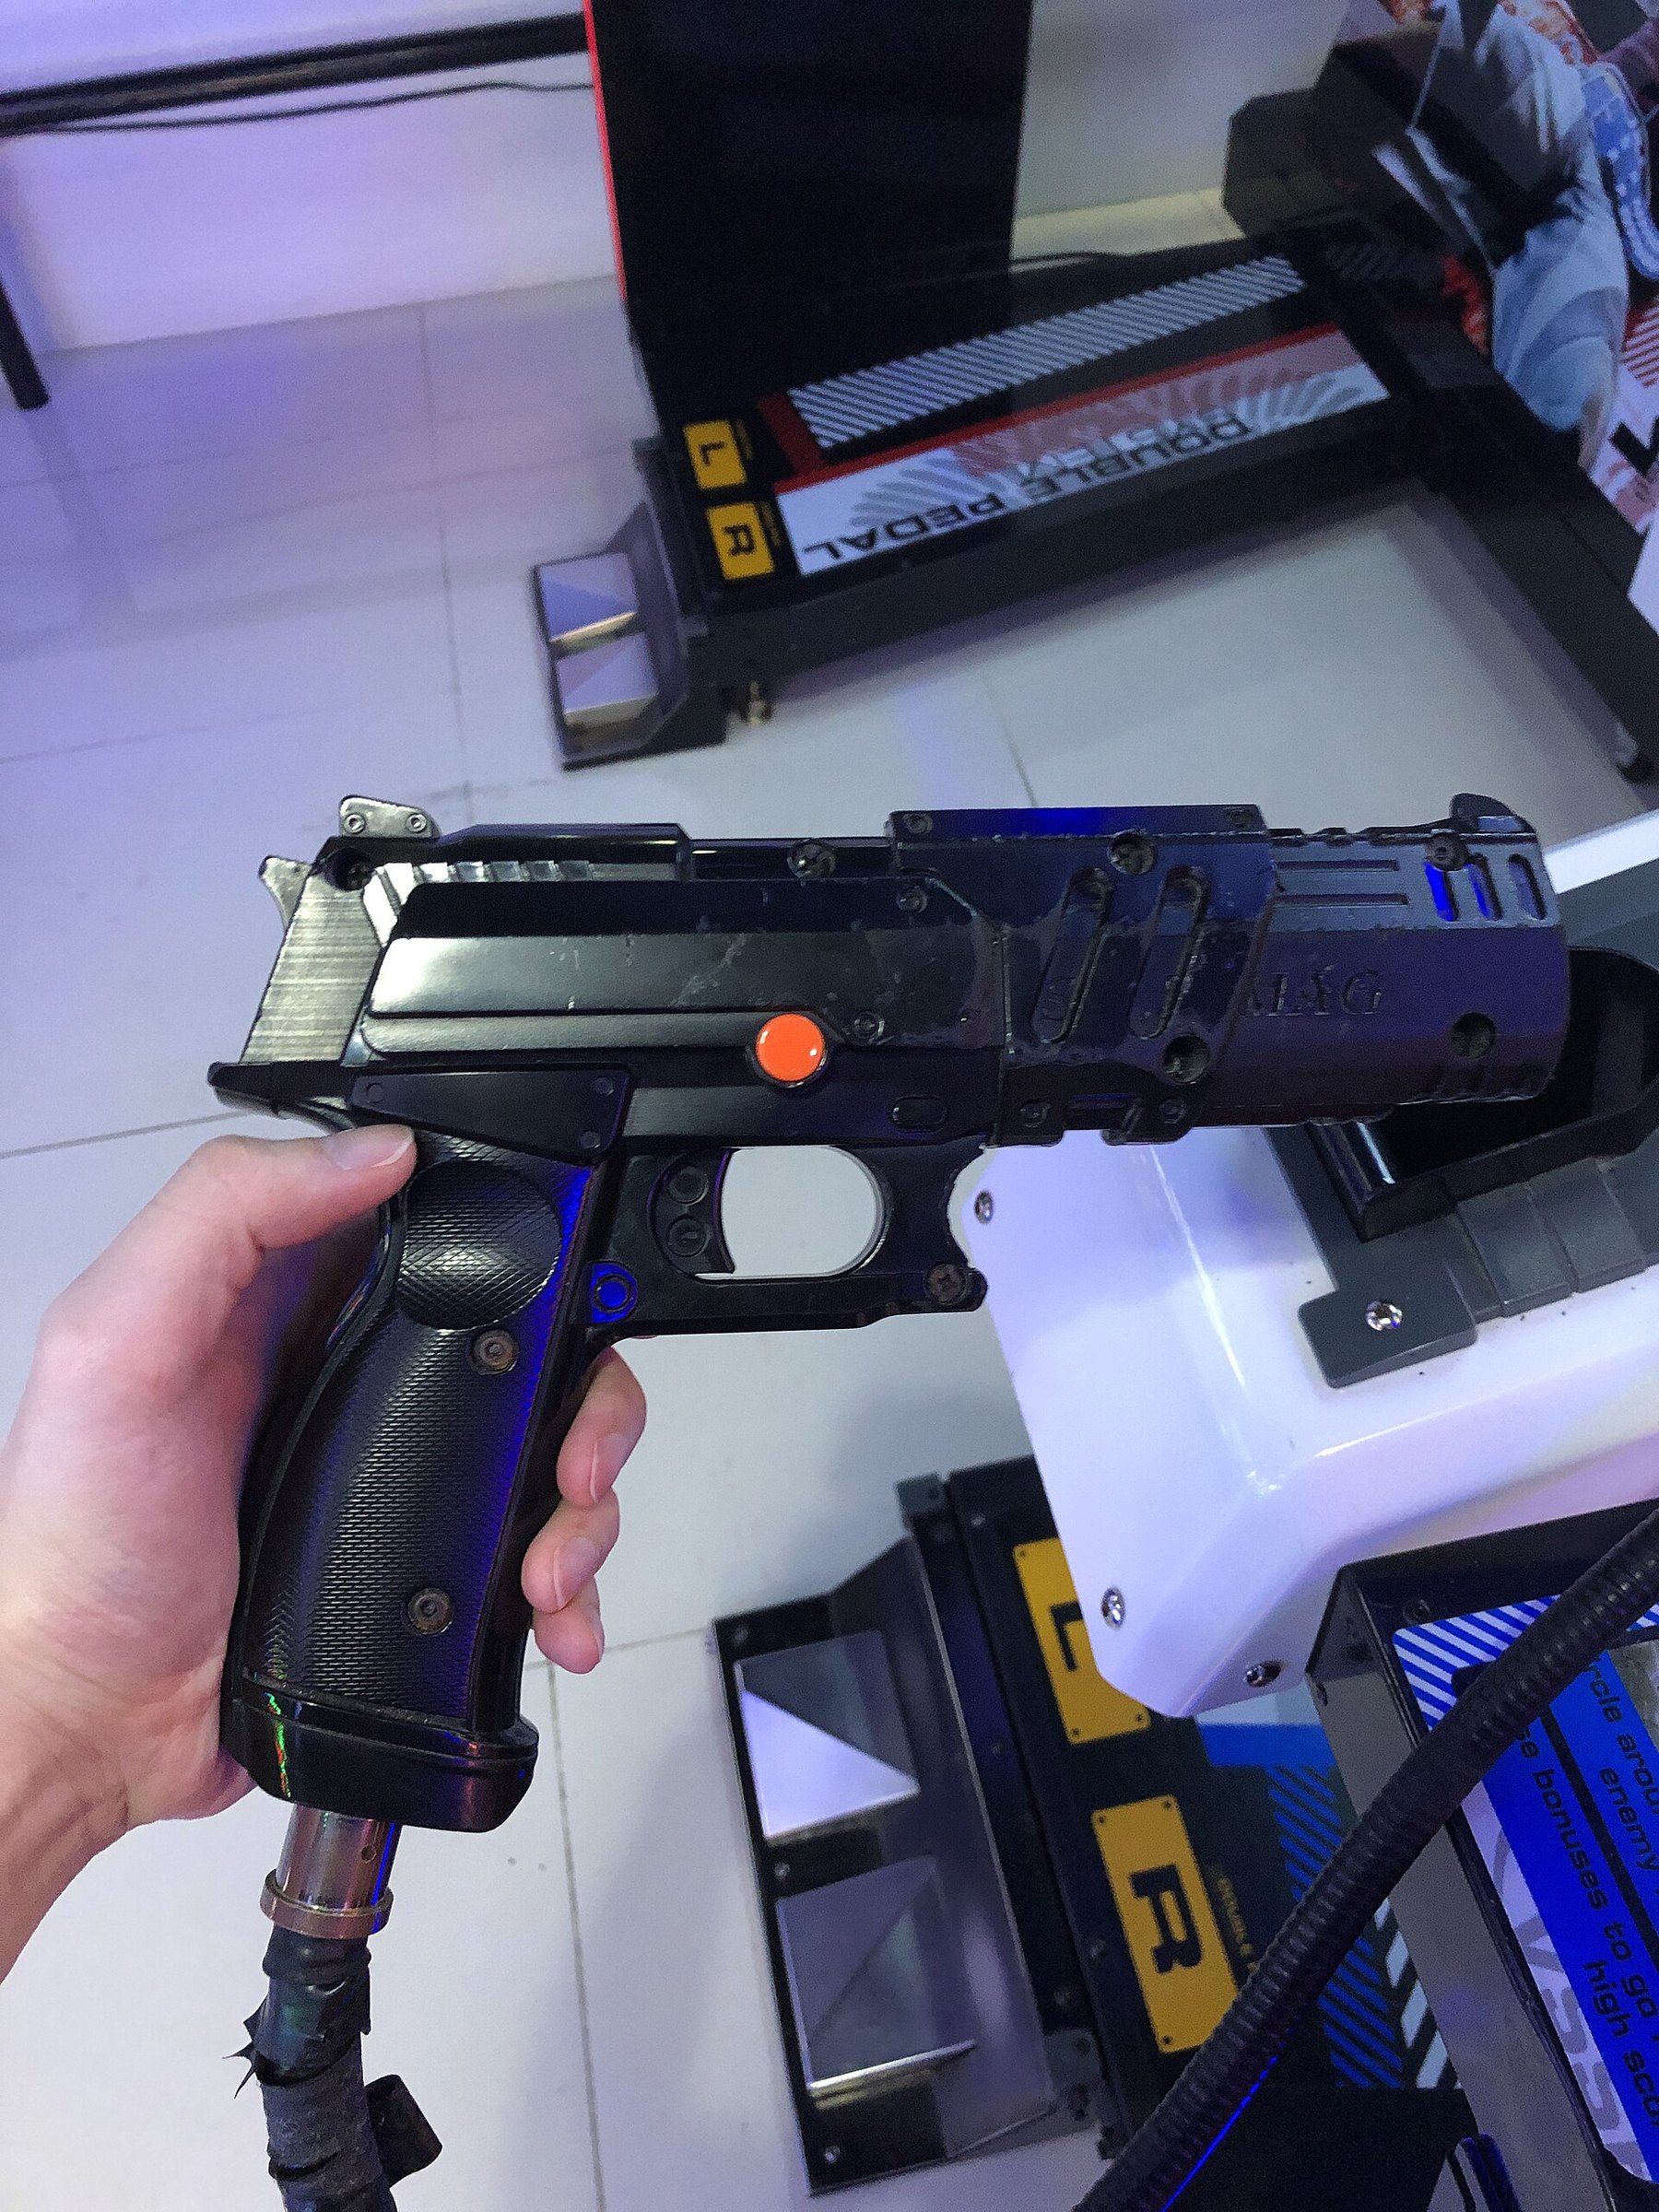
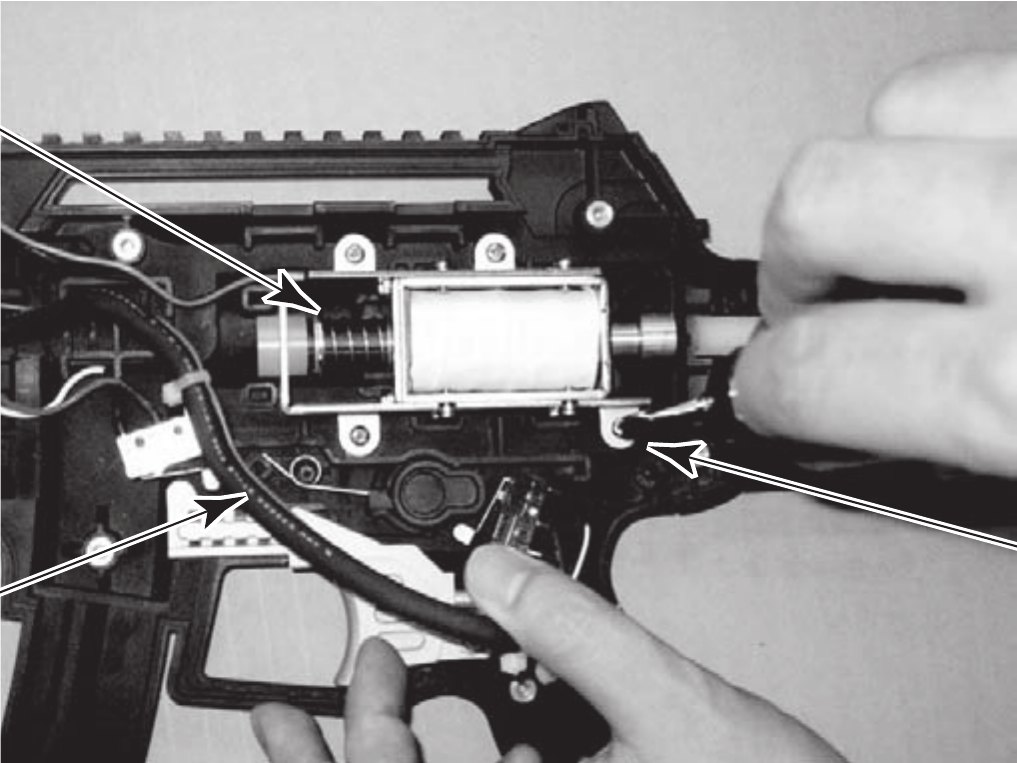
Sega’s manual for Ghost Squad, disclosed in 2004, calls the effect “gun reaction”. Its test menu entry “PLAYER 1 GUN REACTION” “Vibrates the 1P gun”, and the operator’s setting “REACTION” turns “the gun controller vibration ON and OFF”. The hardware, though, is a solenoid. The manual’s procedure “REPLACING THE SOLENOID” removes a “solenoid assembly” held by four M3×6 screws and then the solenoid itself, held by eight more, and its photographs show an open-frame solenoid with an external spring mounted in line with the receiver. One caution in the same manual is the most useful sentence in this whole volume for anyone building a gun: “The solenoid on the Control Unit (Gun Controller) may become hot. Take care as there is a risk of accidental burns.”8
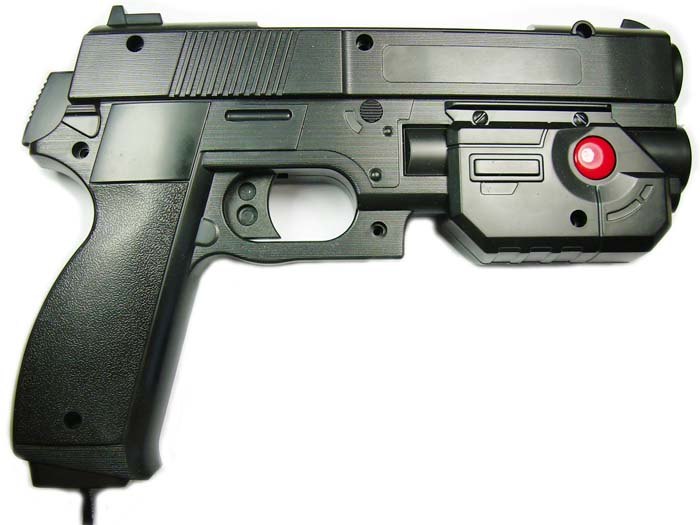
Not every famous gun game kicked. Sega’s The House of the Dead 4 (2005) used a motor, not a solenoid: its output test lists “GUN MOTOR” (Arcade Light Guns, Volume 5). Taito’s Operation Wolf (1987) kicked too; its gun is optical, with a sensor board and a motor and no potentiometer in Taito America’s wiring diagram, while the later Operation Thunderbolt and Space Gun are the potentiometer-aimed ones. Their mechanisms belong to the Arcade Light Guns dive. (Corrected 2026-10-19: this paragraph earlier called Operation Wolf potentiometer-aimed and the House of the Dead 4 motor unverified.)
1.7 What arcade practice settled
Read together, the manuals and the repair thread record a consistent set of choices:
Table 2 — Read together, the manuals and the repair thread record a consistent set of choices
| Choice | Evidence | Why it matters to a builder |
|---|---|---|
| Supply well above what the coil could take continuously | 24 V at the TC II gun, ~15 Ω coil, ~38 W while on;5 “+24V SOLENOID” in TC47 | The kick comes from power the coil can only take in short bursts |
| The game controls when it fires | Every manual’s solenoid test fires on the trigger under software control | Pulse timing is a firmware decision, not a mechanical one |
| Thermal protection on the coil | Thermal fuse under the tape (TC II);5 burn warning (Ghost Squad)8 | Overdriven coils get hot enough to burn a hand |
| Flyback diode at the coil | Diode inside the TC II connector5 | The switch survives turn-off |
| A damper at a stop | ”Silencer rubber” (TC SD); rubber spacer (TC4)47 | Noise and wear are managed at the stops |
| A heavy moving part | A whole slide driven by the plunger (TC series) | More moving mass, more momentum per shot (Volume 5) |
| Replaceable as a unit | Every manual has a solenoid replacement procedure | The coil is a wear part |
1.8 The home and DIY guns
The arcade solution did not move into the home consoles’ own guns for a long time, and the full console history is the History of Light Guns dive’s to tell. What matters here is the generation of PC and emulator guns built since the flat-panel television killed the CRT light gun, which brought solenoid recoil to the living room and then to the hobbyist’s bench.
Ultimarc AimTrak with recoil. Ultimarc’s AimTrak is an infrared USB gun; the recoil version costs US$120.00 on the maker’s page as of 2026-10-18, in black (C-ATE0BK), red (C-ATE0RD) or blue (C-ATE0BL). It is “shipped without recoil power supply”. The required voltage “is 24-36 Volts”, the maximum supply “24 volts 4 Amps, or 36V 3 Amps”, and the page warns: “DO NOT use a supply with a current capability of greater than 4 amps.” Recoil power is adjustable in the AimTrak utility, and “If using two or more guns you will need one supply per gun.”9
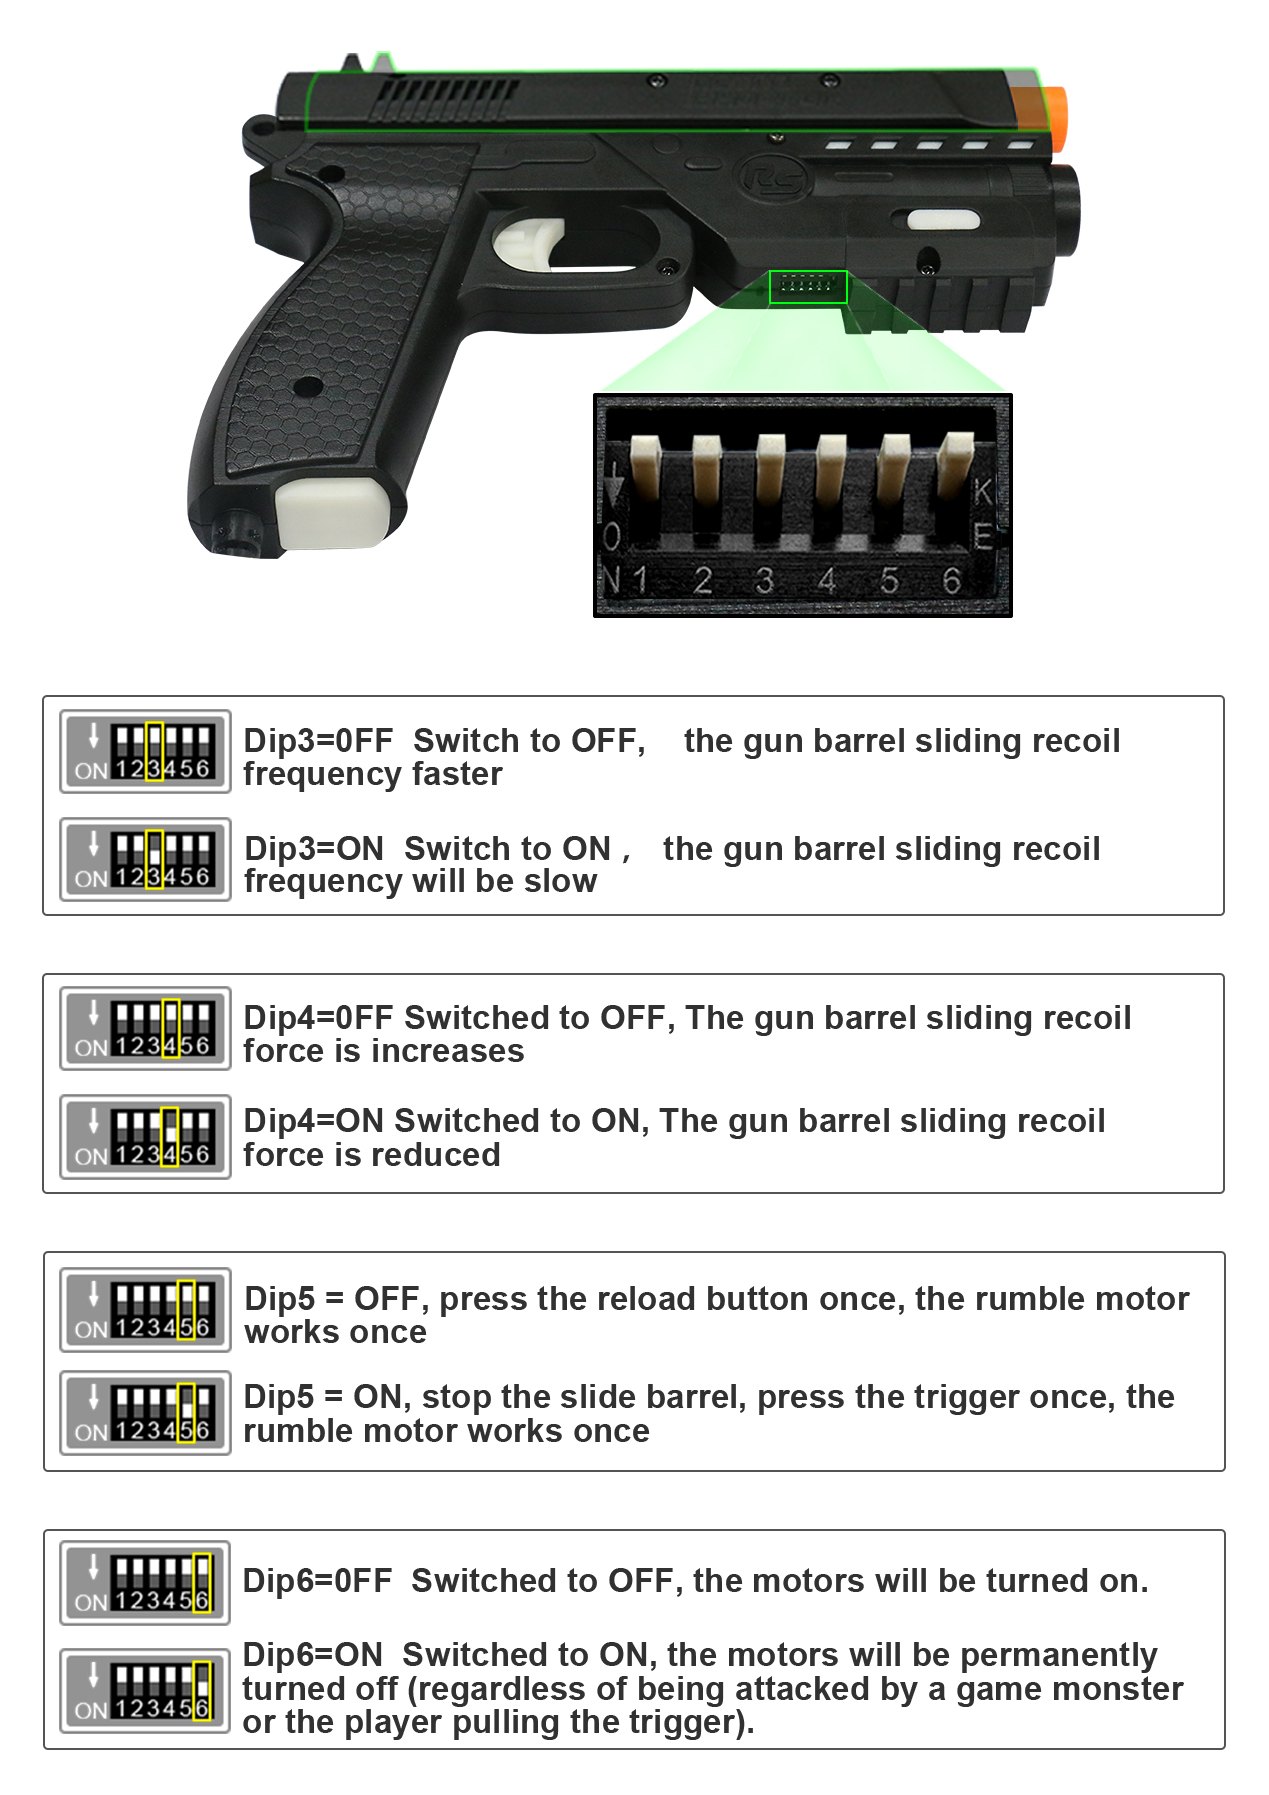
RetroShooter RS3 Reaper. RetroShooter’s RS3 Reaper is a pistol with “powerful sliding recoil action, powered by a 24V solenoid”, sold as a pair for US$229.97 (down from $254.97) on the maker’s page as of 2026-10-18. “This is a 24v recoil pistol”; it needs a 24 V adapter and RetroShooter’s 24 V extension hub, and “The recoil will not function with USB only.”10 Its DIP-switch sheet gives the user exactly two recoil adjustments: switch 3 sets the “sliding recoil frequency” fast or slow, and switch 4 sets the “sliding recoil force” increased or reduced.11 Two binary switches, one for repetition rate and one for strength, are almost certainly the pulse period and the pulse width; that is an inference from the labels, and Volume 4 explains why those are the only two levers a fixed-voltage driver has.

Sinden. The Sinden gun, which aims by tracking a white border drawn around the picture, offers a recoil upgrade that takes a different route: a review in December 2023 describes it as adding “a large solenoid, capacitor and ‘complex innovative solenoid circuit’”, powered by “a standard USB-A connection” with no separate supply, and found the default setting “so strong it often drowns out the game audio”. The upgrade was £139.99 against £89.99 for the base gun at the time.12 Storing energy in a capacitor and dumping it into the coil is the technique the Power Supplies dive develops; its limit, a capacitor that cannot recharge from USB fast enough in sustained fire, is noted there.
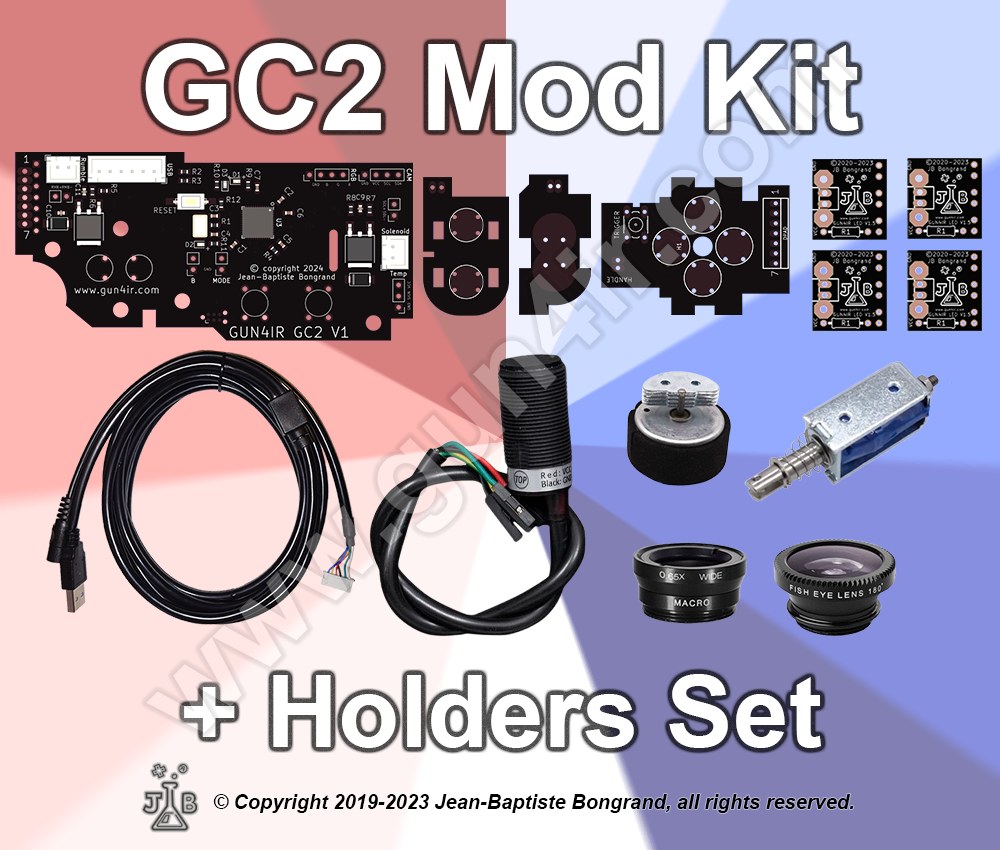
GUN4IR. GUN4IR, sold by JB Game Lab in Tokyo, converts GunCon shells and sells its own boards. Its pre-modified GunCon 2 and GunCon 45 sets list “Solenoid feedback (requires an extra 12v power supply, not included in the set)” and a “Temperature sensor mounted on the solenoid as a safety measure”, and ask for “a standard (non switching if possible) 12v power supply rated for 2A (or more), with center positive polarity”. On 2026-10-18 the UK and EU GunCon 2 set was €279.00 and the GunCon 45 set €250.00; the GC1 and GC2 mod kits, €150 and €155, include a solenoid and printed holders for it.13 The request for a linear rather than a switching supply is unexplained on the page; Volume 3 and the Power Supplies dive take it up.

Blamcon. Blamcon publishes build guides for its printed guns. The Ace of Spades revolver uses a JF-0826B solenoid as a “double action solenoid hammer” that should “move smoothly up and down about 30 degrees”, driven from a 12 V input on the Blamcon Core board or a Pi Pico W, with the note “polarity doesn’t matter” for the solenoid leads.14 The JF-0826B is one of the generic open-frame parts Volume 3 examines.

OpenFIRE. OpenFIRE, the open-source firmware that the Open-Source Firmware dive covers in depth, supports “Any 12/24V solenoid, w/ associated driver board”, and its README links a community driver board.15 Its default timing, read from the source, is a 45 ms on-time and an 80 ms off-time, with a 500 ms pause after the first shot before held-trigger repeats begin; it can read a TMP36 temperature sensor on the solenoid, doubling the off-time above 38 °C and stopping repeated fire above 45 °C, though not, on a reading of the source, the first shot of each trigger pull (Volume 4).16 Those numbers are a recurring reference in Volume 4, which shows what a 45 ms pulse does to a 24 V coil.
1.9 The power-supply problem the kits all share
Every commercial gun above needs a supply that USB cannot give, and no two ask for the same one: 24 to 36 V at no more than 4 A (AimTrak), 24 V through a dedicated hub (RS3 Reaper), 12 V at 2 A or more, preferably not switching (GUN4IR), 12 V (Blamcon), or USB with a capacitor (Sinden). The open firmware accepts 12 or 24 V and leaves the choice to the builder. Behind that spread is the observation that prompted this dive: hobbyists end up owning many supplies, and the usual explanation offered is that the solenoids themselves are inconsistent.
That explanation is right, and it is incomplete. Volume 3 shows that the cheap open-frame units do vary from piece to piece, and that their listings contradict themselves about current and stroke, so a builder cannot pick a supply from the listing. Volume 2 shows that a solenoid’s voltage rating is really a heat rating at a duty cycle, which is why the same coil is sold and used at very different voltages. And Volume 4 shows that the variance can be removed electrically: a driver that regulates current, instead of applying a fixed voltage for a fixed time, delivers the same ampere-turns to every coil whatever the supply. A gun built that way needs one supply, not one per solenoid.
1.10 How the rest of this dive is arranged
Volume 2 is the physics: the magnetic circuit, the force-stroke curve and why it climbs so steeply near closure, open-frame against tubular construction, and push, pull and impact arrangements. Volume 3 turns to the parts on sale, what their listings and the few real datasheets say, and how to characterise one on the bench. Volume 4 is the drive: pulse width, rate, duty cycle and coil heating, overvoltage drive, peak-and-hold and current regulation, and the flyback clamp’s effect on release. Volume 5 is the mechanism: moving mass, striker, stops, return spring, dampers, noise and placement in a long gun. Volume 6 is measurement with ordinary electronics-lab instruments: a USB oscilloscope, a current shunt and an accelerometer. Volume 7 is the selection guide, where to buy with dated prices, and the failure modes and repairs.
1.11 What could not be verified
- ST-0860A2. The Namco solenoid’s maker, voltage rating and resistance were not found in any datasheet. The 15 Ω figure is one forum member’s meter reading of one unit.
- SLA4060. Identified as the recoil driver by two forum members, not by a Namco schematic.
- House of the Dead. Whether any House of the Dead arcade gun used a solenoid was not settled; no Sega service manual for those guns was read.
- Sinden’s circuit. The capacitor’s size and voltage and the drive scheme were not found in a primary source; the Sinden wiki returned an access error.
- AimTrak’s internal drive. Ultimarc does not describe the recoil mechanism or its driver.
Sources
Footnotes
-
Namco, Point Blank Operators Manual, Part No. 90500078, © 1994, UK edition (Brent Leisure). Internet Archive item
pointblank, https://archive.org/details/pointblank, text layer read 2026-10-18. ↩ -
“Time Crisis,” English Wikipedia, read 2026-10-18 (arcade release years for the series). ↩
-
Namco, Time Crisis II Operation Manual. Internet Archive item
arcademanual_Time_Crisis_2, https://archive.org/details/arcademanual_Time_Crisis_2, read 2026-10-18 (solenoid test; gun assembly parts list showing ST-0860A2). ↩ ↩2 -
Namco, Time Crisis SD Operation Manual, §6.3.3 (Solenoid Test), §7.2.5 (Gun ASSY troubleshooting), §7.3.4(4) (Replacing the Solenoid), §8.5 (Gun ASSY parts list). Internet Archive item
arcademanual_Time_Crisis_SD_Manual, https://archive.org/details/arcademanual_Time_Crisis_SD_Manual, read 2026-10-18. ↩ ↩2 ↩3 -
“Replacing solednoid in Time Crisis Namco Gun?”, KLOV / Arcade Museum forum thread, posts by Emby6201, runawayabc123, kspiff and Hydreigon, 17 January 2019, https://forums.arcade-museum.com/threads/replacing-solednoid-in-time-crisis-namco-gun.443665/, read 2026-10-18. Photographs linked from the thread at https://imgur.com/42pPUZC and https://imgur.com/xpsrh5g. ↩ ↩2 ↩3 ↩4 ↩5
-
Distributor parametric listings for Sanken SLA4060 (“TRANS 4NPN DARL 120V 5A 12SIP”), e.g. https://www.ichome.com/product-detail/sanken/sla4060 and https://ic-direct.com/product/sanken/sla4060, via search 2026-10-18. Not the maker’s datasheet. ↩
-
Namco, Time Crisis 4 DX Manual, issue 2, §6-2-3-4 (Solenoid Test), §7-18 (Replacing the Gun Solenoid), wiring diagram. Internet Archive item
time_crisis_4_dx_manual_issue2_ptm, https://archive.org/details/time_crisis_4_dx_manual_issue2_ptm, read 2026-10-18. ↩ ↩2 ↩3 -
Sega, Ghost Squad owner’s/service manual (disclosed 2004), game test mode, cautions, and “Replacing the Solenoid”, pp. 94–95. Internet Archive item
sega-ghost-squad, https://archive.org/details/sega-ghost-squad, read 2026-10-18. ↩ ↩2 -
Ultimarc, “AimTrak Light Gun With Recoil”, https://www.ultimarc.com/light-guns/aimtrak-light-gun/aimtrak-light-gun-with-recoil/, read 2026-10-18. ↩
-
RetroShooter, “RS3 Reaper 2 Pink & Blue”, https://retroshooter.com/?p=22789, read 2026-10-18. ↩
-
RetroShooter, RS3 Reaper DIP-switch settings image, https://retroshooter.com/wp-content/uploads/2024/11/RS3-Reaper-Dip-Settings.jpg, read 2026-10-18. ↩
-
Damien McFerran, “Sinden Light Gun review”, Time Extension, 24 December 2023, https://www.timeextension.com/reviews/sinden-light-gun-old-school-arcade-blasting-on-your-modern-day-tv, read 2026-10-18. ↩
-
GUN4IR / JB Game Lab online store, product data (https://www.gun4ir.com/products.json) and store metadata (currency EUR), read 2026-10-18. ↩
-
Blamcon, “Blamcon Ace of Spades” build guide, https://blamcon.com/lightgun-lineup/blamcon-ace-of-spades/, read 2026-10-18. ↩
-
TeamOpenFIRE, OpenFIRE-Firmware README, branch
OpenFIRE-dev, https://github.com/TeamOpenFIRE/OpenFIRE-Firmware, read 2026-10-18. ↩ -
TeamOpenFIRE, OpenFIRE-Firmware,
OpenFIREmain/OpenFIREprefs.h(default settings array) andOpenFIREmain/OpenFIREFeedback.cpp(FFBOnScreen,SolenoidActivation,TemperatureUpdate), branchOpenFIRE-dev, last pushed 2026-04-19, read 2026-10-18. ↩

Comments (0)