Traditions Blunderbuss Kits · Volume 6
Assembly II: Trigger, Guard, Buttplate, Ramrod & Final Fit
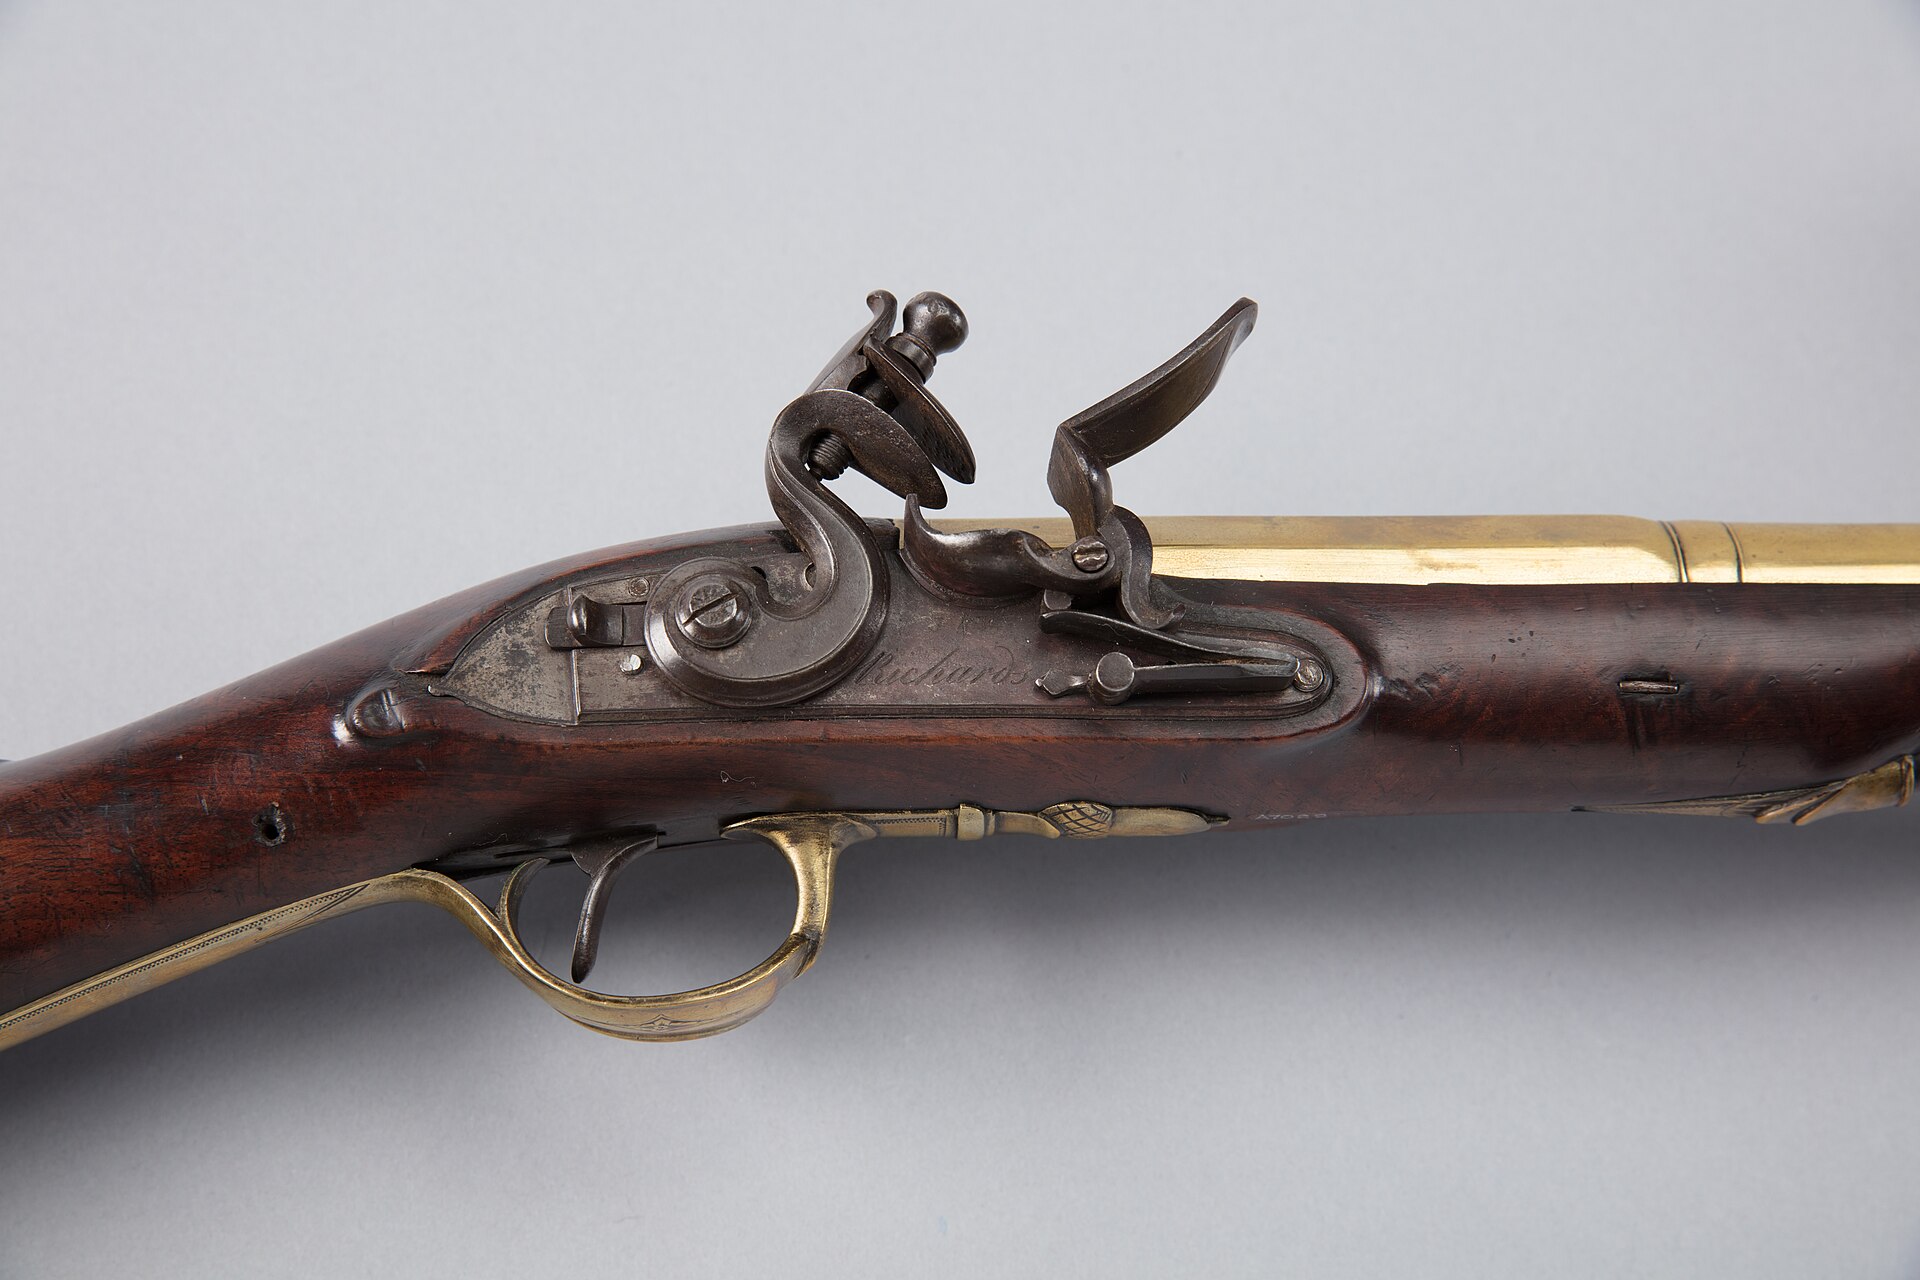
With the barrel, tang, and lock fitted (Volume 5), this volume finishes the mechanical build: the trigger, the brass trigger guard, the buttplate, the ramrod and its pipes, and then the final dry-fit inspection that clears the gun for finishing. Same rules as before — bare wood, bare metal, remove tiny amounts, check constantly, and never force a fit.
6.1 The trigger and its plate
You partly set this up in Volume 5 when you tested sear release. Now finalize it:
- The trigger plate beds into the underside of the wrist and usually takes the tang bolt from below. Black it, seat it flush, and confirm the tang bolt runs straight through tang, wrist, and plate to pull the assembly tight.
- The trigger pivots on a pin through the plate (or through the stock). Its blade must reach up to the lock’s sear so that a normal trigger pull releases the lock crisply, holds reliably at full cock, and — on a lock with a half-cock — is safe at half-cock.
- If the sear release is heavy, creepy, or won’t hold, the fix is trigger geometry: the position of the blade tip relative to the sear. Small adjustments — a touch off the trigger plate mortise to shift the trigger, or careful stoning of the trigger-to-sear contact — cure it. Do not lighten a sear engagement so far that the lock can jar off; a blunderbuss with a hair trigger and no safety is an accident waiting.
6.2 Fitting the brass trigger guard
The trigger guard is solid brass and typically arrives as a casting a little proud and slightly rough — this is normal and it’s where hand work shows. It has two mounting tangs (front and rear) that inlet into the wood and take screws or pins.
- Black the guard’s bearing surfaces and inlet the two tangs until the guard beds down with the bow correctly spaced around the trigger.
- File the guard’s edges flush with the wood after it’s seated, blending brass to wood. Brass files and sands easily — go gently, because you can’t put it back.
- The guard is one of the parts you’ll later polish (Volume 7 covers whether to leave the brass bright or let it age). File and shape now; final polish comes with finishing.
6.3 Fitting the buttplate
The brass buttplate caps the butt and is a classic kit fitting job because the butt is usually left slightly oversized so you can fit the plate to the wood rather than the wood to the plate:
- Set the buttplate on the butt and see where it stands proud of the wood. The correct approach is to fit the wood to the plate — sand/rasp the butt down until the plate sits flush all around — not to file the brass to the wood.
- Once the plate seats flush and its screw holes line up, mark and drill the pilot holes and drive the (soft brass) screws with a properly-fitting driver.
- Then file/sand the plate edges flush with the wood as a final blend. Expect to take your time here; a buttplate that stands proud with a lip is the most visible sign of a rushed kit.
6.4 The ramrod and pipes
The ramrod rides under the barrel in brass pipes (thimbles) and seats your load at the range, so it has to fit and it has to be finished:
- Fit the ramrod pipes into the fore-stock; they’re usually pinned. Confirm they align so the rod runs straight under the barrel with no binding.
- Trim the ramrod to length so it seats fully with a little standing proud to grab, and finishes flush-ish under the muzzle. Cut conservatively — you can trim again, you can’t add.
- Finish the ramrod (a wipe of oil or the same stock finish) so it doesn’t swell, split, or splinter — a raw wooden rod is a hand-injury risk when you’re pushing a tight ball. Many builders fit a brass tip or a cleaning-jag thread to the working end; at minimum, seal the wood.
6.5 The final dry-fit inspection
Now assemble the entire gun, unfinished, and check it as a whole before you take it apart to finish. Confirm:
- Barrel beds fully; tang flush; nose cap and muzzle clean.
- Lock seats flush; hammer/cock aligns to nipple/frizzen; vent or nipple channel clear.
- Trigger releases the sear crisply, holds at full cock, is safe at half-cock; no jar-off.
- Trigger guard and buttplate flush and even; all screws seat with correctly-fitting drivers.
- Ramrod runs freely in its pipes and seats.
- Every screw and pin is present and drives home; nothing is forced.
When the whole gun goes together cleanly and comes apart cleanly, you’re done with fitting. Disassemble completely — barrel out, lock out, furniture off — because the wood and the steel are finished separately and apart. Volume 7 takes the bare stock; Volume 8 takes the bare barrel. Resist the very strong temptation to “just finish it assembled.” Everything downstream looks better done in pieces.
Comments (0)