Smith & Wesson Model 41 · Volume 6
Owning and Maintaining the Pistol Documented Here
The unit as recorded in September 2026, what its markings will say about its era, what Smith & Wesson's manuals actually say about ammunition, and the maker's own field-strip, lubrication, trigger-stop and cleaning procedures
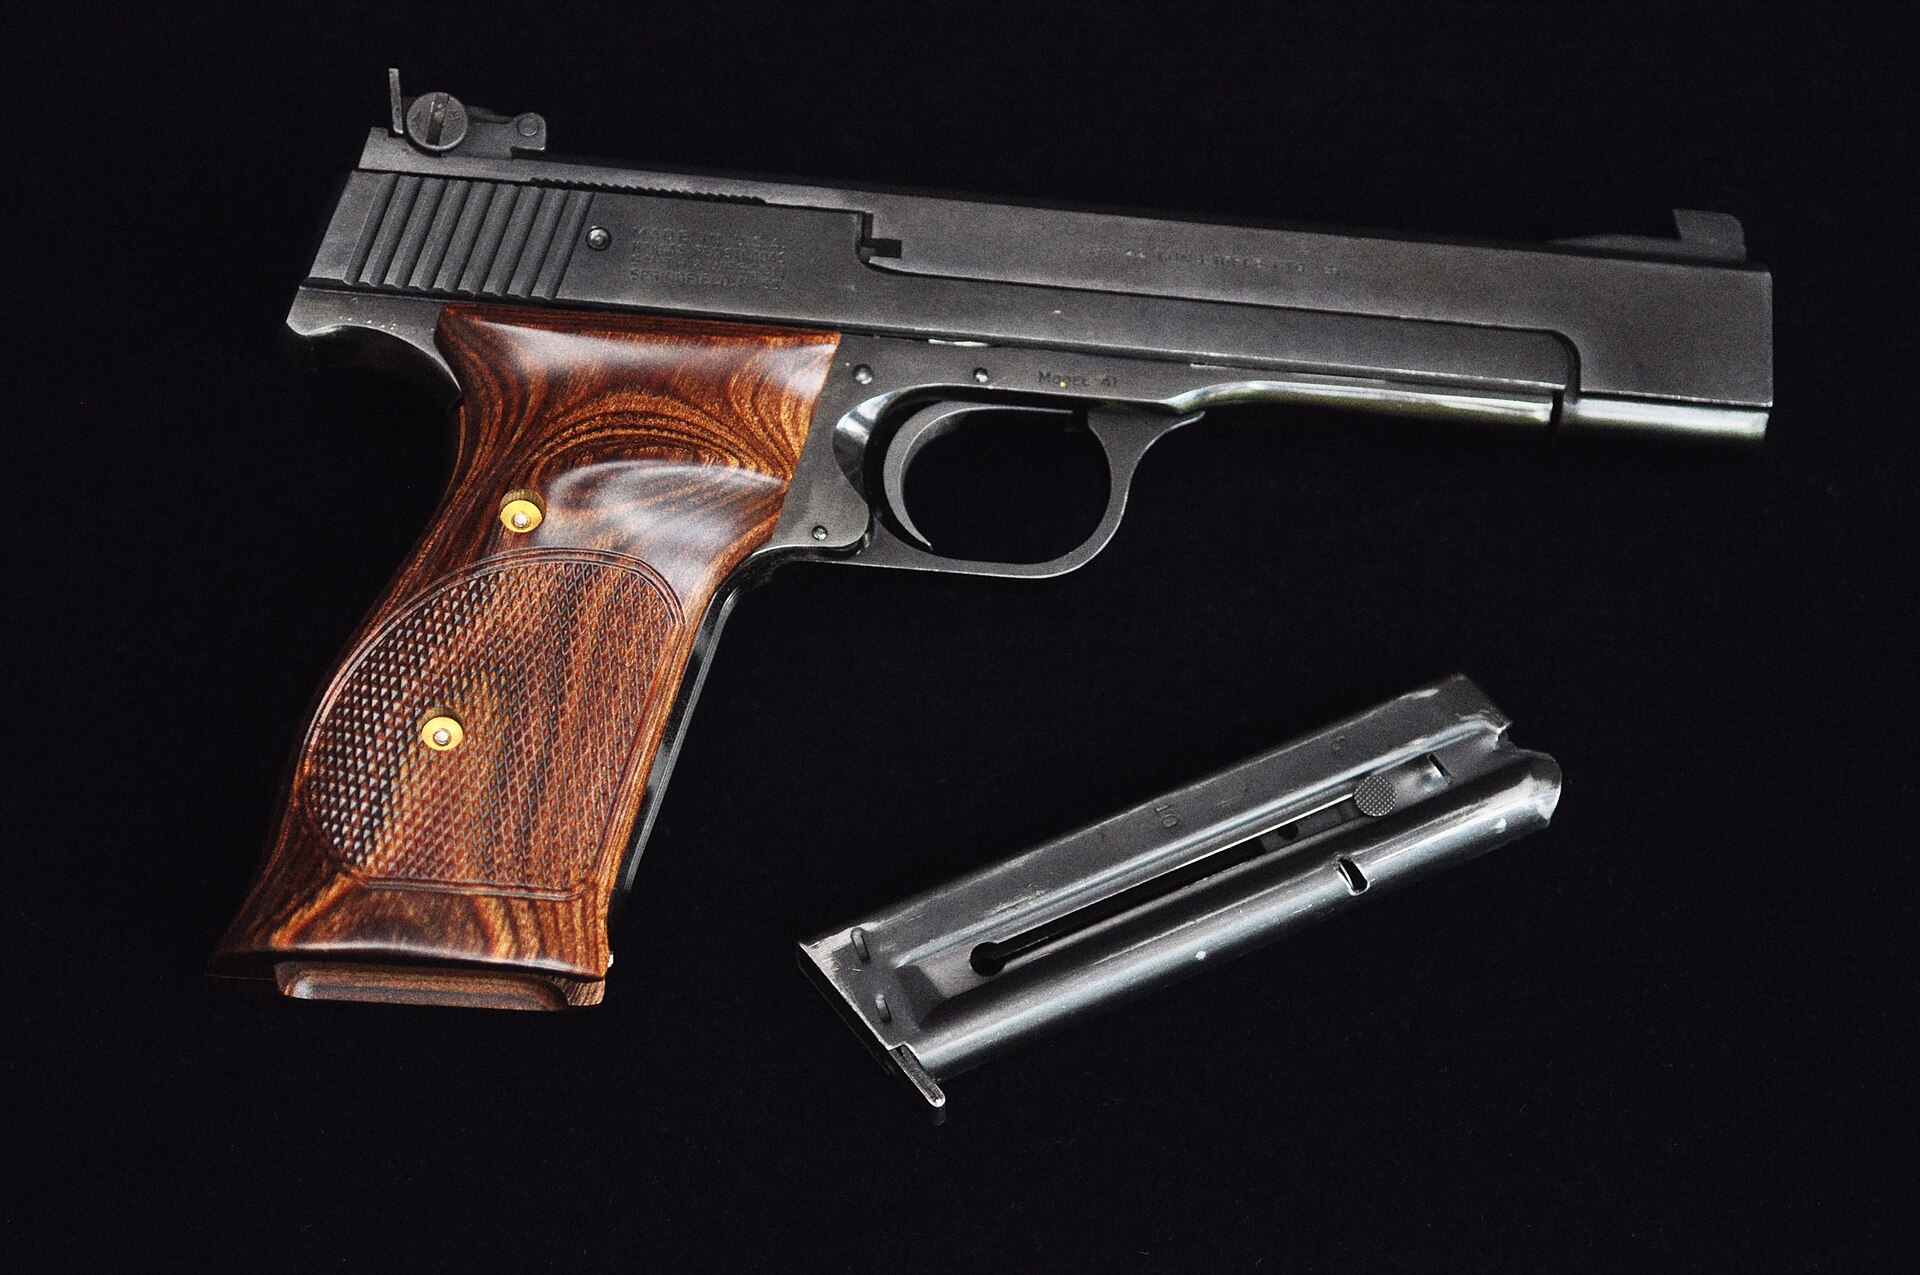
This volume turns from the pattern to the unit. What the owner’s records say about the pistol is set out first, followed by how its era can be read from the gun itself. The rest is maintenance, taken from Smith & Wesson’s own manuals and from nothing else: three editions were examined, an owner’s manual carrying the revision code SW41_022504 (read here as February 2004, and called the 2004 edition below) and the Safety & Instruction Manual of 2014 and 2020.1 Their field-strip, reassembly, lubrication, trigger-stop and sight procedures are substantively identical across all three, and they are given here as the maker gives them.
6.1 The Pistol Documented Here
As documented in September 2026, from the owner’s inventory sheet (last modified 2026-09-17):
Table 1 — As documented in September 2026, from the owner's inventory sheet (last modified 2026-09-17)
| Model | Smith & Wesson Model 41 |
| Calibre | .22 Long Rifle |
| Barrel | 5.5 in heavy |
| Modifications, optics, accessories | None recorded |
| Production era | Not recorded |
Nothing else about the configuration is recorded, and nothing else is assumed. In particular, the record does not say whether the pistol has a cocking indicator, a scope rail or drilled-and-tapped mounting holes, the extended front sight, the original grips, steel or plastic magazine followers, or a threaded barrel. Those are the features that place it in its era, so the next section says where to look.
6.2 Placing It in Its Era
Volume 2 sets out the full method and its sources. For this pistol, the order that gives the most information for the least effort is:
- The serial number’s format on the frame above the trigger guard (the manual shows the serial on one side of the frame and the model marking on the other1). A plain number, an “A” prefix or a three-letter prefix each places a Model 41 in a broad band: before 1970, 1970 to 1984, or from 1984 onward, with the 1994 “New Model” restarting at UAA0001 according to a collectors’ compilation. Volume 2 has the table and the sources for each boundary.
- A cocking indicator at the rear of the pistol. Present means before the 1978 revision.
- The barrel. A 5½ in heavy barrel was offered from 1963, and from 1965 to 1976 also with an extended front sight. A barrel says less about a frame than it seems to, because Model 41 barrels are made to interchange (Volume 3).
- The rear sight and the top of the pistol. From 1994, according to the Blue Book, Millett rear sights replaced Smith & Wesson’s, and the pistol was drilled and tapped for a scope mount. The current Performance Center pistol has an integral rail.
- The grips and the magazines. Laminated stocks from 1997; plastic magazine followers from 1985 (the latter from a collectors’ compilation only).
- A Smith & Wesson Historical Foundation letter settles what the frame shipped with and when. On 2026-09-19 it cost $100 ($75 to members of both collectors’ organisations).2
6.3 Ammunition: What the Manual Says, and What It Does Not
This is a match-ammunition pistol, and the ammunition itself belongs to the .22 Rimfire dive, which is not re-derived here. Its match-house volume covers who makes match .22 LR, what the grades buy and why the lot number is the product; its volume on choosing by job and by gun covers the Model 41 specifically among a worked battery of .22s; and its external-ballistics volume defines the velocity classes. What follows is only what Smith & Wesson’s own documents say, because that is a question of fact about this pistol and the answer is not the one usually given.
What the manuals say. The editions examined say, in substance:1
- Use only “commercially manufactured ammunition with internal ballistic pressures which are in strict accordance with the specifications of the Sporting Arms and Ammunition Manufacturers’ Institute (SAAMI)”.
- Never use “non-standard, reloaded or ‘handloaded’ ammunition which has not been subjected to internal ballistic pressure testing”.
- “Smith & Wesson has found wide variations in primer sensitivity between different brands and types of 22LR ammunition”, and recommends firing “several boxes” of the chosen brand before relying on it, and changing brand if failures to fire occur.
- “Some brands of ammunition may cause difficulty in extracting spent cartridge cases from the chamber”; if so, clean the chamber with solvent, and if it persists, change brand. (This is in the 2014 and 2020 editions. The older owner’s manual prints the same advice only for the Model 940 revolver, one of several signs that it was written on a template shared across models.)
What the manuals do not say. None of the three editions examined contains the words standard velocity, high velocity, hyper-velocity or any brand or product name of ammunition, and none prohibits any velocity class of .22 LR. The widely repeated statement that “the Model 41 manual forbids hyper-velocity ammunition” was checked against the 2004, 2014 and 2020 editions and is not in them. It may be in an earlier edition or in other factory correspondence; none was located, and it is not asserted.
What follows from the mechanism instead. Volume 3 explains why a blowback target pistol is tuned to a cartridge’s impulse: the slide and recoil spring are sized for it, and a harder impulse drives the slide back harder than the design assumed. Feeding the pistol match and standard-velocity ammunition, which is what it was built to shoot and what bullseye shooters feed it, is therefore sensible practice supported by how the action works. It is not, on the evidence of the manuals examined, a printed factory rule. For the record, the one published accuracy test with its loads stated included a Winchester Super X high-velocity load alongside three match loads (Volume 4).3
6.4 Inspecting and Clearing
The manual’s inspection procedure, which it says to follow “every time your firearm leaves your hand, is cleaned, handed to another person, transported or stored”:1
- Finger off the trigger and outside the guard, muzzle in a safe direction. Press the magazine release and remove the magazine.
- Grasp the serrated sides of the slide from the rear and briskly draw it fully rearward to extract any cartridge. Do not obstruct the ejection port.
- Lock the slide open: let it move slightly forward from the rearmost position while pressing up on the slide stop.
- Check the chamber and bore for obstructions.
- Check that the firing pin is not protruding from the breech face. If it is, “unload the firearm and have it inspected and test fired by a gunsmith qualified to perform service on Smith & Wesson firearms.”
- Confirm that the slide moves freely through its full travel, and lock it open again.
For a misfire, the manual says to wait ten seconds with the muzzle in a safe direction, remove the magazine, then draw the slide fully to the rear to eject the round, without trying to catch it over the port.1
6.5 Field Stripping, as Smith & Wesson Gives It
The sequence below is the manual’s, in its order and substance; it is identical in the 2004, 2014 and 2020 editions.1 Volume 3 explains what each step is doing mechanically.
- Point the pistol in a safe direction, finger off the trigger, trigger at rest (forward). Remove the magazine.
- Draw the slide fully rearward to clear the chamber, and lock the slide open by pressing the slide stop up. Confirm the chamber is clear.
- Holding the pistol in the shooting hand, rotate the trigger guard down.
- Keeping the pistol upright so the barrel does not fall off when released, lift off the barrel assembly.
- Warning in the manual: control the slide and spring during removal. Push back on the slide and raise it slightly.
- Move the slide assembly forward to complete disengagement.
- Remove the recoil spring and recoil spring guide rod from the slide.
That leaves five pieces: barrel, slide, recoil spring, guide rod, frame assembly. The 2004 edition adds: “This completes field stripping of the firearm. No further disassembly should be attempted.”1
The manual carries a specific warning at this point: never dry-fire the pistol in its disassembled state (“damage will result”, 2020; “continued dry-firing can cause damage”, 2014).1 The manuals say nothing about dry-firing the assembled pistol, and nothing is inferred here.
6.6 Reassembly
The manual’s sequence:1
- Put the recoil spring guide rod into the recoil spring.
- Put the spring and rod into the slide.
- Place the slide and spring assembly onto the frame, making sure the recoil spring is aligned properly in its space in the frame.
- Pull the slide as far back as it will go, to engage the slide rails with the tracks in the frame.
- Lock the slide open by letting it come forward slightly while pushing up on the slide stop.
- Place the barrel onto the frame and slide, and push it down into place.
- Rotate the trigger guard up into place.
The 2004 edition then tells the owner to confirm the pistol is in proper working order and to repeat the inspection procedure before loading.1 Step 7 is the step that locks the barrel: closing the guard is what cams the latch into the barrel lug (Volume 3). A guard that will not close fully means the barrel is not seated.
6.7 Lubrication
“There are two (2) lubrication points where a single drop of firearms lubricant should be applied.” The manual warns against over-lubrication: “Excess lubricant can collect large quantities of unburned powder and carbon residue, which could interfere with proper functioning of the pistol.”1
The text does not name the two points. They are shown in the manual’s lubrication figure (figure 23 in the 2020 edition), which shows the rear of the frame with the slide removed and two arrows at the rear frame rail and track area where the slide runs. The manual’s own figure should be followed; this volume does not reproduce it and does not name the points more precisely than the figure does.
6.8 Cleaning and Magazine Care
The manual’s cleaning instructions are brief and general:1
- Clean the pistol before first use, removing the factory preservative or oil from the bore, chamber and exposed areas.
- Remove fouling from the bore and chamber with a properly fitted brass brush dipped in gun-cleaning solvent, then run a dry cotton patch through.
- Wipe the exterior with a non-abrasive cloth.
- Lightly oil the metal parts, internal and external, after cleaning.
- Clean and lubricate after exposure to sand, dust, extreme humidity or water.
- Never disassemble beyond the field-stripping section.
Magazines. Wipe all exposed surfaces; clean the top of the follower and the inside of the magazine lips with a clean cloth; swab the inside while holding the follower down.1 Some ammunition brands, the manual notes, “may tend to dirty the magazine more than other brands.” Magazine lip condition matters to feeding in any .22, and the 1959 service manual’s inspection for the High Standard lists exactly the checks an owner would make on a Model 41 magazine: burred or deformed lips, a bent follower or body, and a weak or deformed spring.4
6.9 Adjusting the Trigger Stop
The one trigger adjustment Smith & Wesson gives the owner (2014 and 2020 editions):1
- Confirm the pistol is unloaded.
- Pull down on the trigger guard.
- Insert a hex wrench into the socket set screw: clockwise increases trigger travel; counter-clockwise decreases it.
- Close the trigger guard.
- Check that the pistol is empty, point it in a safe direction, and pull the trigger.
- “If the gun does not fire, you have turned the trigger stop out too far.” Repeat the adjustment, turning the screw clockwise to increase travel.
The manual gives neither the wrench size nor a recommended setting. The purpose (Volume 3) is to stop the trigger just past let-off. Note that step 2 opens the trigger guard, which also releases the barrel latch: the barrel will lift if the pistol is inverted with the guard down.
6.10 Adjusting the Sights
From the manual:1
- Elevation: the screw on top of the rear sight. Clockwise lowers the rear sight; counter-clockwise raises it. Raising the rear sight raises the group.
- Windage: the screw on the right side of the rear sight body. Clockwise moves the blade right; counter-clockwise moves it left. Moving the rear sight right moves the group right.
The manual does not give a value per click, and none is given here. Because the rear sight is on the barrel (Volume 3), a sight setting belongs to the barrel it is on; a second barrel has its own.
6.11 What the Owner Is Told Not to Do
The manual is unusually direct, and its prohibitions are part of the maintenance picture:1
- “NEVER DISASSEMBLE YOUR FIREARM beyond the field stripping procedure outlined in this manual.”
- “NEVER MANIPULATE, ADJUST OR CHANGE ANY OF THE INTERNAL COMPONENTS OF YOUR FIREARM UNLESS SPECIFICALLY INSTRUCTED TO DO SO IN THIS MANUAL.”
- “NEVER ALLOW ANY ALTERATION OR REPLACEMENT OF PARTS IN YOUR SMITH & WESSON FIREARM UNLESS PERFORMED BY A QUALIFIED GUNSMITH using genuine Smith & Wesson parts.”
- Do not interchange magazines between models: a magazine that fits another pistol “will only function properly in the specific model for which it was designed.”
- Do not load a round by dropping it into the ejection port; always feed from the magazine.
- Do not use excessive upward force when inserting a loaded magazine, because it “could cause the slide to move forward, chambering a round”.
An experienced gunsmith will read the first three as the maker’s liability position rather than a description of what is possible. They are also a statement that no detail-strip procedure is published by Smith & Wesson for the owner, and none is given in this volume. The sear, hammer, disconnector and trigger-spring work behind the factory’s 2.75 to 3.25 lb setting is Smith & Wesson’s or a qualified gunsmith’s, working from a source this dive did not have.
6.12 Suppressors and Threading
Smith & Wesson’s description of the current Model 41 barrels does not mention threading, and the owner’s inventory records no threading and no suppressor for this pistol. Whether this pistol’s barrel is threaded is not recorded, and it is not assumed either way. Threading a Model 41 barrel would be a gunsmithing job on a barrel that also carries both sights, and none of the sources consulted describes one being done. For the law and the practice of suppressing a .22, see the Suppressor Law dive and the .22 Rimfire dive’s suppressor volume.
6.13 Michigan
A Model 41 is a pistol under Michigan law, and buying or transferring one follows Michigan’s pistol-licensing and sales-record statutes, MCL 28.422 and 28.422a. The Remington XP-100 dive’s Michigan section quotes both statutes and explains the licence, the exemptions for concealed pistol licence holders, and the pistol sales record, and it applies here without change. Nothing about a .22 target pistol alters that position, and it is not restated.
References
Footnotes
-
Smith & Wesson, Owner’s Manual, Model 41 (back-cover revision code SW41_022504), http://pdf.textfiles.com/manuals/FIREARMS/s&w_41.pdf; Safety & Instruction Manual, Model 41 Pistol, © 2014 Smith & Wesson Corp., https://www.krale.shop/media/blfa_files/Smith_Wesson_Model_41_manual_EN-min.pdf; Safety & Instruction Manual, Model 41 Pistol, Performance Center Models Included, © 2020 Smith & Wesson Inc., https://s3.amazonaws.com/files.ammunitiondepot.com/smith-and-wesson-firearms/pistols/sw-model-41-pistol.pdf. All retrieved 2026-09-19; third-party hosting of Smith & Wesson’s own documents. Quotations are from the 2020 edition except where another edition is named. ↩ ↩2 ↩3 ↩4 ↩5 ↩6 ↩7 ↩8 ↩9 ↩10 ↩11 ↩12 ↩13 ↩14 ↩15 ↩16
-
Smith & Wesson Historical Foundation, “Letters”, https://swhistoricalfoundation.com/letters-new/, accessed 2026-09-19. ↩
-
John Markwell, “The Model 41: S&W’s Masterpiece 22 Auto”, The Gun Mag, 20 April 2020, https://www.thegunmag.com/the-model-41-s-ws-masterpiece-22-auto/, accessed 2026-09-19. ↩
-
Departments of the Army and the Air Force, TM 9-1005-226-14 / AFM 50-11, 20 July 1959, para. 57a, https://commons.wikimedia.org/wiki/File:TM-9-1005-226-14.pdf. ↩
Comments (0)