Steyr AUG · Volume 7
Building an Import Kit — From a Box of Parts to a Test-Fired Rifle
Identifying what a kit is, taking out what must go, the three ways to a receiver, assembly in the maker's order, headspace, the function check and the first thirty rounds
Vol 6 set out the law around an AUG import kit. This volume is the build: what to look for in the box, what to take out of it, how to get the one part the kit cannot supply, and how to assemble, check and prove the rifle. It follows the order in the sequence below, argued in Vol 6.
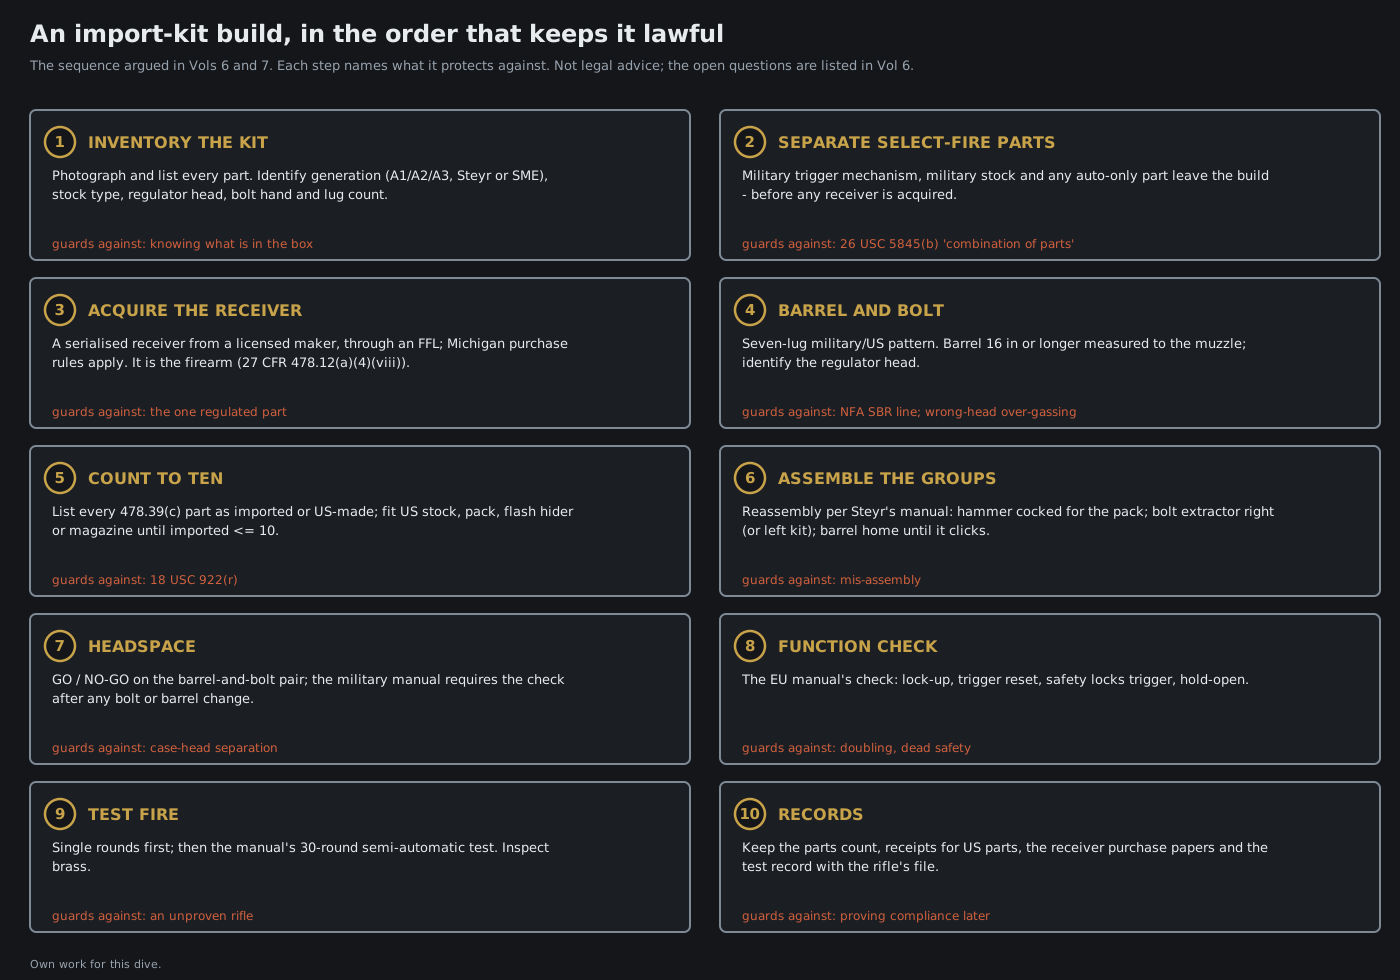
Two limits govern everything here. First, every assembly step is the maker’s, from Steyr’s own manuals, and is cited. Where the manuals stop, this volume stops, and says so; no disassembly or assembly sequence is reconstructed from memory. Second, this dive contains no information on making an AUG fire automatically, and no dimensions for any component that would. That is a deliberate boundary, the same one the hub’s AK-47 dive draws (AK-47, Vol 17).
The reader assumed is a builder with a machine shop and gunsmithing experience. Things that are routine at that level — using a pin punch, reading a torque wrench, dry-fitting before committing — are not explained.
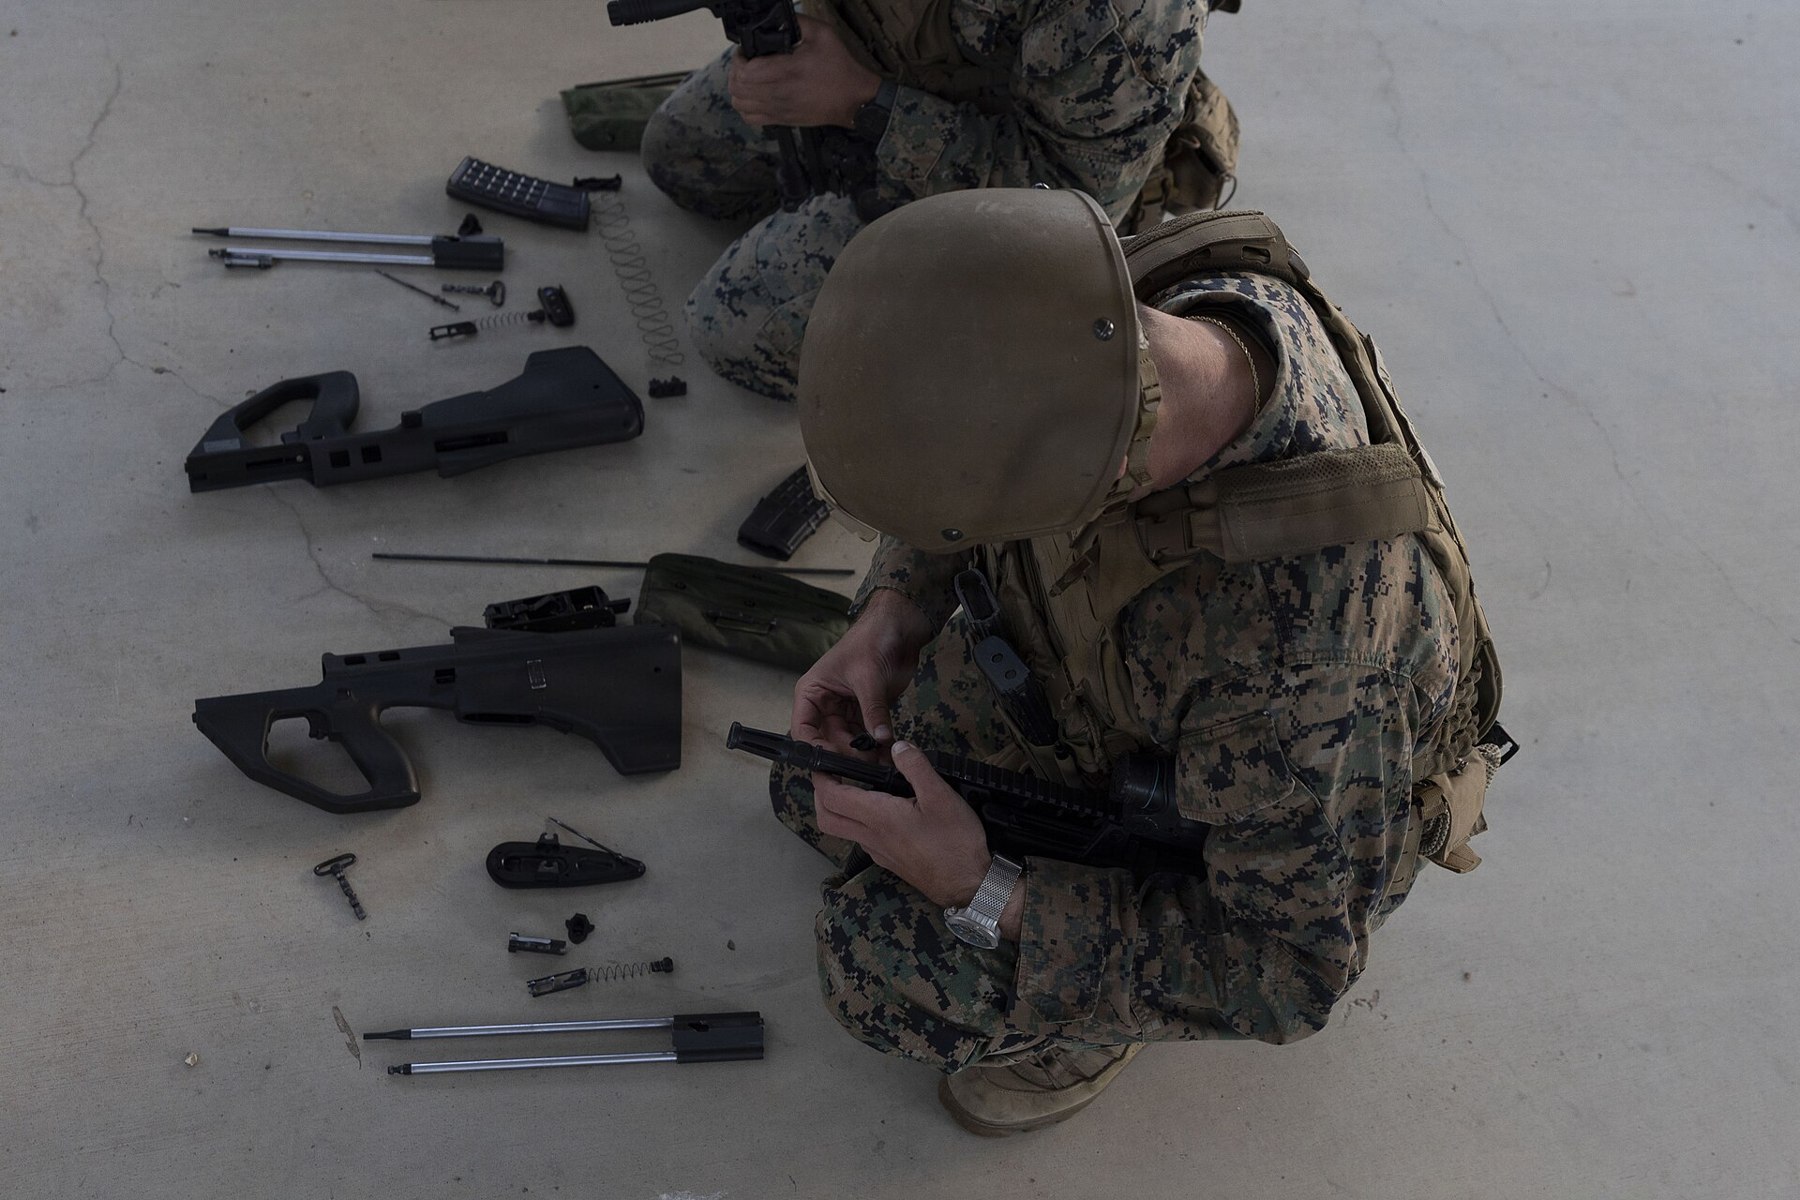
7.1 The Build Documented Here, as of September 2026
The rifle documented in this dive is an AUG being built from an import parts kit. As of September 2026 it is in progress and still needs parts. Nothing else about it has been recorded yet: not the calibre, not where the kit came from or when, not whether a receiver is on hand, not which parts are missing, and not the barrel length. Those facts are not guessed at in any volume of this dive. The questions that would settle them are listed in the dive’s working notes, and this section will be completed when they are answered.
What can be said is what kits on the US market in September 2026 contain, from their vendors’ own descriptions (Vol 6 §6.4): a stock, bolt, trigger pack, butt plate, flash hider and small parts, without a receiver and without a barrel, and with the military rifle’s select-fire trigger mechanism. If the kit documented here is one of those, its “still needing parts” list will begin with a receiver and a barrel, and its first job will be the trigger pack. That is a statement about the market, not about this kit.
7.2 Step 1: Identify What the Kit Is
Before anything is removed, the kit is identified part by part. The questions, and where each answer is found:
Table 1 — Before anything is removed, the kit is identified part by part. The questions, and where each answer is found
| Question | How to answer it | Why it matters |
|---|---|---|
| Steyr (Austria) or SME (Malaysia)? | Markings on stock and bolt; the vendor’s origin statement | origin for the §922(r) count; Malaysian licence production ran 1991–2004 (Vol 2) |
| Which stock generation? | An external bolt-release lever on the left behind the magazine well means an A3-pattern stock; its absence means A1/A2 pattern | the A1/A2/USR semi pack “is not for use on the new AUG/A3 models,” per Steyr Arms USA’s archived store (Vol 5 §5.9) |
| Steyr-magazine or NATO stock? | Which magazine the well takes | the stock, not an adapter, sets the magazine type (Steyr AUG SA manual); trigger packs differ between them (Vol 8) |
| Is the trigger mechanism select-fire? | The vendor’s description; a military pack’s parts list includes a “lever, automatic firing” (Vol 5 §5.9) | it cannot go into a semi-automatic rifle (Vol 6 §6.6) |
| Is the bolt carrier military or SA pattern? | The vendor; a specialist parts dealer | both Steyr and PJ’s list a separate semi-automatic carrier (Vol 6 §6.6) |
| Bolt: right or left hand, and how many lugs? | Extractor side; count the lugs | the ejection cover must match the bolt; six lugs is a European civilian bolt (Vol 5 §5.5) |
| Regulator head (if a barrel is present) | Milled notches (three = KDO suppressor head) or grooves (two = 382 mm head) | the same cylinder mark means different things on different heads (Vol 5 §5.3) |
| Barrel length and twist | Measure; read the barrel markings | under 16 in is a short-barrelled rifle; an AUG’s overall length is close to Michigan’s 26-inch pistol line (Vol 6 §6.9) |
| Muzzle thread | Steyr’s European manual gives M13×1 left-hand for its SA barrels | a US-made flash hider for the count must fit it; the thread on US-made barrels was not confirmed |
7.3 Step 2: Take Out What Must Not Be in the Rifle
Vol 6 §6.6 sets out why the select-fire trigger mechanism, the military stock and any military bolt carrier come out of the build first, and why the question of keeping them at all belongs to ATF in writing. In practice this step is short:
- Remove the trigger mechanism from the stock (butt plate off, retaining bolt out, pack out; Vol 9 §9.2 has the manual’s sequence).
- Set aside the military stock, the military trigger mechanism and the carrier if it is the military pattern.
- Do not acquire a receiver until those parts are gone, returned, or covered by a written classification.
The replacements are ordinary purchases. Steyr Arms USA listed semi-automatic “AUG Trigger Packs” at $136.00 and “AUG Stocks” at $360.00 on 19 September 2026; its standard pack “fits the Steyr AUG A3, A3 M1. Available for either Standard or NATO versions.”1 Where they are made is not stated (Vol 6 §6.8).
7.4 Step 3: The Receiver, Three Ways
Vol 6 §6.5 surveys the market. For the build, the three routes differ in what they demand of the builder.
Route A: a factory receiver bought through a dealer. The only one found for sale in September 2026 was PJ’s “AUG A1/A2/A3/M1/USR RECEIVER GROUP $1250 Shipped — Steyr AUG A3/M1 Receiver long rail.”2 A receiver sold as a firearm arrives serialised by its maker, the build is not a privately made firearm, and the only paperwork is the transfer. Who made that receiver, whether it is new, and whether it is US-made are the questions to ask before buying; an import-marked Austrian receiver would be an imported part in the §922(r) count.
Route B: a factory rifle, with the kit as spares. A new US-made AUG A3 M2 was listed at about $1,880–1,900 in September 2026 (Vol 8). This route abandons the kit build as such but not the kit, whose bolt, stock furniture, butt plate, cleaning kit and small parts are spares for the factory rifle, and whose select-fire pack and stock still have to be dealt with.
Route C: a receiver made in the builder’s own shop. Federal law permits an unlicensed person to make a firearm, including a receiver, for his own use; the result is a privately made firearm, with no federal duty to serialise it while it stays with its maker (Vol 6 §6.3). No Michigan statute requiring serialisation was found (Vol 6 §6.10). On a lab with multi-axis CNC capacity the job is physically possible: the part is a housing with a bored and slotted interior for the carrier’s guide rods and the bolt, a barrel-locking interface at the front, a cocking-handle channel, a rail or optic interface on top, and the features the stock’s receiver lock engages.
Route C carries three problems that this dive can name but not solve.
- No drawing. No dimensioned drawing of an AUG receiver was located from any public source, and this dive does not supply one. A receiver reverse-engineered from a sample is only as good as the sample, the measurement and the understanding of which dimensions are functional.
- The interlock. Steyr’s US receiver is an “SA” part (Vol 5 §5.9). If the features that make a semi-automatic receiver refuse a military trigger mechanism are in the receiver, a receiver copied from military geometry could accept one, and a receiver that is designed to accept a machine-gun mechanism is exactly what 26 U.S.C. § 5845(b) calls “the frame or receiver of any such weapon.” No source read for this dive says where the interlock is. A builder who takes Route C needs to establish that before cutting metal, and a written classification of the design from ATF is the way to establish it.
- The load path is kinder than it looks, and the tolerances are not. The bolt locks into the barrel extension, not into the receiver (Vol 5 §5.6), so the receiver does not carry the firing load and does not set headspace. But it does locate the barrel in its locking bush and guide the carrier’s rods, and both are fits that the whole mechanism depends on.
A privately made receiver would be a US-made part for the count (Vol 6 §6.8). Marking it voluntarily, to the standard 27 CFR 478.92 sets for licensees (serial characters at least 1/16 in, at least .003 in deep), is good practice rather than a federal requirement.3
7.5 Step 4: Will the Parts Go Together?
The makers’ own statements about interchange, collected in Vol 8, reduce to a few rules for a builder combining a kit with a receiver from somewhere else.
- Seven-lug bolts and military-pattern barrels go together; a six-lug European civilian bolt is a different system (Vol 5 §5.5).
- Steyr Arms USA says its StG 77-pattern 20-inch 1:9 barrel “Fits all AUG models with 1:9 twist” and that its bolt fits every 5.56 and .300 Blackout AUG it sells.1
- Trigger packs are not universal. Standard and NATO packs differ; the A3 NATO pack “WILL NOT WORK WITH ORIGINAL A2 NATO STOCKS”; the old A1/A2/USR semi pack is not for the A3 stock with its hold-open release.1
- Optic and rail housings are generation-specific. Steyr Arms USA’s A3SF optic housing “will not fit the A3 SA.”1
- MSAR parts are their own family. MSAR’s documents never claim interchange with Steyr barrels, bolts or packs; its STG-556 “accepts … most of AUG magazines.”4
- Keep the bolt with its carrier. The military manual: “Do not interchange slides and bolt locks. Keep a slide with its original bolt carrier.”5
The practical test before assembly is a dry fit of each group into the receiver: the barrel must turn home and click into the barrel lock; the bolt group must run the length of the receiver on its rods without binding; and the receiver and bolt group must seat in the stock with the receiver lock fully home.
7.6 Tools and Consumables
The operator-level assembly needs no tools; that is the design’s point. Detail work does. The Steyr Mannlicher maintenance manual’s list of special tools and gauges, as read from the Internet Archive scan, includes pin punches of 2, 3 and 4 mm; a torque wrench; a “mounting cone gas piston” for refitting piston rings; a “tube spanner thrust piece” for the carrier’s guide-rod thrust pieces; a rivet support and riveting punch for the guide rods in the butt; gauges for extractor, ejector and firing pin; and a headspace gauge, WL-6335.5 Steyr’s factory gauges are not a US retail item, and no source located sells them.
For a builder, the list translates to:
Table 2 — For a builder, the list translates to
| Need | Why | Source of the requirement |
|---|---|---|
| Pin punches, 2–4 mm | extractor, ejector and grip pins | maintenance manual, special tools |
| Torque wrench to 20 Nm and a spanner for the thrust pieces | only if the carrier’s guide rods are opened | maintenance manual: thrust pieces at 20 Nm with Loctite 648 |
| Heat source to about 250 °C | ”If thrustpieces are difficult to undo” | maintenance manual |
| Loctite 648 and 242 | thrust pieces (648); barrel-lock grub screw and magazine-catch bolt (242) | maintenance manual |
| 5.56 NATO headspace gauges, GO and NO-GO (FIELD) | §7.8 | maintenance manual requires a gauge check after a bolt or barrel change |
| Soft wood | cleaning the regulator head’s holes; “Do not use metal items” | Steyr AUG SA manual |
7.7 Step 5: Assembly, in the Maker’s Order
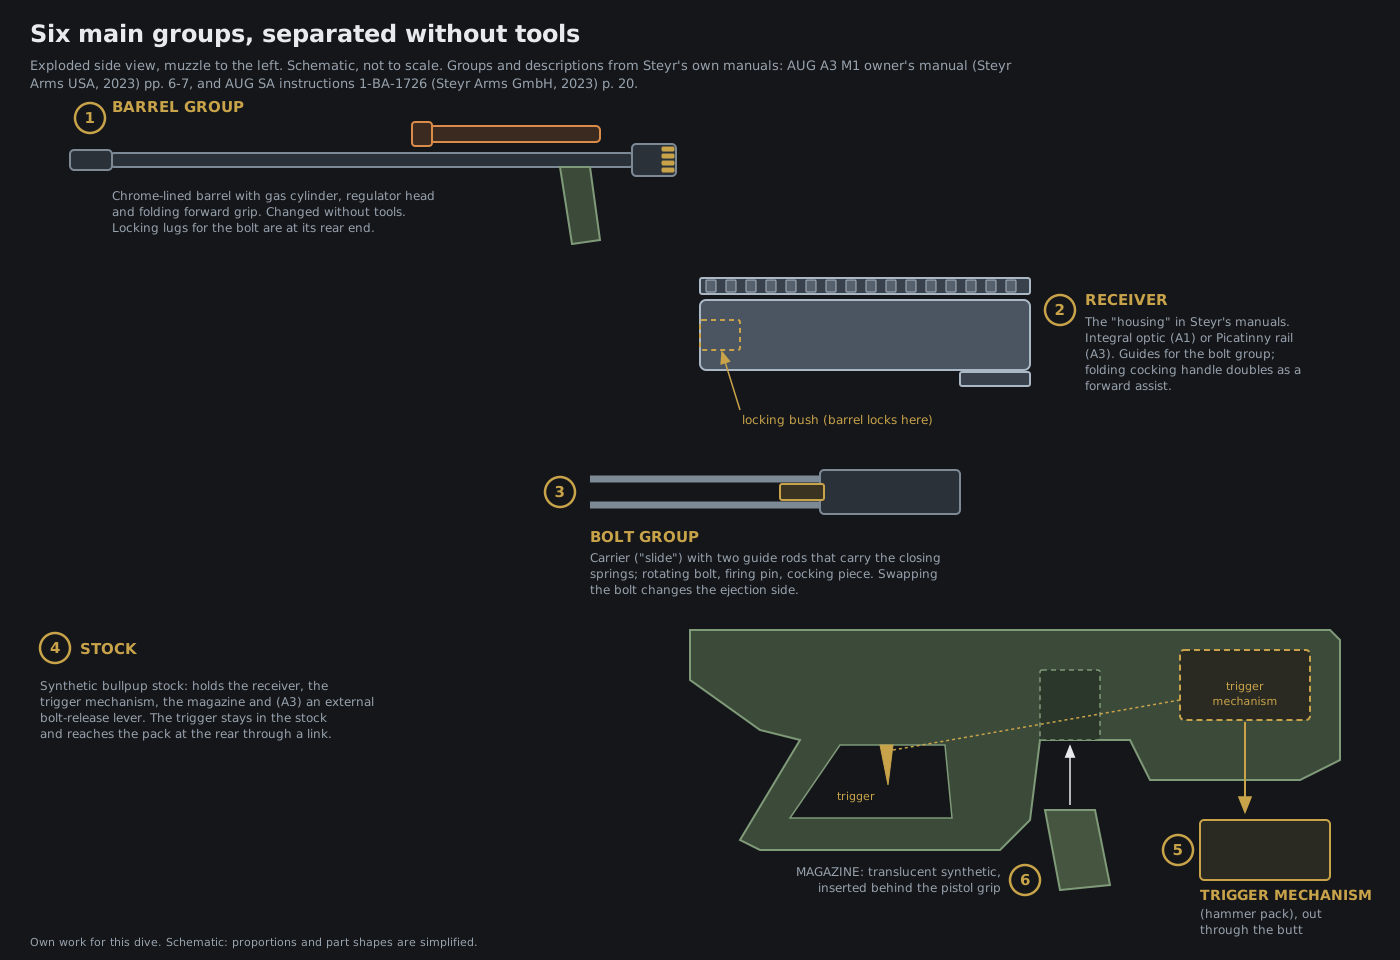
Reassembly is the field-strip in reverse, and Steyr’s manuals give it step by step. The sequence below condenses the Steyr Arms USA A3 M1 manual (Chapter 8) and the European AUG SA manual (sections 7.5–7.8). The points that catch a first-time assembler are marked.67
Bolt group.
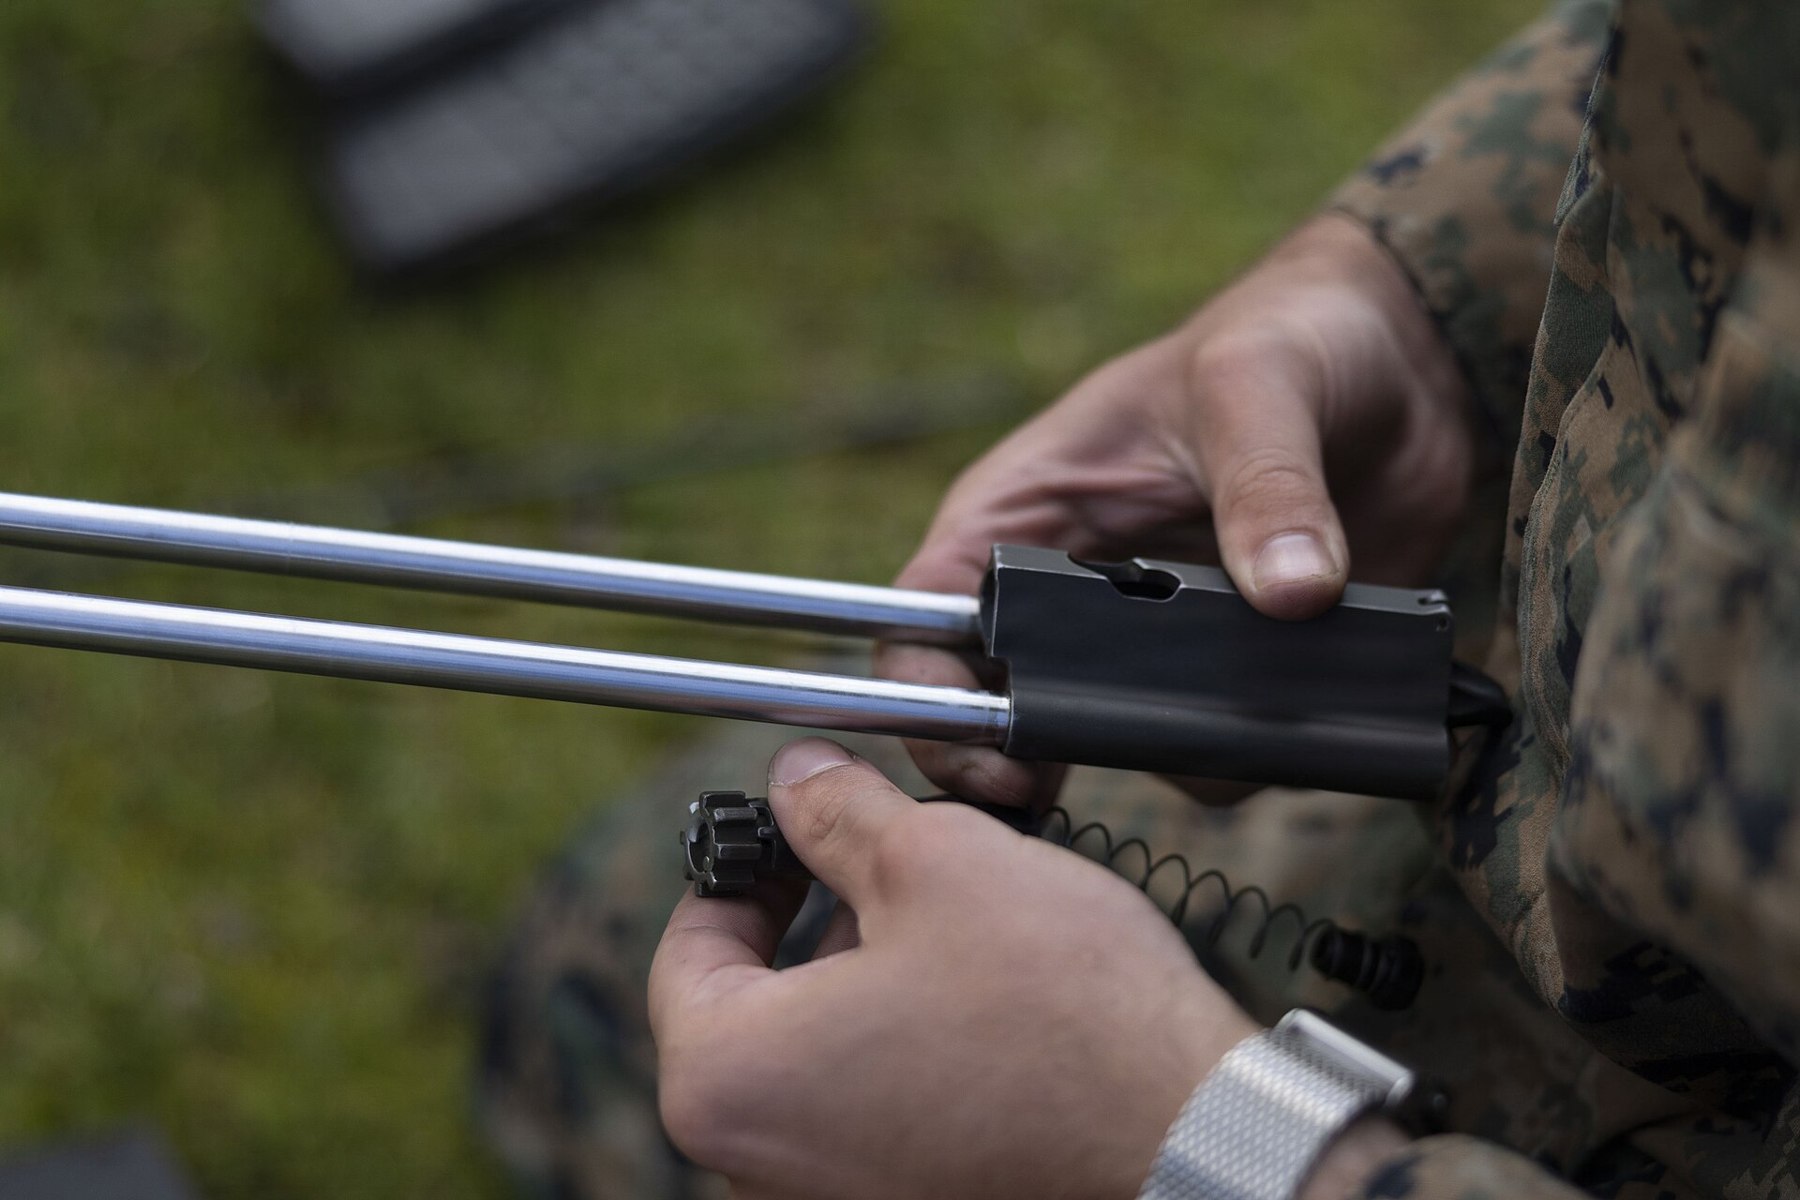
- Cocking piece into the rear of the carrier; locking piece with its spring and sleeve onto the bolt.
- Bolt into the carrier, sleeve and spring first, extractor on the right for a right-hand bolt.
- Press the bolt in until the control pin shows through the recess of the control slot; push the firing pin in through the cocking piece “until you hear a ‘click’ and the firing pin jumps automatically into its locked position.”
- Press the anti-turn device’s wings together and turn them down.
Barrel group. 5. Spring onto the gas piston; piston and spring into the cylinder “so that they are no longer visible from the side.” 6. Regulator head in with its slot on the cylinder’s nose; push in and turn counter-clockwise to position one.
Stock and trigger mechanism. 7. On an A3 stock, press the top of the bolt-release lever against the stock as the trigger mechanism goes in, and check that the bolt for the bolt catch sits in the fork of the lever. 8. The hammer must be cocked when the trigger mechanism goes in. 9. Retaining-bolt lock in, retaining bolt fully in; butt plate on with the stock’s small nose in the plate’s slot; press the plate while drawing the retaining bolt partly out until it clicks. The European manual warns that a retaining bolt with one radial groove instead of three needs the butt plate positioned first — two versions exist in the field.
Receiver and barrel. 10. Bolt group into the receiver; make sure the receiver lock is fully open; receiver and bolt group into the stock; press the receiver lock from right to left until it clicks. 11. Lock the cocking handle back. Slide the barrel in with the forward grip at “about a quarter to seven o’clock” and turn it counter-clockwise until it is fixed. Release the cocking handle.
The European manual’s caution applies throughout: parts that do not go together without force are the wrong parts, or the wrong generation, and forcing them is how an assembler discovers the interchange rules in §7.5 the expensive way.
7.8 Step 6: Headspace
On an AUG, headspace is the distance between the bolt face and the chamber’s datum when the bolt is locked into the barrel extension’s lugs. The receiver is not in that dimension (Vol 5 §5.6). A builder combining a kit’s bolt with a barrel from somewhere else, or a new bolt with a kit’s barrel, is doing exactly what the military manual says requires a check: if a bolt or barrel is replaced, “carefully check the new part to see that it fits properly, operates smoothly and that proper headspace is provided,” with headspace gauge WL-6335, followed by a function check.5
The manual does not set out the gauging procedure in the pages read, and none is reconstructed here. The general procedure for a rotating-bolt rifle — GO closes, NO-GO does not, and what FIELD means — is covered at length in the hub’s Headspace dive: GO, NO-GO and FIELD, using the gauges, and why headspace is a property of the whole action. The AUG-specific points are these:
- Gauge the bolt and barrel as a pair, because that is the pair that sets the dimension. The receiver and carrier are only the fixture that holds them.
- Use gauges for the chamber the barrel is marked for. Steyr’s US rifles are marked 5.56 × 45; its European manual gives “5.56×45 (.223 Rem.)” under C.I.P. proof. The difference between the two chambers is the subject of AR-15 5.56, Vol 4.
- A bolt that fails NO-GO on a given barrel is not a fitting problem to be machined out. On a rifle whose design premise is barrel and bolt interchange without adjustment, it is a worn or wrong part, and the remedy is a different bolt or barrel.
7.9 Step 7: The Function Check
Steyr’s European manual gives the fuller of the two function checks (section 7.9), and it tests the three things a mis-assembled pack gets wrong: lock-up, trigger reset and the safety.7
- Magazine out. Cocking handle back and locked; release it and let the bolt group run forward on its spring.
- Check that the bolt group “is locked completely.”
- Safety to fire (pushed to the left, red dot showing).
- “Squeeze the trigger until the hammer is released and hold the trigger squeezed.”
- Holding the trigger back, pull the cocking handle fully back and release it.
- “Release the trigger and squeeze it again until the hammer is released. The hammer has to knock off again.” That is the disconnector and reset.
- Safety to the right (white dot showing): the trigger must not move.
To that, the hold-open is worth adding: with an empty magazine in, cycling the cocking handle should leave the bolt group held to the rear (Vol 5 §5.7). A rifle that fails any step is not loaded. The US manual’s own check is a shorter subset of the same steps.6
7.10 Step 8: Test-Firing
Neither Steyr’s US nor its European civilian manual prescribes a proof-firing procedure for an owner; they assume a factory rifle. The military manual prescribes one for an armourer after a barrel or bolt has been replaced: “an operational test … consisting of 30 shots of semi-automatic and short bursts of automatic fire.”5 For a semi-automatic rifle the first half is the relevant part, and it is a reasonable standard for a kit build’s first session. How it is done is the builder’s judgement; what the maker’s documents contribute is this:
- Regulator on position one for the first rounds. The US manual’s malfunction table moves it to position two only for “insufficient gas pressure.”8
- Hang-fire discipline: the US manual says keep the rifle pointed safely for 30 seconds; the European manual says 60.67
- Single rounds first. One round in the magazine, then two, confirms feeding, ejection, hold-open and the disconnector before a full magazine is fired.
- Read the brass. Fired cases are the only witness to what happened under pressure; the hub’s Headspace dive, Vol 12 is the reference. On an AUG the ejection side is a second check: cases should leave by the open port, and none should strike the cover on the other side.
- Inspect after the string: the bolt face, the extractor, the gas piston and the regulator head, using the field strip in Vol 9.
7.11 Step 9: The File
A kit rifle’s legal status rests on facts that are not visible on the rifle: which parts are imported, where the others came from, and when the select-fire parts left. The file that proves them should hold:
- the §922(r) count, part by part, listing each of the twenty categories as imported, US-made or absent, with the evidence for each US-made part;
- receipts and origin statements for every US-made part;
- the receiver’s purchase papers;
- the disposition of the kit’s select-fire parts, with dates, and any ATF correspondence;
- the headspace result, the function check and the test-firing record.
The count is a property of the rifle as it stands, not of the build (Vol 6 §6.7). A later change — an imported magazine, a different stock, a replacement pack — changes it, and the file should be updated when the rifle is.
7.12 What Could Not Be Confirmed
- Any detail of the kit documented here. Calibre, source, generation, receiver, missing parts and barrel length are not recorded.
- A current US maker of stand-alone AUG receivers, and who made the one receiver group found for sale.
- Where the semi-automatic interlock lies — receiver, stock, carrier or pack.
- The muzzle thread of US-made AUG barrels. Steyr’s European manual gives M13×1 left-hand for its own.
- Steyr’s headspace gauging procedure with gauge WL-6335; the manual requires the check but the procedure was not in the pages read.
- Where Steyr Arms USA’s parts are made.
Sources
Footnotes
-
Steyr Arms, Inc., online store, https://steyr-arms.us/shop/category/tactical/aug/, product data read 2026-09-19 (AUG Trigger Packs, SKU 1250030530, $136.00; AUG Stocks, $360.00; AUG A3 NATO Trigger Pack, SKU 1250030512; STG77/AUG Barrel 20” 1:9, SKU STG1255010660, $449.00; AUG Bolts, SKU 120004057, $330.00; AUG A3 M1 Optic A3SF 60mm, SKU 1252020528). The archived A1/A2/USR semi pack is cited in Vol 5. ↩ ↩2 ↩3 ↩4
-
PJ’s Steyr AUG parts, “Factory Steyr AUG/USR Parts,” http://www.pjs-steyraug.com/augusrparts.html, page marked “Updated: December 8, 2025,” read 2026-09-19. ↩
-
27 CFR 478.92(a)(1)(v), eCFR current to 2026-09-17, retrieved 2026-09-19. ↩
-
Microtech Small Arms Research, STG-556 Operator’s Manual, Wayback Machine capture of 14 July 2011 of http://www.msarinc.com/_media/stg556manual.pdf, retrieved 2026-09-19. ↩
-
Steyr Mannlicher AG, Maintenance Manual, Army Universal Assault Rifle, Steyr AUG, undated, Chapter I §4.2 (special tools and gauges), Chapter IV §2 (slide sub-assembly, fo. 24) and §4.2 (replacement of parts, fo. 32). Internet Archive, https://archive.org/details/maintenance-manual-army-universal-assault-rifle-steyr-aug, retrieved 2026-09-19. The tools list was read from the scan’s OCR. ↩ ↩2 ↩3 ↩4
-
Steyr Arms, Inc., Owner’s Manual STEYR AUG A3 M1, 2023, Chapters 4, 8 and 9, https://steyr-arms.us/wp-content/uploads/2023/07/AUG_A3_M1_US_2023.pdf, retrieved 2026-09-19. ↩ ↩2 ↩3
-
Steyr Arms GmbH, Instructions for use STEYR AUG SA, 1-BA-1726, EU-03, 2023, sections 7.5–7.9, pp. 70–82, https://www.steyr-arms.com/wp-content/uploads/2023/03/BA-STEYR-AUG-SA_ende_1-BA-1726_EU-03.pdf, retrieved 2026-09-19. ↩ ↩2 ↩3
-
AUG A3 M1 manual (2023), p. 29, malfunction table. ↩
Comments (0)