SIG P320-M17 · Volume 8
Upkeep — Field Strip, Cleaning and Function Check, from SIG's Own Manual
What the M17 operator's manual authorises, what it forbids, and where this build has already gone past it
Every procedure in this volume is taken from one document: SIG Sauer’s operator’s manual for the commercial P320-M17 and P320-M18, part number 1302517-01, revision 05 (©2025), downloaded from SIG’s own site.1 Nothing is added from memory, from armorer courses or from forum practice. Where the pistol documented here differs from the pistol the manual describes — and, in its chassis with a deleted safety and aftermarket internals, it differs a good deal — the difference is stated, and the manual’s own words on the subject are quoted.
Page numbers below are the manual’s printed page numbers.
8.1 What the Manual Says About Everything on This Build
Before any procedure, the manual’s position on modification has to be set down, because almost every item on the pistol documented here falls under it.
“Do not attempt to disassemble a SIG SAUER firearm beyond the point explained in the Operator’s Manual. Disassembly beyond the instructions in the Operator’s Manual is restricted to a certified SIG SAUER Armorer. Failure to comply with these restrictions will void the warranty.” (§3.0, p. 9)
“Do not alter or substitute any parts or accessories not manufactured by SIG SAUER for this firearm.” … “The use of aftermarket replacement parts is unauthorized and, in some instances, could alter the function of the firearm.” (§3.0, p. 9)
“THE USE OF AFTERMARKET PARTS IS NOT AUTHORIZED AND WILL VOID THE WARRANTY OF THIS FIREARM.” (§16.0, p. 76)
Of the eleven items fitted to this pistol as of September 2026,2 only the FCU and slide are SIG’s; the chassis, threaded barrel, compensator, guide rod and springs, charging handle, pedal, safety-delete pin, optic, mount and light are all, in SIG’s terms, aftermarket. The manual also places responsibility for accessories squarely on the user: “It is the responsibility of the operator to ensure all accessories are compatible with the firearm and do not interfere with the safe operation and handling of the firearm” (§3.1). That is not a criticism of the build. It is what the maker’s document says, and an owner should know that SIG’s warranty position and SIG’s procedures describe a different pistol from this one.
8.1.1 🔴 The manual safety removal is FCU disassembly — and the manual forbids it
This is the most useful single finding in the manual for this build, and it contradicts what the chassis maker says.
Flux Defense’s compatibility note for the Raider X reads: “M17/18 manual safeties must be removed and replaced with an OEM pin (simple mod).”3 The manual safety is part of the fire control unit. SIG’s manual, at the end of the only section in which the FCU is removed from its grip module, says in capitals:
“NO FURTHER DISASSEMBLY OF THE FIRE CONTROL UNIT (FCU) IS AUTHORIZED.” (§12.8, p. 63)
Read together with §3.0, removing the manual-safety levers is disassembly beyond the operator’s manual and is restricted to a certified SIG armorer. The chassis maker calls it a simple modification; the pistol maker’s manual does not authorise the owner to make it. Both statements are quoted as they stand. The owner’s record says only that the safety was removed and a delete pin fitted; who did the work is not recorded.
8.2 Clearing First
Every procedure in the manual begins with unloading and clearing the pistol as set out in §9.8 (p. 34), and so does every procedure here. The manual’s field-strip sequence opens: “Unload and clear the pistol as described in 9.8 Unloading and Clearing the Pistol on page 34.” (§12.1, step 1)
8.3 Field Strip — §12.1, pp. 44–46
The manual’s sequence, verbatim:
- “Unload and clear the pistol as described in 9.8 Unloading and Clearing the Pistol on page 34.”
- “Lock the slide to rear by pulling the slide rearward and pushing up on the slide catch/release lever.”
- “Rotate the takedown lever clockwise until the takedown lever can no longer rotate.”
- “Retract the slide slightly to disengage the slide catch lever.”
- “Remove the slide from the receiver, maintaining control of the recoil spring guide assembly.”
- “Push the recoil spring guide forward slightly and lift from rear to remove the recoil spring and guide assembly from the slide.”
- “Remove the barrel from the slide by pulling upward slightly and to the rear.”
The warning attached to step 2: “SLIDE IS UNDER SPRING TENSION. MAINTAIN POSITIVE CONTROL OF RECOIL SPRING GUIDE ASSEMBLY DURING SLIDE REMOVAL TO PREVENT DAMAGE OR INJURY. WEAR EYE PROTECTION.”
No trigger press appears anywhere in the sequence. The P320 is taken down by rotating a lever, not by dropping the striker, and SIG made a point of this in its August 2017 statement (Volume 3).
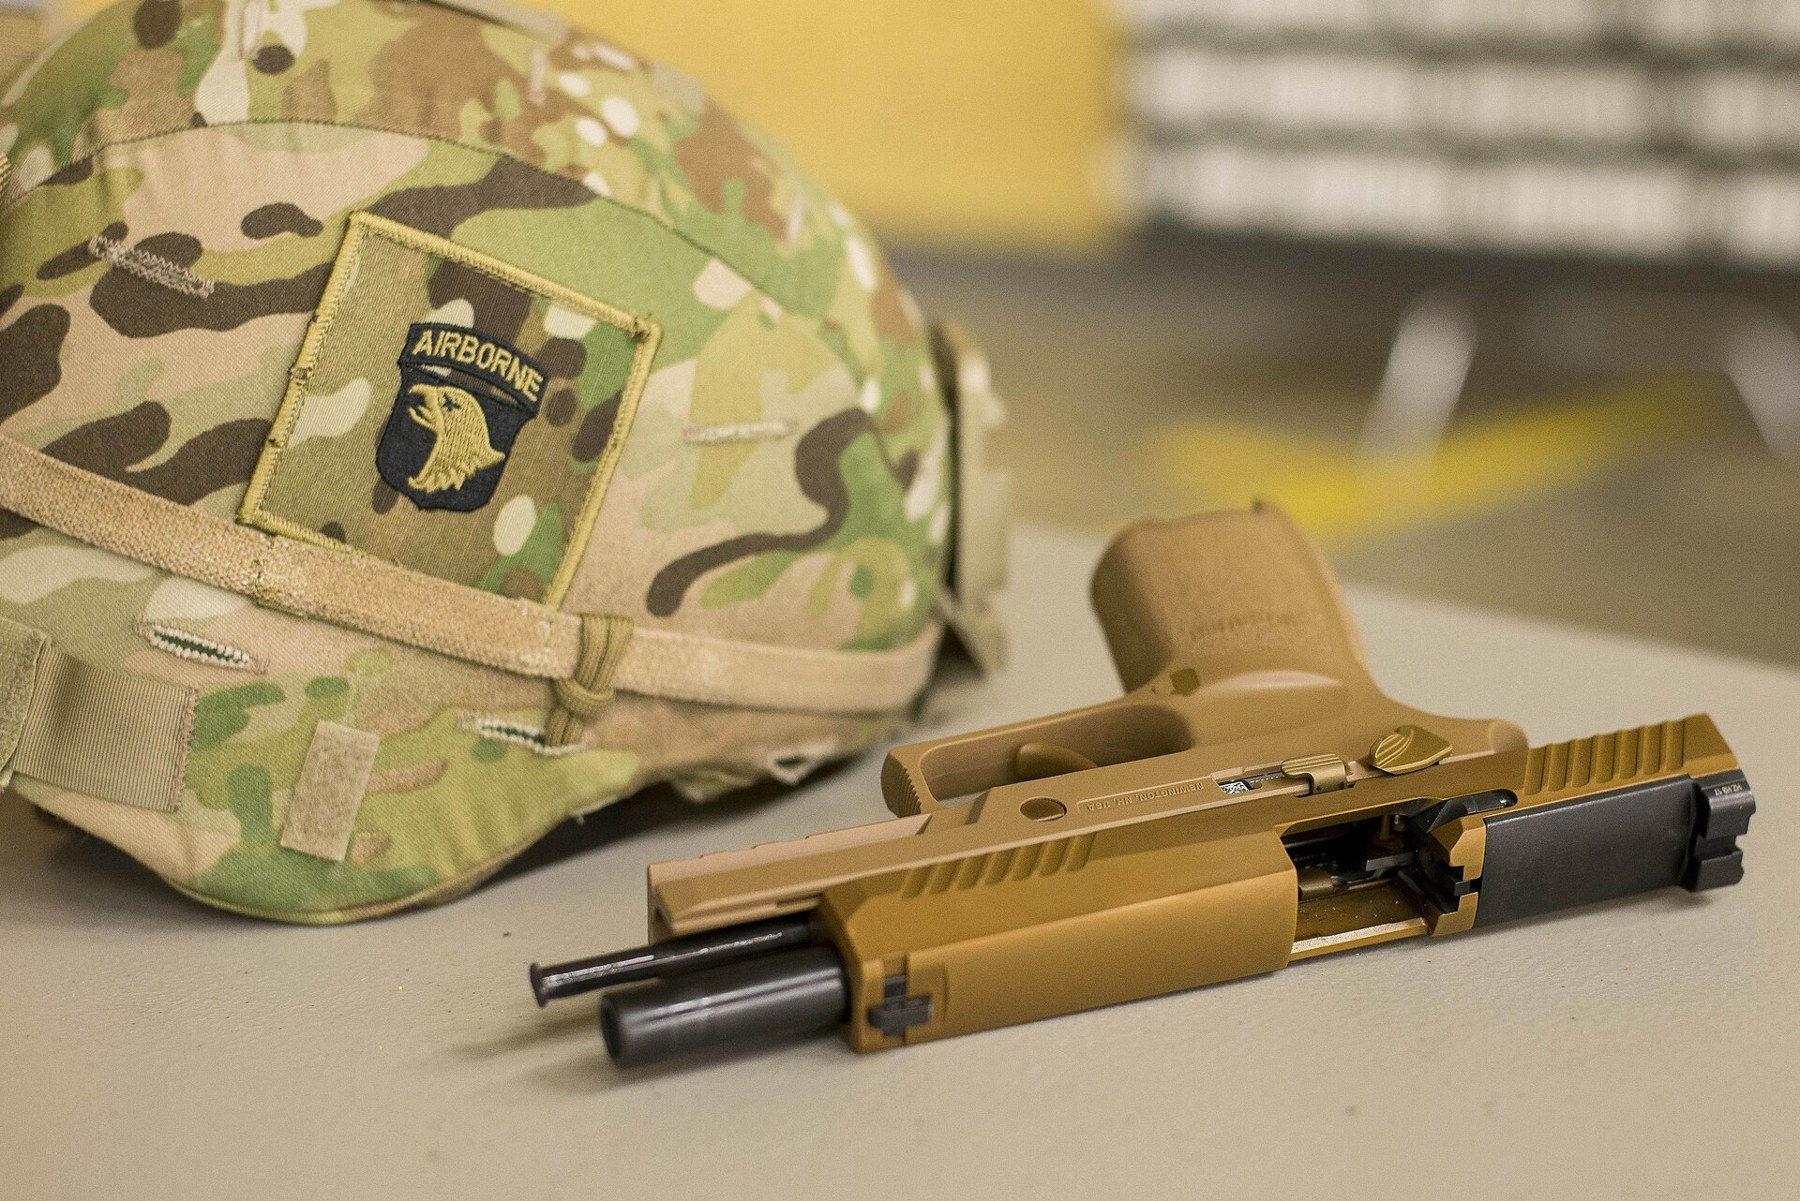
The manual adds, of the magazine: “This level of disassembly is sufficient to allow a thorough cleaning after firing.” (§12.2, p. 47)
8.3.1 How this build departs from it
- The recoil spring. The manual describes SIG’s captive “recoil spring guide assembly,” which “is not to be disassembled. It is serviced as a single unit.” (§12.3) The pistol documented here runs ArmoryCraft’s solid guide rod with a separate 11 lb spring (Volume 6). A loose spring on a solid rod has to be controlled as two parts rather than one when the slide comes off; the manual’s warning about spring tension applies with more force, not less.
- The chassis. Flux says the FCU and slide go into the Raider X “the same way you would a standard grip module,” and that takedown stays toolless unless a slide-mounted optic or suppressor-height sights are fitted.4 The optic on this pistol is on the chassis rail, not the slide (Volume 7), so the slide comes off as the manual describes.
- The compensator. A comp on the barrel changes how the barrel leaves the slide in step 7: it is removed first or it must clear the slide’s front. The manual does not address it because the M17’s barrel is not threaded. ArmoryCraft retains its comp with a set screw and supplies the wrench.5
- The RipStik. It is pressed into the slide’s front-sight channel and stays with the slide. Tactical Development warns that it is “7075 CNC’d Aluminum not steel” and must be installed only “via the middle sight protrusion” with a sight pusher, never hammered.6 It is not a part to knock against a bench when the slide is off.
8.4 The Grip Module Change — Moving the FCU (§12.8, pp. 62–63)
This is the procedure that put the FCU into the Raider X, and SIG’s manual includes it at operator level. It calls the FCU the “frame assembly.”
Removing the grip module (§12.8.1):
- “Remove the slide but not the recoil spring and recoil spring guide covered in 12.1 Pistol Disassembly on page 44.”
- “Remove the takedown lever by rotating and pull simultaneously.”
- “Push the frame assembly forward. Slight rearward pressure of the trigger may be required.”
- “Pull up on the frame rails and remove to rotate the frame assembly out from the grip module.”
Installing the grip module (§12.8.2):
- “Insert the frame assembly locking tab into the mating slot inside the rear of the grip module.”
- “Press down on the frame rails, rotating the frame assembly into position.”
- “Insert the takedown lever by rotating it and pushing simultaneously through the corresponding hole on the left side of the grip module/frame assembly, locking the frame assembly in place.”
- “Assemble the pistol as described in 12.5 Pistol Assembly on page 54.”
And then the caution already quoted: “NO FURTHER DISASSEMBLY OF THE FIRE CONTROL UNIT (FCU) IS AUTHORIZED.”
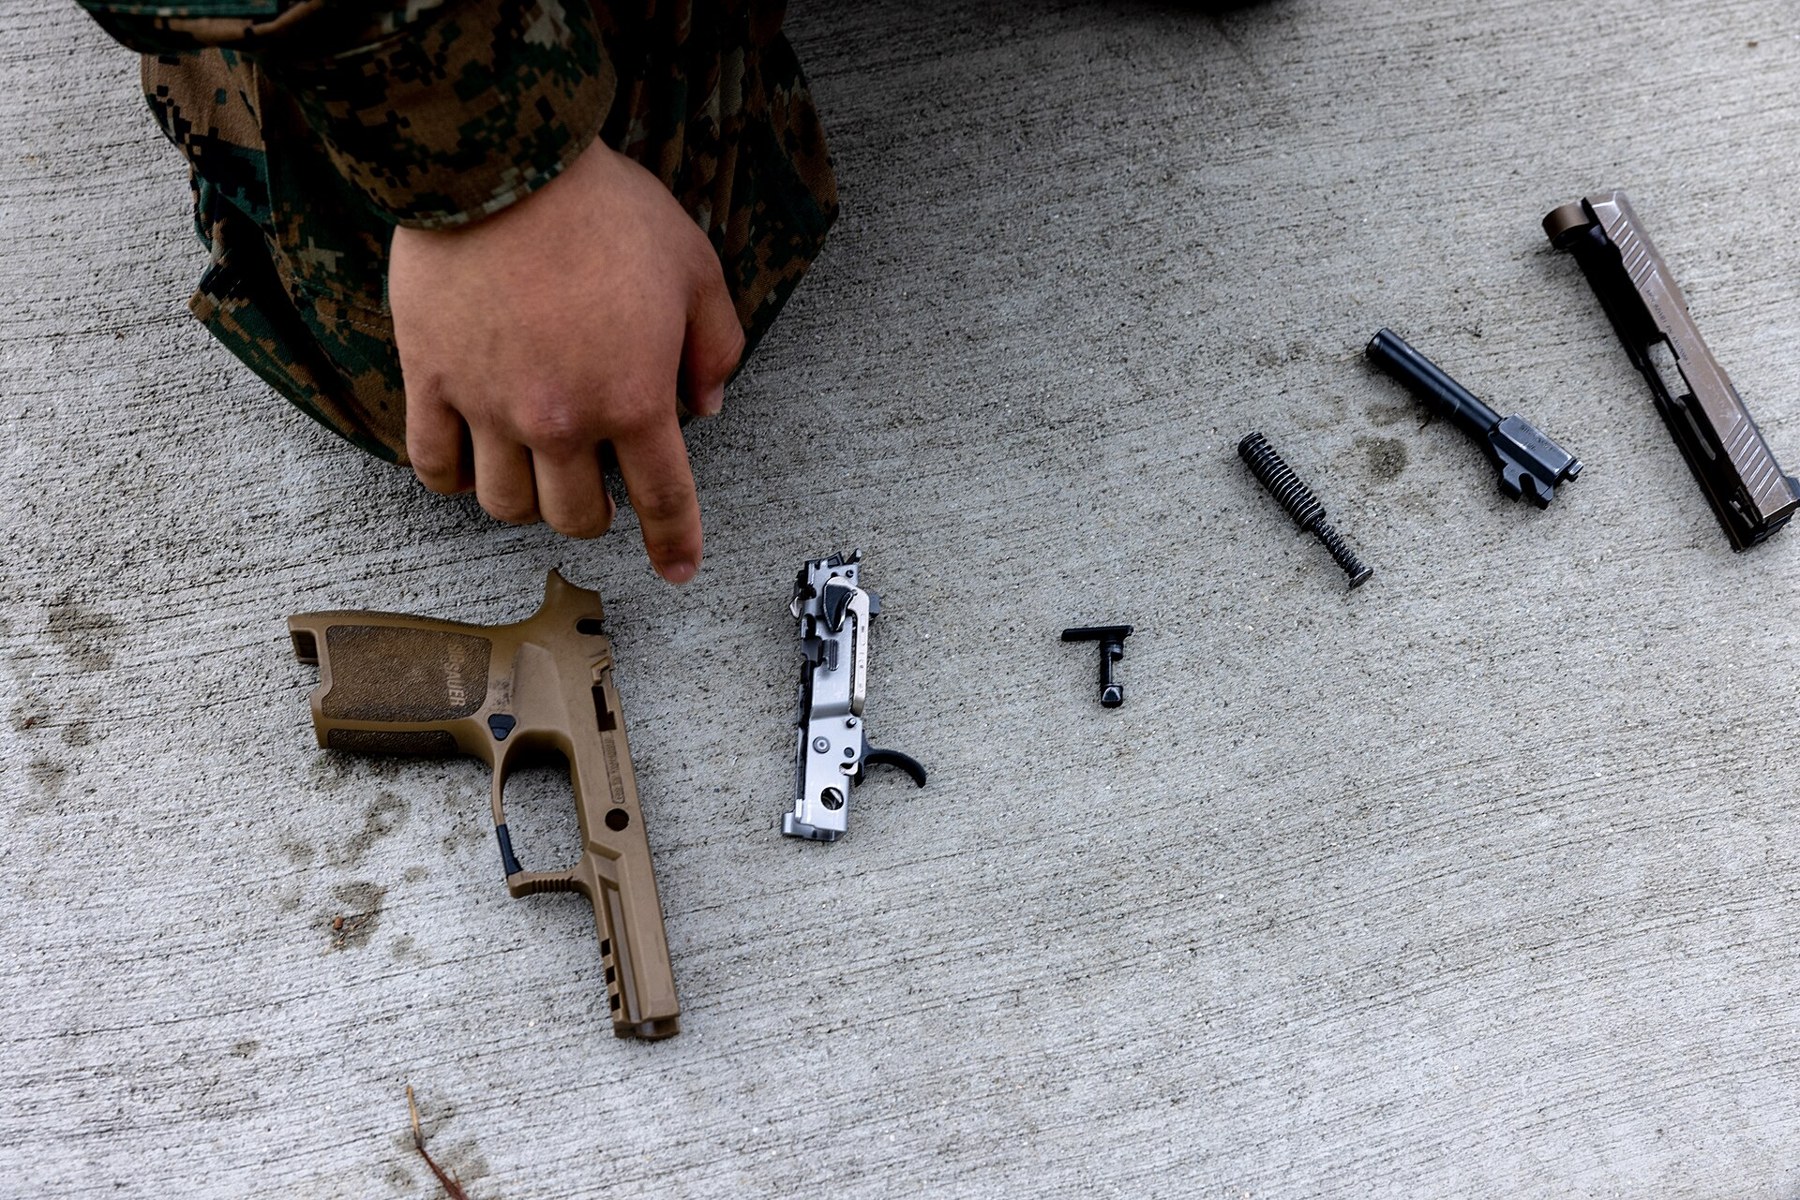
The Raider X takes the place of the grip module in this procedure. Flux’s instruction is that the FCU and slide install “the same way you would a standard grip module.”4
8.5 Cleaning — §12.3, pp. 48–52
Interval. “Clean and lube before or after every day the pistol is fired or at a minimum of every 500 rounds.”
Materials. Patches, a rag, a bore brush, a cleaning rod, and “CLP (Cleaning, Lubricant, Preservative) or LSA (Lubricant, Small Arms),” with “LAW (Lubricant, Arctic Weather) when applicable.”
The two cautions that matter most, verbatim:
“DO NOT LUBRICATE THE STRIKER OR ALLOW LUBRICANT TO FLOW INTO THE STRIKER CHANNEL OF THE SLIDE. THIS MAY CAUSE A LIGHT STRIKE TO THE CARTRIDGE RESULTING IN A FAILURE TO FIRE.”
“NEVER CLEAN THE BARREL FROM THE MUZZLE END. DO NOT USE A STEEL WIRE BRUSH … USE A SUITABLE CLEANING ROD AND BRONZE BRUSH OF THE CORRECT CALIBER. SOLVENTS CAN BE HARMFUL TO THE SURFACE FINISH OF THE PISTOL. AVOID OVER-LUBRICATION OF COMPONENTS.”
Slide. “Remove all of the old lubricant before you reapply.” Keep “the extractor, rail slots, and breech face … free of dirt and residue.” “Apply a light coat of CLP/LSA to the frame rail slots of the slide.” “Lightly oil all external parts.”
Barrel. CLP on a patch “through the bore from the chamber end”; soak, brush, dry patches. “Lightly oil bore and chamber if the pistol is to be stored for a period of time.” “Always remove any lubricant from the bore prior to firing the pistol.”
Recoil spring and guide. Clean with CLP and a soft brush and “apply a light coat of CLP/LSA.” (For SIG’s captive assembly; the ArmoryCraft rod and spring on this pistol can be cleaned apart.)
Frame and grip module. “Pay special attention to the frame rails, takedown lever, and slide catch lever.” “Lubricate the frame rails with a light coat of CLP/LSA.” “Apply CLP/LSA to accessible functioning parts.”
Magazines. “Apply a light coat of CLP/LSA to the spring and magazine tube.” The manual’s adverse-conditions section says the opposite for sand — “Do not lubricate the magazine or ammunition” — so the magazine instruction depends on where the pistol is used.
8.5.1 Lubrication guide — §12.4, p. 53
“a. CLP, LSA, and LAW are the only lubricants authorized for this pistol.” … “d. Light coat is defined as a film of lubricant that is barely visible to the naked eye.” “e. Generously lubed is defined as heavy enough to spread with the finger.” “f. Apply lubricant where indicated by arrows.”
The arrows are in a drawing on that page and are not reproduced here; the page itself should be consulted. The drawing’s one text label reads: “DO NOT APPLY LUBE TO STRIKER OR ALLOW TO RUN INTO CHANNEL.”
8.5.2 What the manual does not cover on this pistol
- The chassis. Flux’s own maintenance note: “We recommend disassembling your slide and FCU for traditional handgun cleaning from time to time. Additionally, we suggest applying a drop of lubricant inside the ejection rail channels on the Raider X on occasion.”4 Flux’s warranty is voided by “Cutting or altering the optic mount,” “Removing safety notches,” and “Painting or cerakoting the chassis.”
- The compensator. A comp collects carbon in its port and baffles, and the set screw that retains it sits in that carbon. Neither SIG nor ArmoryCraft publishes a cleaning procedure for it in the pages consulted, and none is invented here.
- The optic and light. Leupold and Streamlight each publish their own; the DeltaPoint Pro’s battery is top-loading and does not require re-zeroing (Volume 7).
8.6 Reassembly — §12.5, pp. 54–57
- “Verify the pistol is clear of all foreign matter.”
- “Insert the barrel into the slide.”
- “Insert recoil spring guide assembly into the slide and up against the barrel lug.”
- “Ensure the takedown lever is rotated completely clockwise to the stop.”
- “Guide the slide onto the receiver rails from the front.”
- “Retract the slide completely to the rear. Engage the slide catch lever to lock the slide in the open position.”
- “Rotate the takedown lever counterclockwise until locked in the horizontal position.”
- “Depress the slide catch lever to release the slide fully forward.”
The manual’s note on step 6 is easy to skip and should not be: “Failure to fully engage the slide catch lever may result in a non-functioning trigger, the slide catch lever must be engaged in step 6.”
8.7 Function Check — §13.0, p. 64, and What Has to Change
The manual prescribes a function check “after the completion of repairs and after each cleaning and assembly of the pistol.” Its eleven steps, verbatim:
- “Insert an empty magazine into pistol and ensure magazine catch locks it into place.”
- “Fully retract slide and release it. The magazine follower should have pushed the slide catch lever up and locked the slide to the rear.”
- “Press magazine catch. Magazine should fall free of pistol under its own weight.”
- “Press slide catch lever. The slide should release and lock fully forward.”
- “Engage manual safety by pressing upward on either of the ambidextrous levers.”
- “Press the trigger to the rear. The striker should not be released.”
- “Disengage manual safety by pressing the lever downward.”
- “Press and hold trigger rearward. The striker should have released and you should hear an audible click.”
- “While still holding trigger rearward, fully retract and release the slide.”
- “Release trigger. You should hear a click as it resets.”
- “Press trigger. The striker should release and you should hear an audible click.”
“NEVER USE A FIREARM OR MAGAZINE THAT SHOWS SIGNS OF DAMAGE OR FAILS A FUNCTION CHECK.”
On the pistol documented here, steps 5 to 7 test a part that is no longer there. The FCU’s manual safety has been replaced with a delete pin. Flux’s stated substitute is the chassis’s “Built in trigger block manual safety.”3 The logical equivalent of steps 5 to 7 is therefore to engage the chassis safety, press the trigger, confirm the striker does not release, and disengage it — but no published check for the Raider X’s safety was found on Flux’s pages, and that sequence is stated here as the equivalent of SIG’s steps, not as a procedure either maker publishes. Flux also warns that the chassis “Safety mechanism may not work with all aftermarket or adjustable triggers — verify before use.”3
Two further checks follow from the build’s other changes rather than from any manual:
- Step 2 carries more weight than usual. With a compensator and a light spring, the slide locking open on an empty magazine is the first sign the spring and the comp are mismatched (Volume 6). It is checked by hand here and must also hold with live ammunition on the range.
- The RipStik and slide. After reassembly the charging handle should move with the slide through its full stroke without contacting the chassis.
8.8 Ammunition — §5.0, pp. 13–14
“Use only high-quality, original, factory-manufactured ammunition.” “Do not oil cartridges.” “The use of reloaded, hand-loaded (re-manufactured), or other nonstandard ammunition voids all warranties.” “Always use ammunition that complies with the industry performance standards established by the Sporting Arms and Ammunition Manufacturers’ Institute, Inc. (SAAMI) or ammunition manufactured to U.S. military specifications.”
The manual makes no statement about +P ammunition. The pistol’s specifications in §18.2 give the M17’s rifling as 1:10, six grooves, right hand, and its trigger pull as 6.0–7.0 lb — neither figure applies unchanged to a pistol with a replacement barrel, whose twist the barrel maker sets, and a chassis whose safety acts on the trigger.1 A reader who handloads is pointed to this hub’s Reloading Bench with SIG’s warranty statement above in mind.
References
Footnotes
-
SIG Sauer, P320-M17 / P320-M18 Pistol, Semi-Automatic, 9mm — Operator’s Manual: Handling & Safety Instructions, P/N 1302517-01 REV05, ©2025. Every procedure and caution in this volume is quoted from it with its printed page number. https://www.sigsauer.com/media/sigsauer/resources/OPERATOR_MANUAL_M17_M18_COMMERCIAL_1302517-01_REV05_WEB_FILE.pdf (downloaded 2026-09-19). ↩ ↩2
-
The unit documented here: owner’s inventory sheet (last modified 2026-09-17), updated by the owner 2026-09-19. Recorded in the dive’s
00-inventory/. ↩ -
Flux Defense, “Raider X P320” product page, compatibility section and feature list quoted. https://fluxdefense.com/shop/raider-x (accessed 2026-09-19). ↩ ↩2 ↩3
-
Flux Defense, “Frequently Asked Questions,” items 25, 27, 50 and 54 quoted. https://fluxdefense.com/frequently-asked-questions (accessed 2026-09-19). ↩ ↩2 ↩3
-
Armory Craft, “Sig Sauer Compensators – for 9mm P320 & P226, P228, P229, P225/P6”: “A set screw and a wrench are included.” https://www.armorycraft.com/product-page/sig-sauer-compensators-p320-p226-228-229 (accessed 2026-09-19). ↩
-
Tactical Development, “RipStik - Charging Handle for Sig Sauer P320,” installation notes quoted. https://tactical.dev/products/charging-handle-for-sig-sauer-p320 (accessed 2026-09-19). ↩
Comments (0)