Ruger Mark III & Mark IV · Volume 4
Takedown and Reassembly — From Ruger's Own Manuals
Four generations of procedure, the places the manuals disagree with each other, and the button that ended sixty-seven years of complaint
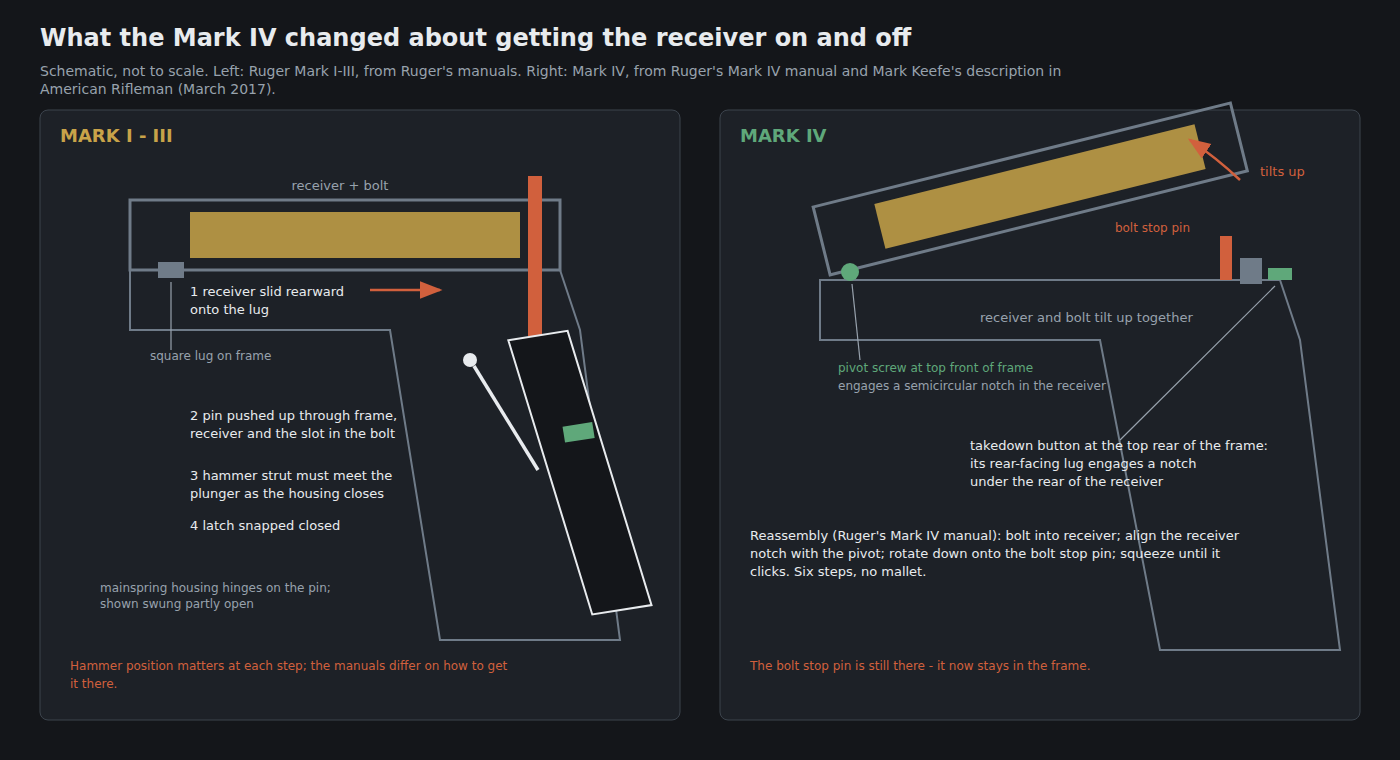
Every owner of a Mark I, II or III has a story about putting it back together. Ruger has one too: its instruction manuals have carried the same reassurance for at least thirty-four years, and when it finally replaced the mechanism its president described the old one as a headache. This volume sets out Ruger’s own procedures for the two generations documented in these volumes, the Mark III and the Mark IV, compares the Mark III procedure with the Mark I and Mark II versions, and records the places where the manuals disagree with one another.
4.1 The rule for this volume
Every step below is taken from a Ruger instruction manual, and each is attributed to the manual it comes from. None is reconstructed from memory, from video, or from forum advice. Where manuals disagree, both are given. Where a manual is silent, the text says so rather than filling the gap. The manuals are free from Ruger and should be read in full before either pistol is taken apart; the Mark III manual adds that “an on-line video demonstrating the disassembly and reassembly of the Mark III pistol can be viewed by going to www.ruger.com/resources/videos,” and the Mark IV manual points to “Ruger.com/TechTips.”12
The manuals used are:
Table 1 — The manuals used are
| Manual | Ruger code | Covers |
|---|---|---|
| Mark I Target and Standard (reference only) | A-7-81 | Standard, Mark I Target |
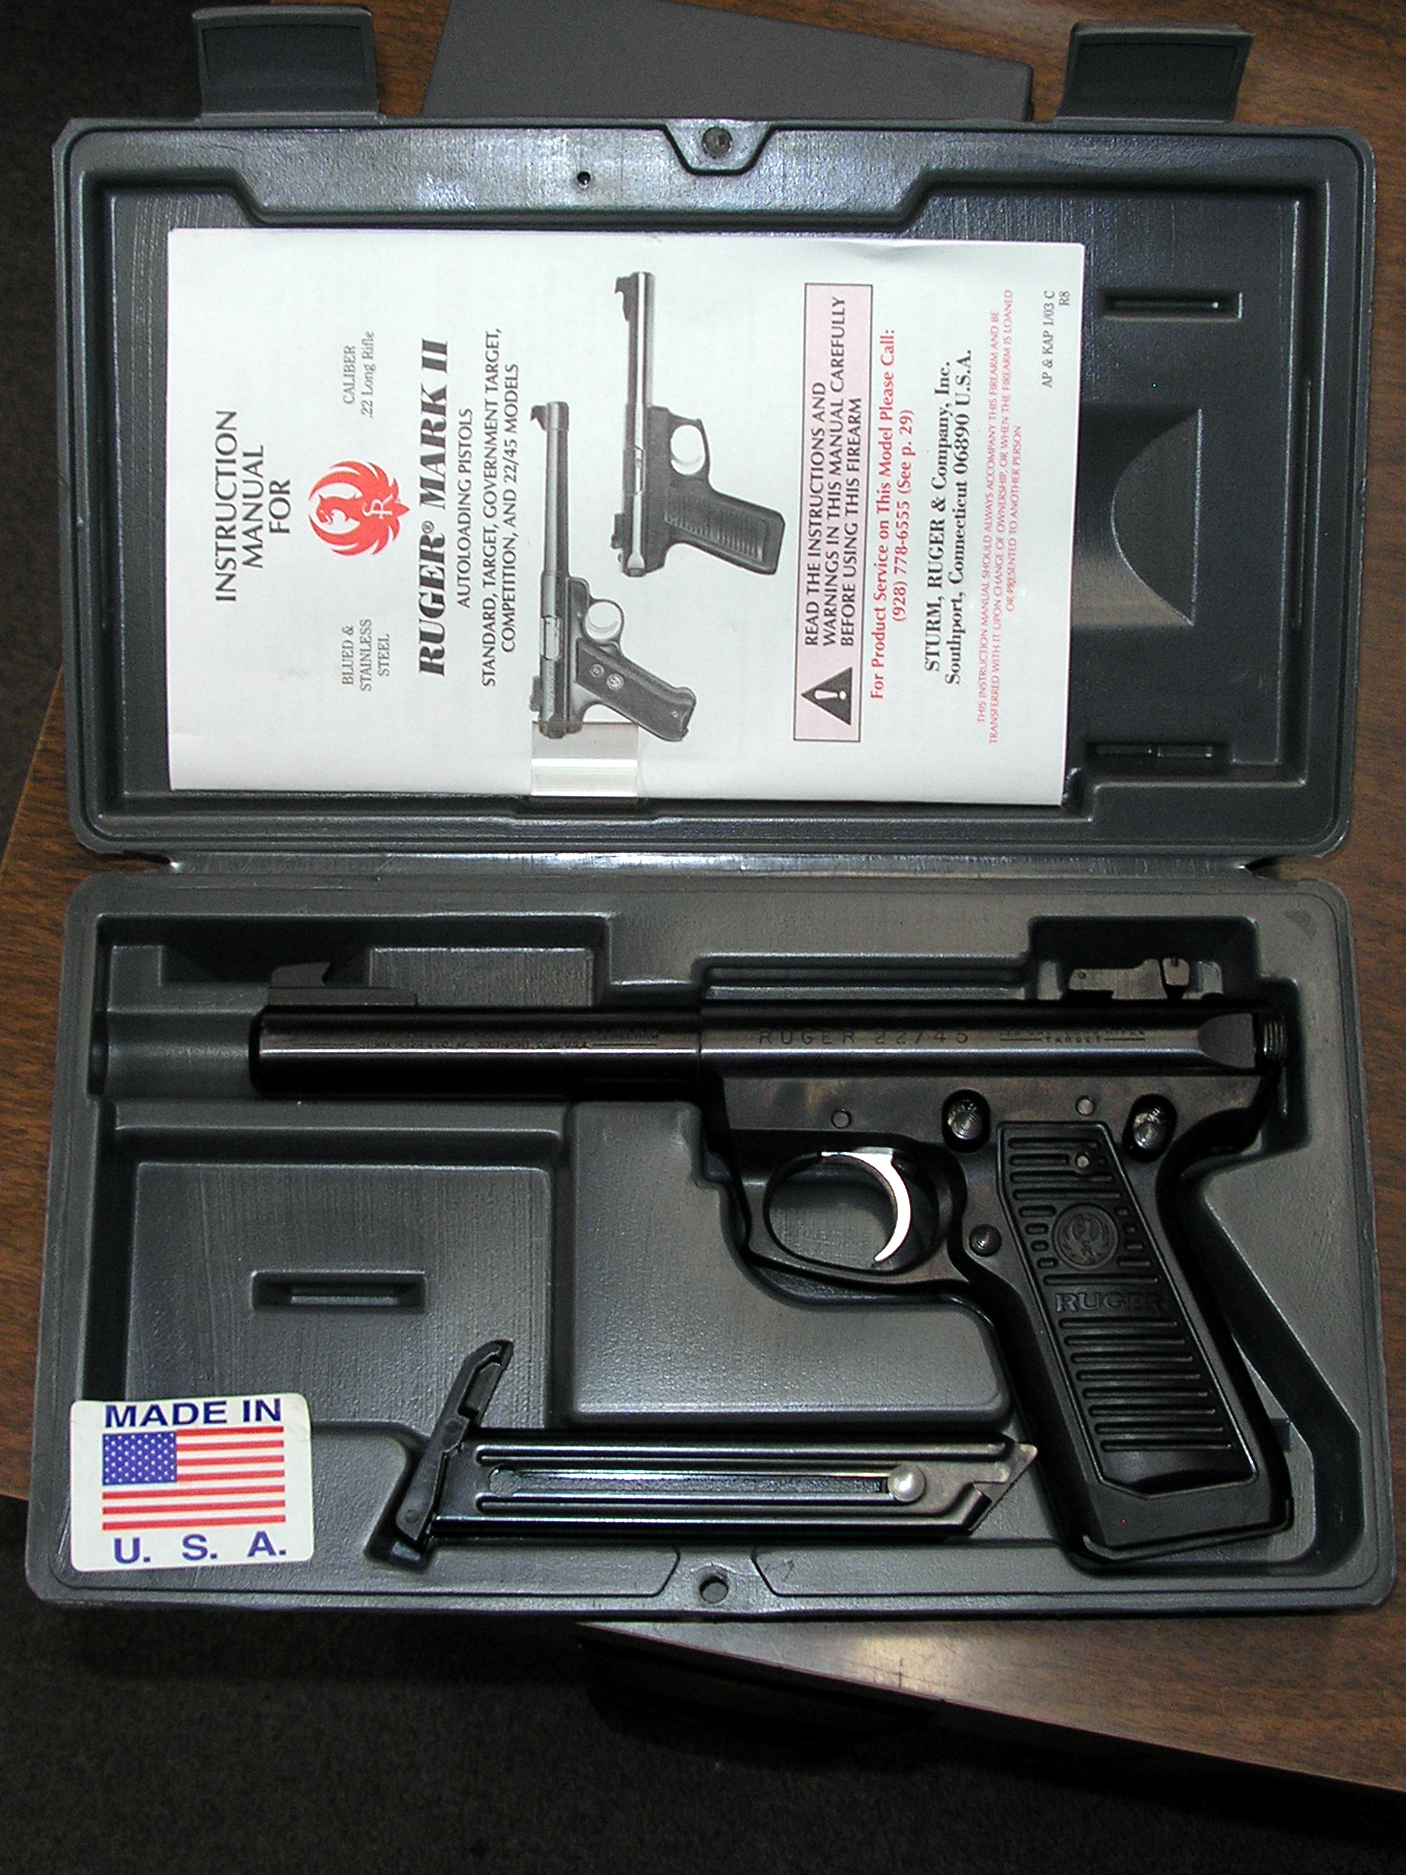
| Mark II (reference only) | AP & KAP 1/03 C R8 | Mark II Standard, Target, Government Target, Competition, 22/45 |
| Mark III | AP & KAP 9/15 R15, © 2015 | Mark III Standard, Target, Government Target, Competition, Hunter, 22/45 |
| Mark IV | PM1179, © 2026 (current revision) | Mark IV Standard, Target, Hunter, Competition, 22/45, 22/45 Lite, 22/45 Tactical |
Each manual begins its disassembly with the same unloading discipline: magazine out, bolt back, chamber inspected. Nothing below should be read as permission to skip it.
4.2 The reputation, in the words of the people closest to it
Ruger never pretended the reassembly was easy; it only insisted it was learnable. The 1981 Mark I manual ends its reassembly procedure with a note: “The foregoing description of the reassembly procedure may give the impression that reassembly is difficult; but in reality it is a straightforward operation, once properly learned.”3 The 2015 Mark III manual ends its procedure with a list headed “IF YOU HAVE DIFFICULTY REASSEMBLING THE PISTOL, HERE ARE SOME HELPFUL TIPS!” and then the same sentiment: “The foregoing may give the impression that reassembly is difficult, but it is quickly and easily done once properly learned.”1 The sentence survived thirty-four years and two generations of redesign.
When the Mark IV was announced in September 2016, Ruger’s president and chief operating officer, Chris Killoy, conceded the point on the company’s behalf: “This one-button takedown alleviates the headache that our Mark III owners are all too familiar with.”4 Ten months later, as chief executive, he told investors how the project had started: “we got a lot of voice of the customer, we know that was a frustration with a lot of the Mark III users,” and the takedown system was accordingly “a structured top-down project.”5
The most vivid record comes from American Rifleman’s Mark Keefe, who joined the NRA’s technical staff in 1991 and recalled what arrived in the post:
“Typically it was a small, greasy box that, when shaken, rattled a lot, and inside would be a note that read: ‘Sir: Can you put my Ruger back together!? Thanks.’ … It is illegal for an FFL to just mail a guy’s gun back. The problem was I would have to find an FFL in a member’s area to send the gun back—after I put it back together.”6
His own method, before he learned the correct one, “involved taking the gun, holding it upside down, shaking it and releasing a series of extremely colorful expletives.” And his summary: “There are times that I wondered whether or not Ruger should just sell its .22 pistols in pieces in a paper bag, because that’s how they were going to end up anyway.”6
4.3 Mark III — disassembly, per Ruger
The Mark III manual says the pistol is “designed to be disassembled and reassembled without the use of tools,” and then lists three that “may be useful in the process, particularly when the pistols are new”: “(1) a soft rubber/plastic mallet; (2) a paper clip; and (3) a wooden dowel (1/8” - 1/4” diameter).”1
Ruger’s disassembly, pp. 22–23, in five steps. The wording below is condensed; quotations are Ruger’s.
- Unload, then uncock. With the muzzle in a safe direction, remove the magazine and check it is empty; draw the bolt back and inspect the chamber; release the bolt. Insert the empty magazine “until it ‘clicks’ and is fully in place.” Disengage the internal lock if it is on. Put the safety to “F,” point the pistol safely and pull the trigger “to be sure the hammer has fallen. The hammer must be uncocked before the pistol can be disassembled.” Remove the empty magazine.
- Open the housing latch. “Insert a blunt, ‘pointed’ instrument in the oval recess of the mainspring housing (at the back of the grip) and swing the housing latch open (similar to the operation of a pocket knife). Some users find that a paper clip, looped over the latch, is an ideal ‘instrument’ for this phase of disassembly.”
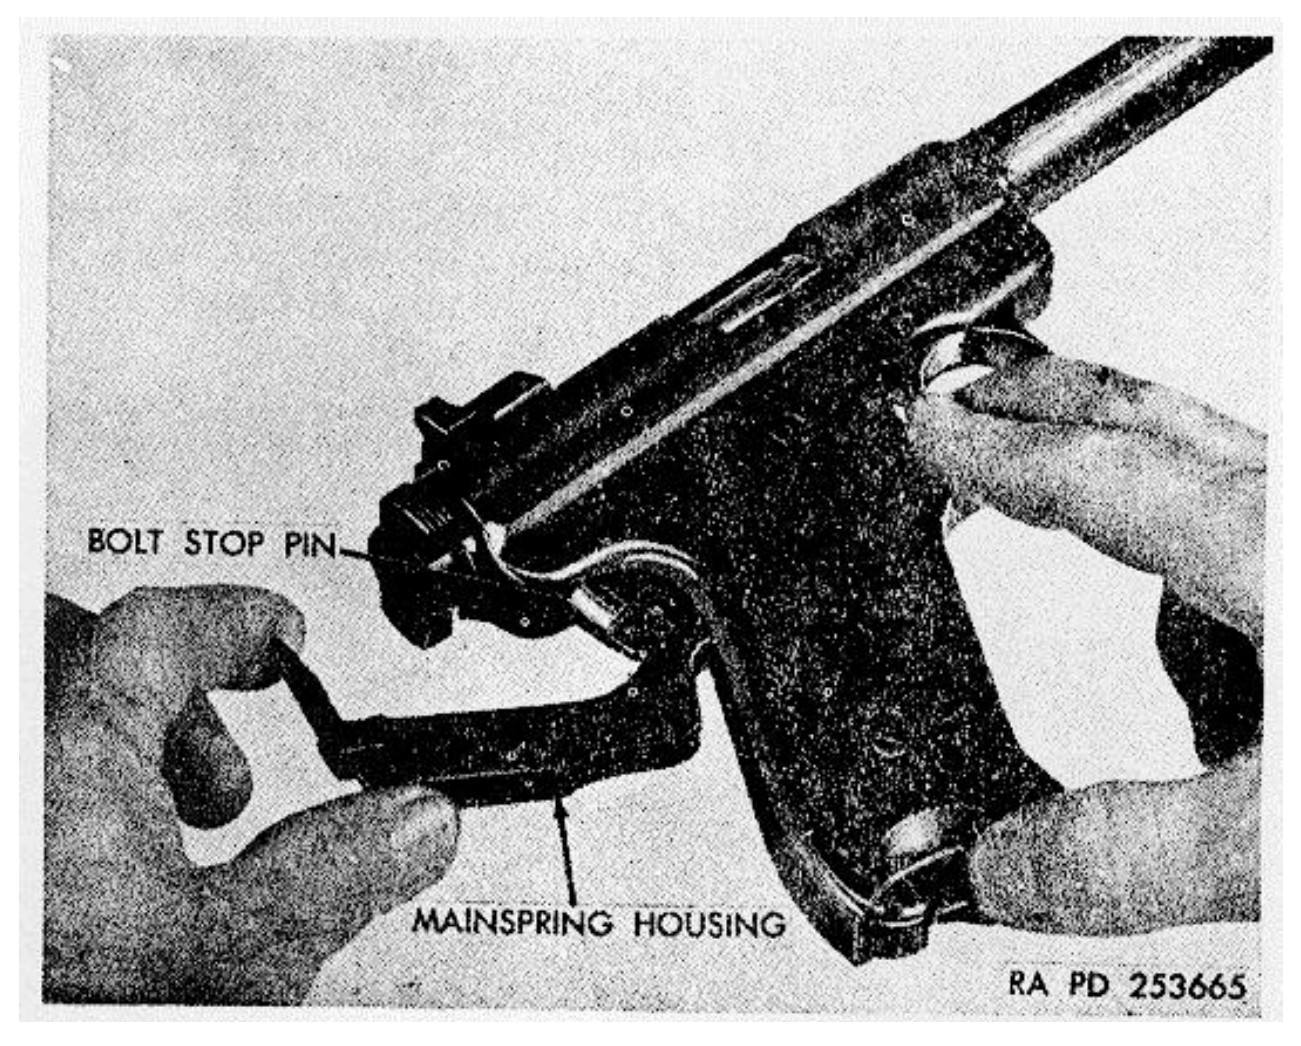
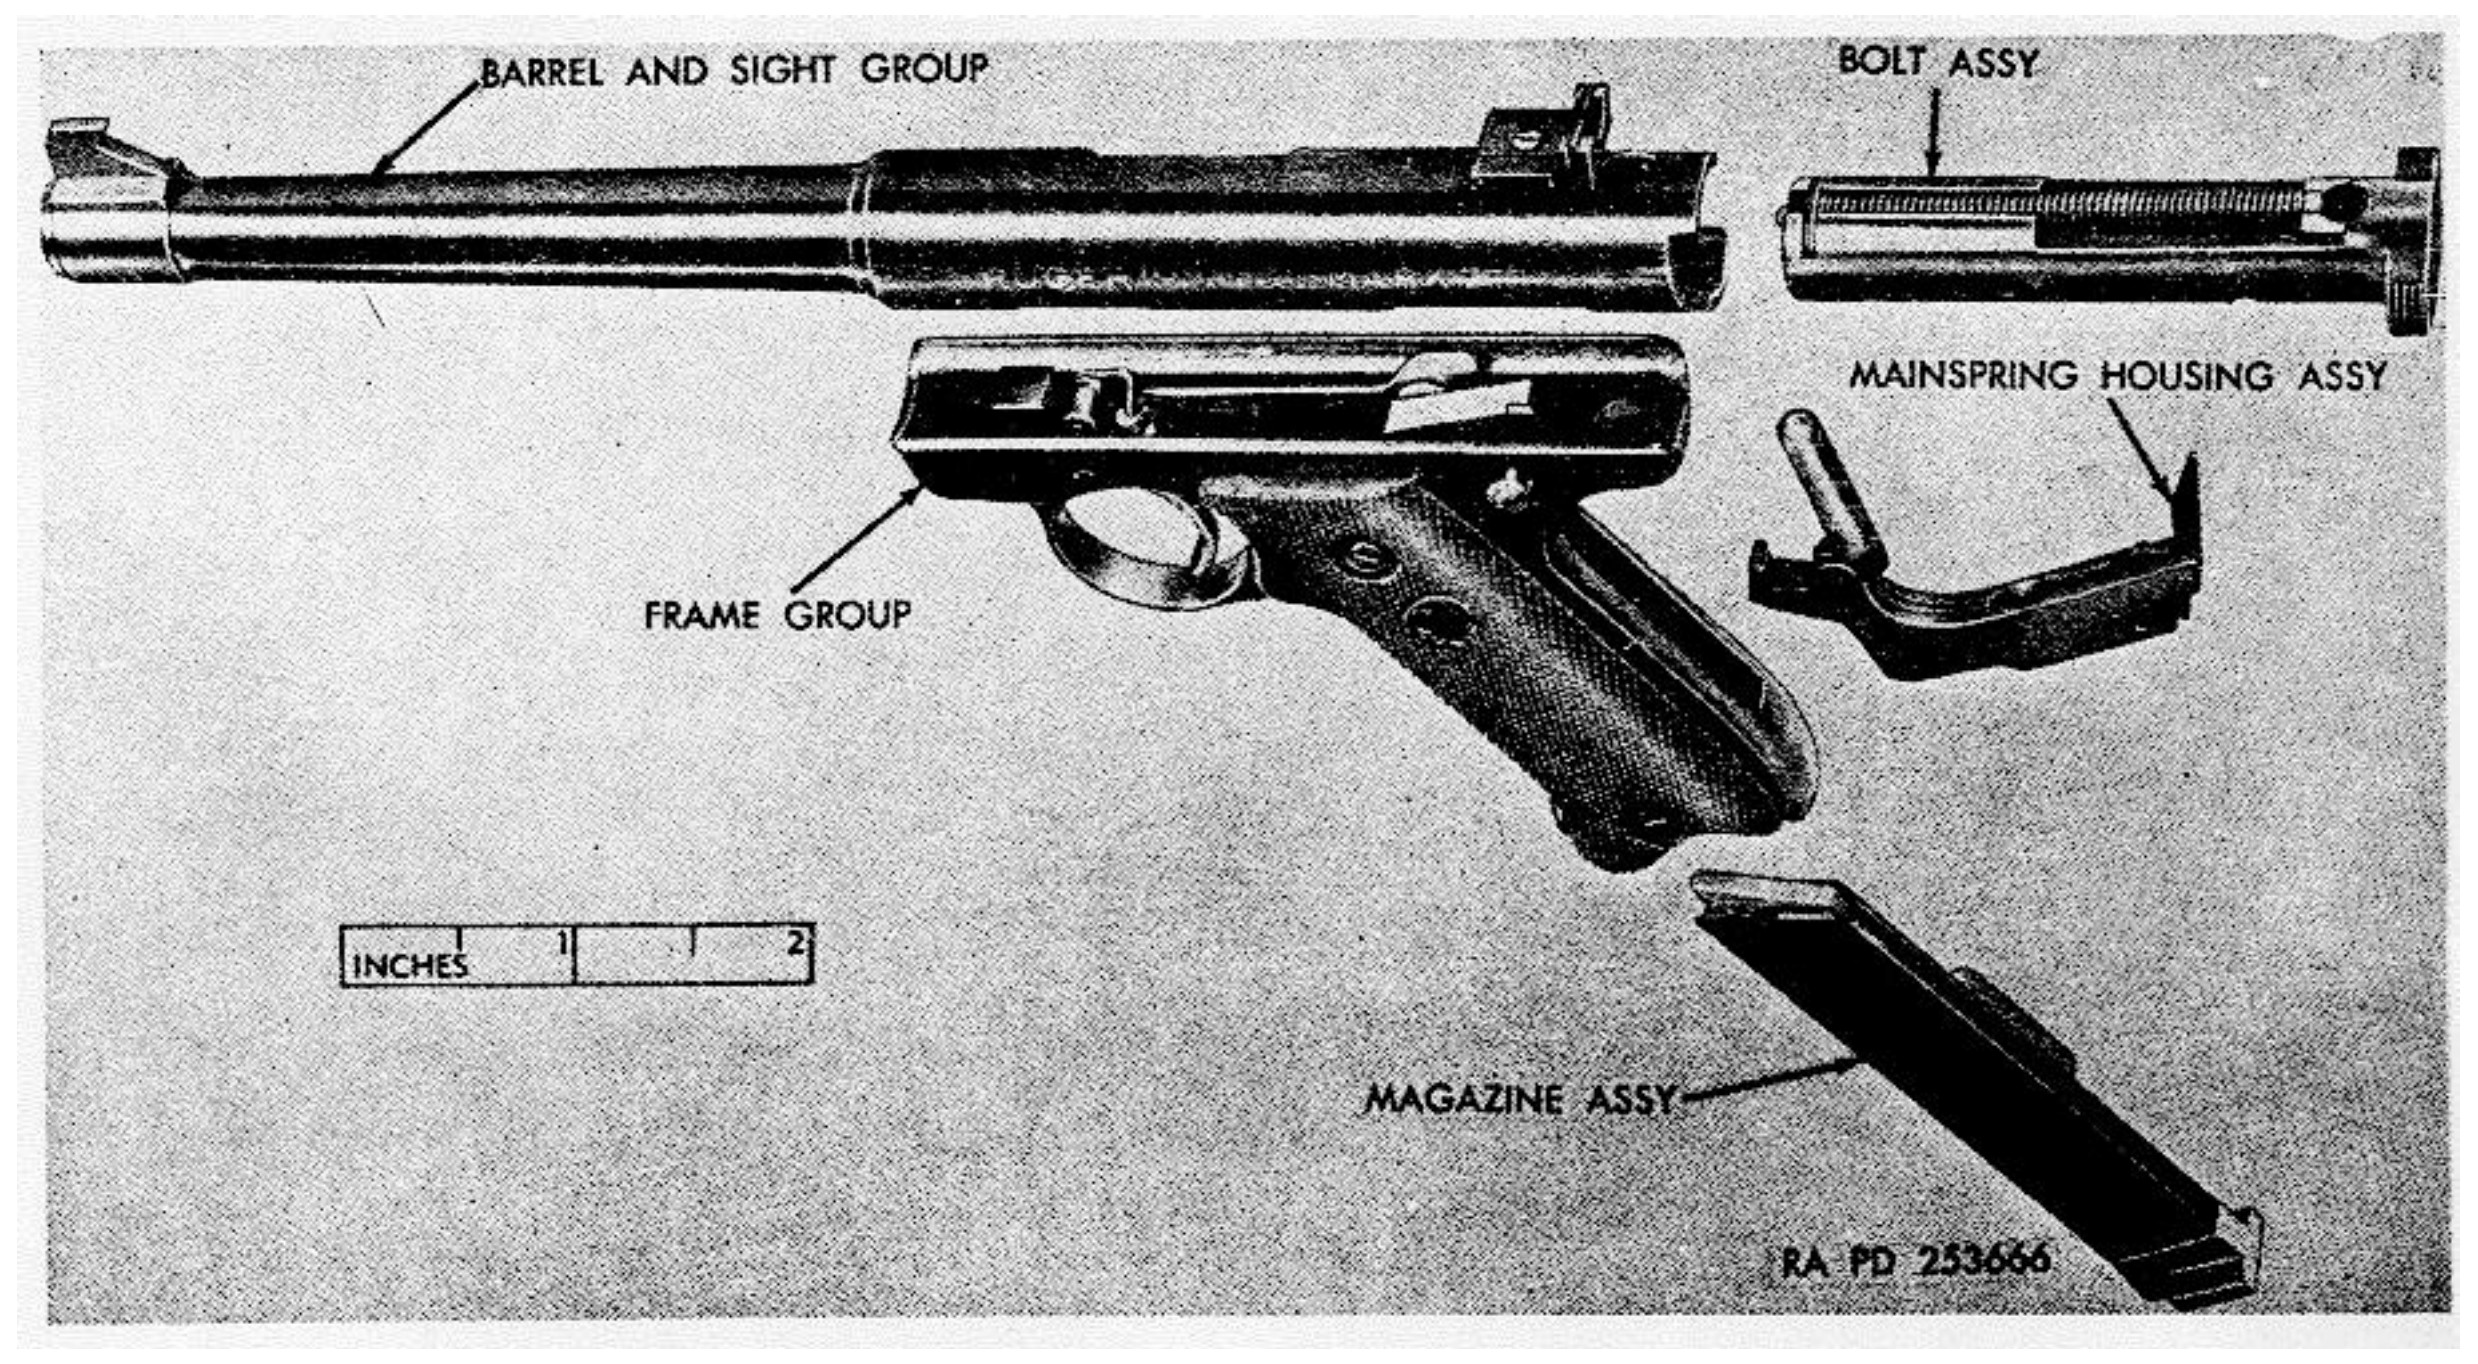
- Remove the housing and pin. “Swing the entire housing outward on its pivot and pull downward, removing the mainspring housing and bolt stop pin.” On new pistols it may be necessary to tap the top of the bolt stop pin where it protrudes above the receiver, with a plastic hammer and a wooden dowel, while pulling the housing down; the manual warns not to damage the rear sight.
- Remove the bolt. “Fully insert the empty magazine into the frame. Point the muzzle upward in a safe direction and pull the trigger. The bolt will drop out of the receiver or it can readily be removed. Remove the magazine.”
- Separate the receiver. “A forward blow (with a plastic hammer) on the rear of the receiver will disengage the barrel-receiver assembly from the grip frame. No attempt should be made to remove rivets or staked pins. Further disassembly should be undertaken only by the factory.”
Two of these steps require an empty magazine in the pistol for no reason other than to let the trigger move. That is the magazine disconnect (Volume 3) at work, and it is the reason the Mark III procedure has more steps than the Mark II’s, whose manual simply says “Point muzzle up. The bolt will drop out of the receiver.”7
4.4 Mark III — reassembly, per Ruger
The Mark III manual’s reassembly runs to ten steps and a page of tips, pp. 23–26, “The procedure is the same for all RUGER® MARK III pistols.” Condensed, with Ruger’s words quoted where precision matters:
- Clear and set the safety. “Be certain the pistol is free of cartridges! The safety must be in the ‘off’ (F) position for reassembly.”
- Set the hammer horizontal. “Keep your finger off the trigger. Place the hammer in the horizontal (cocked) position.” If it will not go there, “it is most likely because the hammer strut is trapped behind the crosspin” (not applicable to 22/45 models): lift the hammer to free the strut. If the hammer has rotated too far forward, inserting the empty magazine lets it rotate back. Remove the magazine. Check that the loaded-chamber indicator pin has not fallen out of the receiver.
- Fit the receiver. Place it on the frame “so that the square lug engages the square front recess on the underside of the receiver”; push it rearward until it stops, the rear of the receiver slightly overhanging the rear of the grip frame. If hand pressure will not do it, “place the pistol (muzzle down) on a padded bench and strike the rear of the grip frame immediately below the receiver with a plastic or wooden mallet.”
- Re-cock if needed. Insert the empty magazine, point the muzzle up and pull the trigger; “Gravity should cause the hammer to return to the cocked position if it became dislodged in step 3.” If not, push the hammer flat through the rear of the receiver. Remove the magazine.
- Fit the bolt. The bolt stop must be down. “BE CERTAIN that the firing pin stop … is in the bolt” — without it the firing pin will “irreparably dent the rear end of the chamber of the barrel, making the pistol useless.” Slide the bolt, recoil spring upward, fully forward.
- Drop the hammer and insert the pin. Insert the empty magazine, point the muzzle toward the ground and pull the trigger: “The hammer should fall to its full forward position.” If not, retract the bolt partly and move the hammer through the slot in the rear of the frame. With the muzzle still down, press the bolt stop pin up through the receiver and bolt “until the tip of the pin protrudes beyond the top of the receiver,” tapping the housing with a mallet if necessary. “Do not yet move the mainspring housing into the frame.”
- Capture the strut. Invert the pistol, muzzle up. “Make sure you can see the hammer strut when you lift the housing up. The hammer strut should go into the oval-shaped cut inside the mainspring housing.” Hold the trigger to the rear and move the housing into place. (22/45 models, step 7A: close the housing as far as it goes without excessive pressure, release the trigger, remove the magazine, and the housing “will close the rest of the way.”)
- Close the latch. “Spring pressure should be felt just before the housing is fully shut if the internal parts are correctly aligned.”
- Check. “Pull the bolt backward and verify that it opens fully. If not, open the latch and repeat steps 6 - 8.”
- Uncock. Insert the empty magazine, point safely, pull the trigger. “Guns should not be stored loaded or cocked.”
And the manual’s troubleshooting:
“If the mainspring housing pulls out of the gun when swung in, the barrel/receiver assembly is not fully rearward on the frame. Repeat step 3, above. Remember that it is essential that the hammer must be in its vertical, uncocked position as the mainspring housing is swung shut. If the housing is excessively difficult to close, the hammer is probably cocked. Repeat steps 6-9, above.”1
4.5 Where the Mark I, II and III manuals disagree
Ruger rewrote the procedure for each generation, and the rewrites are not just rewordings. Three differences stand out, and each is a place where a reader following the wrong generation’s manual will be told to do something different.
Table 2 — Where the Mark I, II and III manuals disagree
| Mark I manual (A-7-81) | Mark II manual (1/03) | Mark III manual (9/15) | |
|---|---|---|---|
| Order of fitting | Bolt into receiver first, then receiver onto frame | Receiver onto frame first, then bolt | Receiver onto frame first, then bolt |
| If the receiver will not seat by hand | ”Strike the muzzle of the barrel with a plastic hammer or wood mallet,” keeping downward pressure on the receiver | ”Strike the muzzle (front) of the barrel with a plastic or wood mallet only” | Muzzle down on a padded bench; “strike the rear of the grip frame immediately below the receiver” |
| How to get the receiver off | ”A blow … on the rear of the bolt" | "A forward blow … on the rear of the receiver" | "A forward blow … on the rear of the receiver” |
| Hammer before the pin goes in | Safety on with hammer horizontal; after the pin is in, safety off and trigger pulled so the strut can be seen | Hammer falls “to its uncocked position” with the muzzle angled down, and “you will hear a ‘click’. This is essential to all later reassembly steps” | Muzzle toward the ground, trigger pulled: “The hammer should fall to its full forward position” |
| Trigger needs a magazine in? | No | No | Yes — magazine disconnect |
Sources for each cell are the three manuals as cited.371 Two practical conclusions follow. First, a Mark III owner working from a Mark II guide will be told to strike the muzzle, which the Mark III manual has replaced with an instruction to strike the frame The manual does not say why the instruction changed, and no reason is supplied here. Second, the hammer instructions differ in detail across all three and agree in only one thing: when the housing is swung closed, the hammer must be down. The Mark I manual puts it most plainly — “the hammer [itself must] be in its uncocked, upward position (resting on the firing pin) as the mainspring housing is swung shut.”3
One apparent contradiction inside the Mark III manual is worth resolving because it confuses readers. Step 2 calls the horizontal hammer “cocked”; the troubleshooting tips require the hammer “in its vertical, uncocked position” when the housing closes. Both are correct. The hammer is set cocked (horizontal) so that the receiver and bolt can be fitted over it, and then deliberately dropped (vertical) in step 6 before the pin goes in and the housing closes. The procedure passes through both states, in that order.
4.6 Why it defeats people
With the mechanism of Volume 3 in mind, the difficulty reduces to three simultaneous conditions, all of which must be true at the moment the housing is closed:
- The receiver must be fully rearward on its front lug, or the housing’s upper end will not engage the receiver and “will pull out when it is swung closed” (the Mark I manual’s wording) — “the mainspring housing pulls out of the gun when swung in” (the Mark III’s).31
- The hammer must be down. “If the housing is excessively difficult to close, the hammer is probably cocked.”1
- The hammer strut must fall into its seat on the plunger inside the housing. If it does not, the Mark I manual warns, “it will either be impossible to complete the closure of the housing or the housing may be closed but it will be impossible to draw the bolt all the way back.”3
The third condition is invisible from outside. The strut is a loose link hanging from the hammer inside the grip, and the only way to steer it is by the angle at which the pistol is held — which is why every manual specifies an orientation (the Mark I manual: “the barrel generally in a vertical position, but tilted at an angle that causes the hammer strut to drop into the correct position to ‘meet’ the mainspring plunger in the housing”).3 Every Ruger reassembly procedure therefore ends with the same test. The Mark I manual: “pull bolt to its rearward position. The bolt should open fully.” The Mark III: “verify that it opens fully.”31 A housing that closed with the strut out of its seat produces a pistol that looks assembled and will not cycle.
4.7 Mark IV — disassembly and reassembly, per Ruger
The Mark IV manual’s disassembly, pp. 21–22, is five steps and needs no tools: “RUGER® MARK IV pistols are designed to be disassembled and reassembled without the use of tools.”2
- Unload, and leave it cocked with the safety on. Remove the magazine and all cartridges from it; draw the bolt back, inspect the chamber, release the bolt. “Put the safety in the ‘on’ position with the white dot visible.” (Because the safety can only be applied with the hammer cocked, the Mark IV comes apart cocked — the opposite of the Mark I–III, which must be uncocked.)
- Press the button. “Holding the barrel in one hand and the grip frame assembly in the other, depress the take-down button located just below the rear of the bolt.”
- Tilt and lift. “With the take-down button pressed, tilt the barrel downward so that it clears the bolt stop pin. The barrel/receiver assembly can now be lifted straight up off of the grip frame assembly.”
- Grips, if wanted. They come off with a 3/32-inch hex wrench.
- Remove the bolt. “Pull straight back on the bolt ears to remove the bolt from the receiver. No further disassembly is necessary.”
Reassembly, pp. 24–25, is six steps, “the same for all RUGER® MARK IV pistols”:
- Pistol free of cartridges; finger out of the trigger guard; “The safety must be in the ‘on’ position with the white dot fully visible for reassembly.”
- “Insert the bolt fully into the barrel/receiver assembly.”
- “Place the barrel/receiver assembly on top of the frame so that the notch in the receiver aligns with the pivot pin in the grip frame.”
- “Rotate the barrel/receiver assembly down on to the bolt-stop pin in the grip frame.”
- “Gently squeeze the barrel/receiver assembly and the grip frame assembly together so that a click is heard and check to ensure that they are firmly together and cannot be pulled apart.”
- Insert the empty magazine, point the pistol safely, put the safety off (red dot), and pull the trigger to uncock.
There is no mallet, no paper clip, no instruction about the hammer strut, and no orientation to hold the pistol in. The strut problem has not been solved so much as removed: on the Mark IV the housing and the bolt stop pin never leave the frame, so the strut is never disturbed.6
The manual adds one optional operation. The right-hand safety lever can be removed for a left-side-only safety: take off the right grip panel with a 3/32-inch hex wrench — covering the spring-loaded magazine ejector underneath “with your hand when removing the grip panel to prevent it from being dislodged” — remove the lever with a 1/16-inch hex wrench, and fit the supplied spacer.2
4.8 After reassembly: the checks Ruger prints
The Mark III manual’s check is one line — the bolt must open fully (step 9). The current Mark IV manual prints a fuller function check, “CHECK YOUR PISTOL’S FUNCTION,” to be done “after any disassembly and reassembly … before any live firing is attempted,” with the pistol unloaded and pointed safely:2
- Bolt. Magazine out, safety off: the bolt should run fully back and close fully under the recoil spring (twice). With an empty magazine in, the bolt should be held open by the bolt stop; with the magazine then removed it should stay open; pulled back and released, it should close.
- Trigger and disconnect. With the hammer cocked and the magazine out, safety off: “The trigger should move slightly rearward and stop. The hammer should not fall.”
- Safety. Empty magazine in, safety on: the hammer should not fall.
- Firing. Empty magazine in, safety off: “The trigger should move fully rearward and you should hear a click as the hammer falls.”
- Safety against a fallen hammer. “The manual safety lever should NOT move to ‘SAFE’ with the hammer in the fired position.”
If any step fails, the manual refers the owner to “a competent gunsmith” or to Ruger Customer Service.2 The sequence is equally applicable, step for step, to a Mark III, which has the same magazine disconnect and the same cocked-only safety; it is offered here as a useful routine, not as a Ruger instruction for the Mark III.
4.9 Magazines, and what not to take apart
Both manuals describe magazine disassembly in the same five steps, and both open it with a warning to wear safety glasses: a drift punch through the hole in the base depresses the magazine block retaining plunger about 1/4 inch; the block slides forward; the plunger and spring come out — “if not contained, these parts will fly out with considerable force”; the follower button lifts out through the circular opening in the body; and the follower comes out. Reassembly is the reverse. Ruger’s closing instruction is to “‘ride’ the magazine follower button up and down with your thumb. Do not lower follower button and then permit it to snap up.”12 The reason is given elsewhere in both manuals: a cartridge rim struck against the magazine lips “may set off a sensitive primer.”1
Beyond the field strip, the manuals draw firm lines:
- Mark I–III: “No attempt should be made to remove rivets or staked pins. Further disassembly should be undertaken only by the factory.”1 The mainspring housing is not to be dismantled — “No disassembly of the mainspring housing assembly is authorized,” in the Army’s 1959 wording.8
- Mark IV: “No further disassembly is necessary.”2
- 22/45 Lite and threaded models: the barrel nut under the muzzle cap “should never be loosened, removed or tampered with.”12
- Parts marked for factory fitting — on the Mark III these include the barrel/receiver assembly, the complete bolt assembly, the grip frame, the trigger, the safety assembly, the hammer assembly, the disconnector assembly and the mainspring housing assembly — are “fitted on an exchange basis only.”1
Aftermarket trigger kits go well past the field strip, into the grip frame. Volume 7 describes what the Volquartsen kits require and where their instructions depart from Ruger’s.
References
Footnotes
-
Sturm, Ruger & Co., Instruction Manual for Ruger Mark III … Autoloading Pistols, © 2015, code AP & KAP 9/15 R15, https://ruger-docs.s3.amazonaws.com/_manuals/markIII.pdf , consulted 2026-09-19 — pp. 15, 22–27, 33, 35–36. ↩ ↩2 ↩3 ↩4 ↩5 ↩6 ↩7 ↩8 ↩9 ↩10 ↩11 ↩12 ↩13
-
Sturm, Ruger & Co., Instruction Manual for Ruger Mark IV … Autoloading Pistols, code PM1179, © 2026, https://www.ruger.com/dataProcess/manual/fetch.php/ms/40160/manual_40160.pdf , consulted 2026-09-19 — pp. 21–27, 31. ↩ ↩2 ↩3 ↩4 ↩5 ↩6 ↩7 ↩8
-
Sturm, Ruger & Co., Instruction Manual for Ruger Mark I Target Model and Standard Model Automatic Pistols, “For Reference Only,” code A-7-81, https://ruger-docs.s3.amazonaws.com/_manuals/markI.pdf (scanned; text by OCR), consulted 2026-09-19 — “To Disassemble for Cleaning,” “To Reassemble.” ↩ ↩2 ↩3 ↩4 ↩5 ↩6 ↩7
-
Sturm, Ruger & Co., “Ruger Perfects Rimfire — Again: Introducing the One-Button Takedown Mark IV,” 22 September 2016, https://ruger.com/news/2016-09-22.html , consulted 2026-09-19. ↩
-
Sturm, Ruger & Co., Form 8-K, 3 August 2017, exhibit transcript of the second-quarter 2017 earnings call (C. J. Killoy), https://ruger.com/corporate/PDF/8K-2017-08-03.pdf , consulted 2026-09-19. ↩
-
Mark A. Keefe IV, “Mark IV: The Ruger Evolution,” American Rifleman, 20 March 2017, including the sidebar “Ruger Takes Steps To End World Profanity,” https://www.americanrifleman.org/articles/2017/3/20/mark-iv-the-ruger-evolution/ , consulted 2026-09-19. ↩ ↩2 ↩3
-
Sturm, Ruger & Co., Instruction Manual for Ruger Mark II Autoloading Pistols, “For Reference Only,” code AP & KAP 1/03 C R8, https://ruger-docs.s3.amazonaws.com/_manuals/markII.pdf , consulted 2026-09-19 — “Disassembly,” “Reassembly,” pp. 19–22. ↩ ↩2
-
Departments of the Army and the Air Force, TM 9-1005-226-14 / AFM 50-11, 20 July 1959, paras. 46 and 66 and figs. 47–48 (Army photographs RA PD 253665 and 253666); Wikimedia Commons File:TM-9-1005-226-14.pdf, consulted 2026-09-19. ↩
Comments (0)