LeMat Revolver · Volume 8
Making One — Finishing a Reproduction, Period Finishes, and a Percussion LeMat from Scratch
There is no kit; what a period finish on a LeMat actually looked like, part by part, from the catalogue record; and a machinist-level plan for building a nine-shot, two-barrel percussion revolver in a shop with CNC mills, printers and a laser, without ever making it a cartridge gun
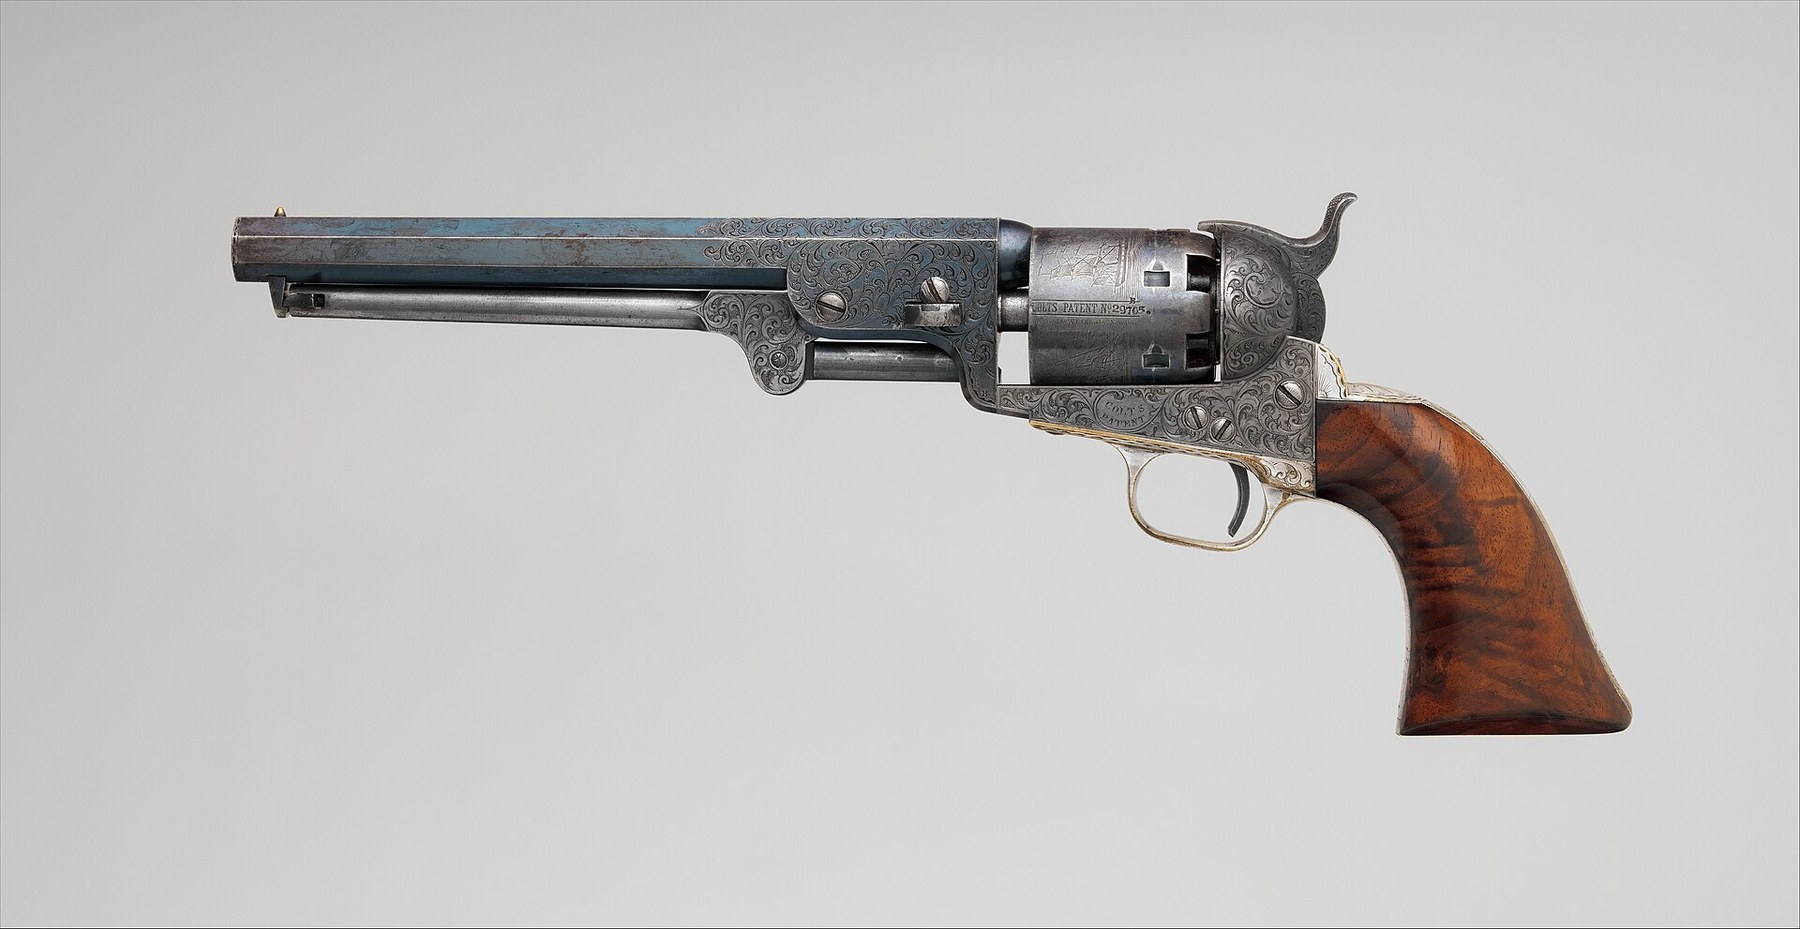
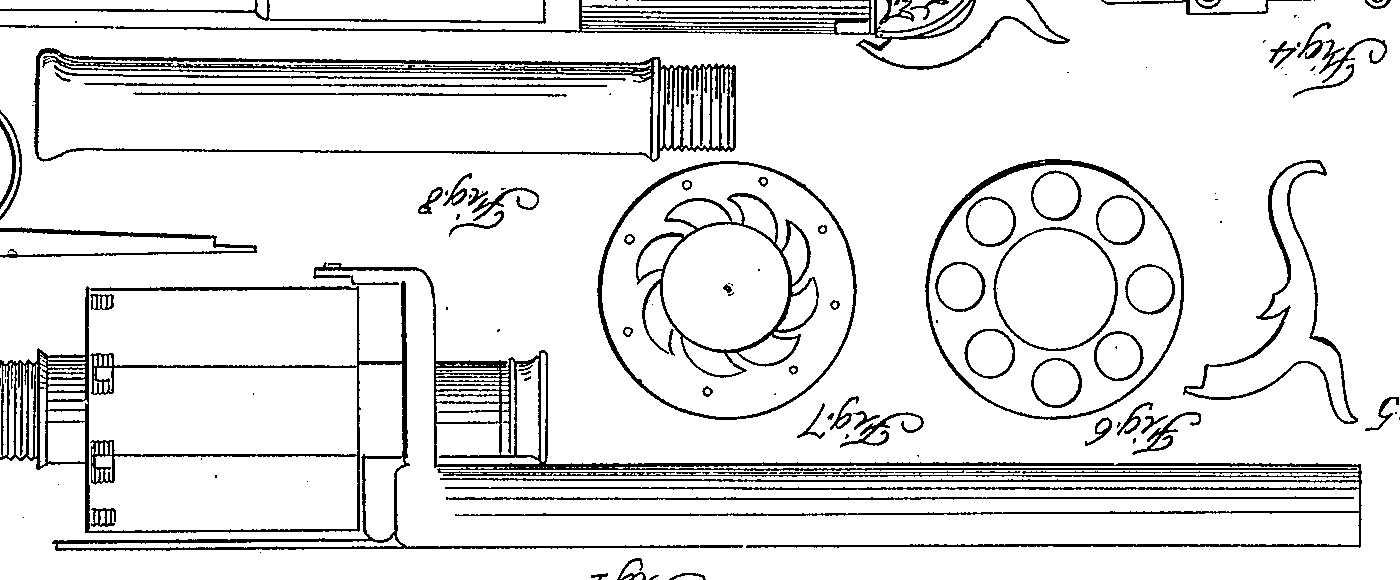
This volume has three parts. The first is short: there is no LeMat kit or unfinished gun on the market. The second is about finish — what the originals’ surfaces actually were, according to the catalogue descriptions of surviving guns, and how a reproduction can be refinished to match. The third is a plan for building a percussion LeMat from bar stock in a well-equipped home shop. It is written for a machinist with multiple CNC mills, 3D printers, a 100-watt laser and a full set of gunsmithing tools, and it does not explain what a reamer is.
8.1 The legal line this volume never crosses
The whole of the from-scratch section rests on one constraint. A replica of a pre-1898 percussion revolver that is “not designed or redesigned for using rimfire or conventional centerfire fixed ammunition” is an “antique firearm” under 18 U.S.C. § 921(a)(16)(B)(i), and is therefore not a “firearm” under the Gun Control Act.1 A cartridge-firing LeMat — new-made, or a percussion gun converted to fixed ammunition — is not an antique. Its smoothbore centre barrel, if made to fire a fixed shotgun shell, would make it a pistol “having a barrel with a smooth bore designed or redesigned to fire a fixed shotgun shell,” an “any other weapon” under the National Firearms Act, 26 U.S.C. § 5845(e), which must be registered before it is made.2
So this volume builds percussion only. No cartridge cylinder, no loading gate, no breech-loading centre barrel, no conversion. The 1869 cartridge LeMat is history, described in Volumes 3 and 4; it is not a build here. Michigan’s position — which still treats a black-powder pistol as a “firearm” and a “pistol” for most purposes — and the other limits are in Volume 9, and a reader should read it before cutting metal.
8.2 No kit, no gun in the white
Pietta’s 2025 catalogue lists four standard LeMats and a commemorative, all finished guns; no kit and no unfinished (“in the white”) LeMat appears in the catalogue or on Pietta’s US company’s LeMat pages.34 Pietta’s catalogue mentions “SHERIFF’S and CARBINE versions” in its text but not in its tables.3 No other maker of a LeMat kit was found. The muzzleloading kit market covered in the Blunderbuss Kits Compared dive has no revolver equivalent for the LeMat.
The practical routes are therefore: refinish a finished Pietta (§8.4), or build from scratch (§8.7 onward).
8.3 What an original’s finish was, part by part
The catalogue descriptions of surviving guns record finishes where they survive. Collected:
Table 1 — The catalogue descriptions of surviving guns record finishes where they survive. Collected
| Part | Finish recorded | Gun and source |
|---|---|---|
| Barrels and cylinder | Blue; “high polish blue” | Paris First Model (Rock Island); London 8604 (Rock Island); Birmingham-proofed Second Model (Rock Island); pinfire 265 (Rock Island)5678 |
| Hammer | Colour casehardened | Paris First Model; Birmingham-proofed Second Model (Rock Island)57 |
| Hammer | Straw colour | Pinfire 265 (Rock Island)8; Baby 31 (Julia)9 |
| Hammer | ”Apparently finish bright” | London 8074 (Julia, quoting a former owner)10 |
| Trigger guard | Casehardened | Paris First Model (Rock Island)5; pinfire 265, with frame8 |
| Trigger guard and backstrap | Brass, silver plated | Krider prototype serial 2 (Julia)11 |
| Frame | Casehardened | Second Model 1475 (Julia); pinfire 265 and 249 (Rock Island)12813 |
| Frame | Blue | Birmingham-proofed Second Model, “high polish blue finish on the frame, barrels, cylinder and trigger guard” (Rock Island)7 |
| Trigger, rammer extension | Straw | Baby 31 (Julia)9 |
| Loading lever | ”Bright finished,” aged to grey | Birmingham-proofed Second Model (Rock Island)7 |
| Screw heads | ”Engraved with a simple line pattern” | Paris First Model (Rock Island)5 |
| Grips | Checkered walnut, oil or varnish | most guns; Krider serial 1’s grips “were never checkered” (Simmons); pinfire 3023 has smooth walnut1415 |
| Whole gun | Golden varnish overcoat | One Second Model at Rock Island, “a unique overcoat of golden varnish”16 |
| Whole gun (cartridge Baby) | Black lacquer | Rock Island lot 120217 |
Two lessons follow. There was no single LeMat finish. The frame was casehardened on some guns and blued on others; the hammer was casehardened, straw or bright. And finish quality varied widely, as Edmunds observed: some guns show “imperfections [that] had not been polished out before the bluing process,” while others “approach the quality of the Colt.”18 A reproduction refinished with blued barrels and cylinder, a casehardened frame, hammer and guard, straw small parts and oiled checkered walnut is defensible as period-correct; so is a blued frame.
Pietta’s own finish, in Bodinson’s description of a Navy Arms-imported Cavalry, is “richly blued and color casehardened.”19
8.4 Refinishing a Pietta in a period style
The methods are covered elsewhere in this collection and are linked rather than restated:
- Rust bluing, slow rust bluing, browning and cold blue, with the reasons to avoid hot caustic bluing at home: Traditions Blunderbuss Kits, Volume 8.
- Case hardening and heat treatment of small parts, and hot bluing: STEN Gun, Volume 9.
- Browning a big barrel and finishing figured walnut: Stonewall Creek Blunderbuss, Volumes 5–6.
What is LeMat-specific:
- Strip completely. The frame, side plate, hammer, trigger guard and lever all carry finish; the side plate must come off (Volume 6). Record the cylinder-stop adjustment before disturbing it.
- Do not reblue the bores or chambers, and keep finishing chemicals out of the shot barrel’s bearing surface and the cylinder’s bore, which must stay smooth and true.
- Mask the cylinder’s stop-pin holes and the ratchet if a rust blue is used; rust in those holes defeats the cylinder lock.
- Case colour on the frame and hammer is a bone-charcoal pack process at temperature, done by specialists or with the method in the STEN volume; it is also a hardening process, so it changes dimensions and hardness. On a Pietta frame already casehardened, re-hardening is unnecessary and risks warping a part whose bores locate the shot barrel.
- Straw small parts — trigger, screws, rammer — are an oxide temper colour on bright steel, produced by controlled heating; it is how the originals’ straw colours were made, though no source quoted here describes the factory method.
- “De-farbing.” Garbers notes that reenactors age reproductions to look used.20 An aged Pietta should never be sold without disclosure; its Italian proofs remain, and Volume 7 explains how a buyer recognises one.
8.5 Grips, markings and the barrel address
Grips. Originals had two-piece walnut grips, usually finely checkered, held by one screw through escutcheons, with assembly numbers inked inside.21 Making a pair is a routine job: profile on a CNC router from a scan of the frame, inlet the escutcheons, and checker. The 100-watt laser can mark a checkering layout on the blank as a guide for hand cutting; a fully laser-cut checkering pattern looks like what it is.
The barrel address. The originals were engraved early and roll-stamped later (Garbers), with forms such as “COL. LeMat Patent” in an engraved panel with fleurs-de-lis (First Model serial 28), “Col Le Mat Bte s.g.d.g. Paris” in Gothic letters between scrolled borders (Second Models), and “LEMAT & GIRARD’S PATENT LONDON” in block letters.20221610 A laser can engrave such a legend, but adding an original maker’s address to a reproduction is how fakes are made. If a period legend is wanted on a reproduction or a scratch-built gun, add a clear modern maker’s mark and date as well, permanently, where a buyer will see it.
8.6 Making parts for an original
The parts most often missing from originals are the loading lever, its catch spring, the shot rammer, the barrel pin and spring, and the hammer nose (Volume 6).21 A shop can make each of them, and reproduction levers have been made for decades.18 For an original:
- Measure, do not adapt. Original parts are hand-fitted; a Pietta part will not fit, and a part copied from one original may not fit another.
- Mark every replacement inconspicuously but permanently, and record it in writing with the gun. A replacement that later passes as original is a fraud on the next owner, whatever its maker intended.
- Leave the old part with the gun if it survives, broken or not.
- Do not refinish the gun to match the new part. Leave the new part slightly different.
8.7 From scratch: the decisions to make first
The Mauser C96 dive’s from-scratch volume makes a point that applies here exactly: decide the target before cutting steel — a functional gun, or a non-firing model.23 For the LeMat:
- Functional percussion replica, .44 or .42, with a smoothbore centre barrel, built to fire black powder. This is the serious project and the subject of the rest of the volume.
- Non-firing model — no chambers through, no nipple holes, a plugged centre barrel. Far easier, and a legitimate way to prove the geometry, the lockwork and the selector before committing to steel that has to hold a charge. A Denix replica already exists in that space (Volume 7).
Calibre. A scratch-built gun can be .42 with an 18-bore centre barrel, as the originals were, or .44 and 20-gauge, as Pietta builds. The original calibres are more interesting; the Pietta calibres let the builder use standard .454 ball and the maker’s charge tables as a reference, and allow a Pietta to be measured as a pattern. The rest of this volume assumes the Pietta calibres for that reason.
Not a copy of a current product’s trade dress. A scratch build modelled on Pietta’s measurements is a working replica of a nineteenth-century design. It should carry its builder’s own markings, not Pietta’s.
8.8 Getting the geometry: no drawings exist
No dimensioned drawings of the LeMat were found — not of the originals, and not of the Pietta. The sources give only a handful of figures: a 6¾ in rifled barrel; a shot barrel of about 5 in; 13¼–14 in overall; a cylinder “almost 2 inches in diameter”; the rifled bore about .42 in (60-bore) on originals and .44 on Pietta’s; the centre barrel about .63 in (18-bore) on originals and 20-gauge on Pietta’s; Pietta’s 1:30 in twist; and a 55-part parts list.1921324 The patents give proportions but not dimensions.2526
So the geometry has to be measured from a gun. The workable approach in a shop with printers and CNC:
- Buy or borrow a Pietta and field-strip it (Volume 6). Detail-strip it only with the maker’s exploded diagram in hand.
- Measure every part. Calipers, micrometers, pin and bore gauges for the cylinder chambers, the shot-barrel diameters and the cylinder bore; a height gauge on a surface plate for the frame; thread gauges for the barrel-to-shot-barrel and shot-barrel-to-frame threads and for the nipples.
- Scan the frame, hammer and grips if a scanner is available; a scan gives the surfaces, the measurements give the datums.
- Model it in CAD with the shot-barrel axis as the master datum. Every important feature — the nine chamber axes, the rifled barrel’s axis, the hammer’s pivot, the shot-barrel nipple — is located from it.
- Print the parts in plastic and assemble them on a printed frame to prove the lockwork motion and the selector before cutting steel. Printing is the cheapest way to find the interference between the hammer head, the shot-barrel nipple and the breech face, which is the gun’s most delicate geometry.
- Check against the patents: the 1859 patent’s wings on the hammer head and their notches in the cylinder are a feature the builder may choose to include even if the pattern gun lacks it.26
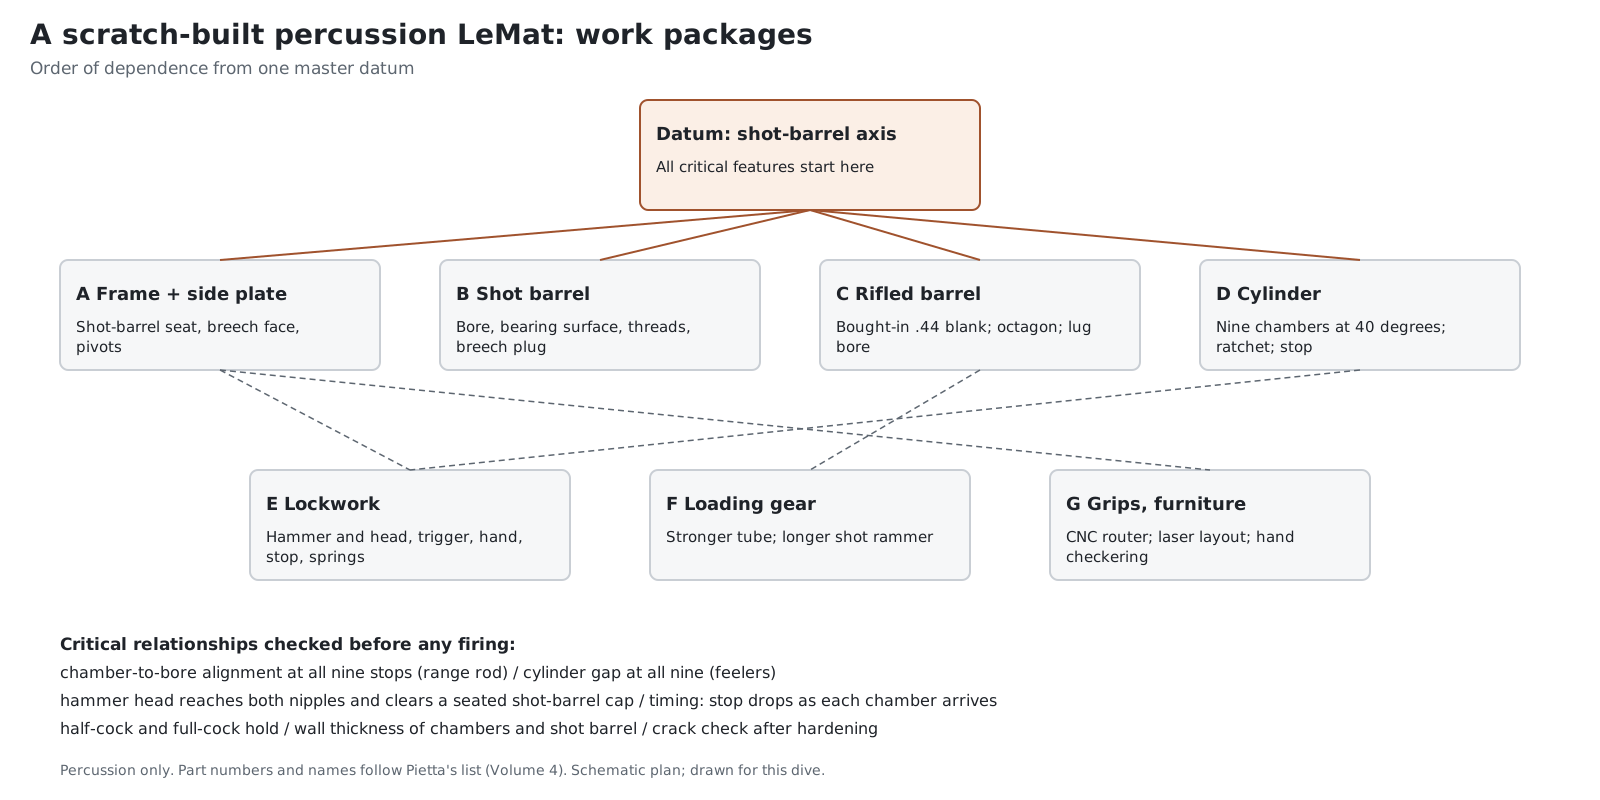
8.9 The work packages
Table 2 — The work packages
| Package | Parts (Pietta numbers) | Main machines | Critical relationship |
|---|---|---|---|
| A. Frame | frame 23, side plate 24, nut 17, trigger guard 28 | CNC mill, 4th axis or fixture plate | Shot-barrel bore and breech face square to it; hammer and trigger pivots located from it |
| B. Shot barrel | shot barrel 14, breech plug 15, nipple 13 | Lathe | Concentric bearing surface for the cylinder; threads to frame and to rifled barrel |
| C. Rifled barrel | barrel 8, front sight 7, latch parts 9–11 | Lathe, CNC mill; rifled blank bought in | Bore parallel to and at the right distance from the shot-barrel axis |
| D. Cylinder | cylinder 12, nine nipples 13 | Lathe, CNC mill with indexer | Nine chambers on true 40° spacing, ratchet and stop holes timed to them |
| E. Lockwork | hammer 32, head 31 with 33–35 and 55, trigger 26, hand 40–42, stop 19–21, 36, 37, 54, 16, mainspring 43, 44, 38, 39, springs | CNC mill, surface grinder, hand fitting | Timing; hammer head reach; sear engagement |
| F. Loading gear | lever 3, tube 2, plunger 5, rammer 1, screws 4, 6, 50, retaining spring 51 | Lathe, mill | Plunger on the chamber axis at the bottom position |
| G. Grips and furniture | grips 48–49, escutcheons, lanyard 52–53 | CNC router, laser | Fit to frame |
Source for the part list: 24
8.10 Frame and side plate
The originals’ frames were cast — “malleable iron,” Edmunds says, or “cast steel,” as Girard claimed — and finished by hand.18 Pietta’s are steel.3 A shop with CNC mills will machine the frame from solid.
Setups. The frame has three important datum families: the shot-barrel bore and the breech face it is square to; the lockwork pivots on the left face (under the side plate); and the grip frame. A practical sequence:
- Square a blank and machine the left face’s lockwork pocket and pivot holes with the blank on a fixture plate, from a datum hole that will become the shot-barrel bore’s pilot.
- Turn the blank on a 4th axis, or re-fixture on the pilot, to bore and thread the shot-barrel seat and face the breech square to it.
- Machine the cylinder window and the recess for the shot-barrel nipple in the breech face; cut the opening through which the cylinder-stop pin works and the window for the hand.
- Profile the outside and the grip frame last, holding on the finished bores.
- Machine the side plate as a separate part, fitted to its pocket, with the pivot bosses it carries located from the same datums.
Why the side plate matters. It closes the lockwork and supports the outer ends of the pivots; a loose side plate lets the hammer pivot float and ruins timing. Fit it with no shake.
8.11 The shot barrel
The shot barrel is the gun’s spine. It is a pressure vessel (the centre barrel’s charge), the cylinder’s bearing, and the anchor for the rifled barrel. It is also simple: a tube with a smooth bore, an external bearing surface, a thread at the breech into the frame, a thread or collar for the rifled barrel, and a breech closure carrying the nipple (Pietta separates the breech plug, part 15).24
- Material. Use a barrel-quality steel with a known specification, bought with a mill certificate. The choice is the builder’s; no source gives the originals’ or Pietta’s steel.
- Bore. Deep-hole drill and ream for the chosen gauge; finish smooth. A chamber is not needed; it is a muzzleloader.
- Bearing surface. Turn concentric with the bore and finish smooth; it is the surface the cylinder turns on and the one LeMat’s 1869 patent gave an oil groove.27 Concentricity of bore, bearing and threads is what makes the gun work.
- Breech. Pietta’s arrangement — a separate screwed plug carrying the nipple — is easier to make and inspect than an integral breech, and allows the bore to be cleaned through.24 The nipple seat must sit in the breech face’s recess where the turned-down hammer head will reach it.
- Muzzle end. Garbers and Julia describe how the originals’ rifled barrel screws onto the shot barrel, with interrupted threads at the muzzle end on serial 28.2022 Measure the Pietta’s arrangement.
8.12 The rifled barrel
The rifled barrel is the one part most shops will not make whole. The Mauser C96 dive reaches the same conclusion for its 9 mm barrel and recommends buying a rifled blank or farming out the rifling.23 For the LeMat:
- Buy a rifled .44 muzzleloading barrel blank in the chosen twist (Pietta’s is 1:30 in) from a barrel maker, long enough for the 6¾ in barrel and its rear lug, or have a blank rifled.3 No specific supplier was researched for this volume.
- Machine the octagon on a mill with an indexer; leave the rear lug full size.
- Bore the lug to fit over the shot barrel, with the rifled bore’s axis at exactly the right distance above and parallel to it. This single dimension, with the frame’s, decides whether the top chamber lines up with the bore.
- Thread or collar to the shot barrel as measured from the pattern gun, and machine the latch slot for the pin or lever.
- Front sight: dovetailed post, cut tall to be filed to zero.
- Forcing cone at the breech end, as on any percussion revolver barrel, to receive the ball from the chamber.
8.13 The cylinder
The cylinder is the most demanding part, and it is where a CNC mill with an accurate indexer earns its keep.
- Turn the blank: outside diameter, length, the central bore for the shot barrel (a running fit on the bearing surface), and both faces square to the bore.
- Bore and ream the nine chambers on a true 40-degree spacing about the central bore, at the pitch circle that puts each chamber under the rifled barrel. Ream to a size that shaves a ring of lead from a .454 in ball, which is how Pietta describes a correct fit.24 Chamber mouths should be smooth and square.
- Drill and thread the nipple seats on the rear face, on the chamber axes, at the thread measured from the pattern gun, with recesses and dividing walls round them as the originals have.
- Cut the ratchet: nine teeth on the rear face, each timed so that the hand pushes the cylinder through 40 degrees. Without a wire EDM, cut the teeth on the mill with the cylinder on the indexer and a small end mill, and finish the driving faces by hand.
- Drill the stop-pin holes between the nipples on the rear face, timed to the chambers; or, if a bolt-type stop is preferred (the later originals’ “more conventional and more rugged locking lug,” Bodinson), cut bolt notches on the periphery.19 The bolt is the better choice for a working gun because the pin system fouls (Volume 5).
- Optional: notches for the hammer head’s wings, after the 1859 patent.26
Inspection. Every chamber’s axis must meet the bore axis at its stop. Check with a range rod through the barrel into each chamber at each stop (§8.18).
8.14 The lockwork
Make the lockwork in mild or medium-carbon steel, harden the working surfaces, and fit by hand. The Pietta’s parts and their names (Volume 4) are the pattern.
- Hammer and head. Machine the hammer from solid; cut the slot for the movable head and fit the head on its pin with its spring and screws. The head must present its face to the top chamber’s nipple in the raised position and to the shot-barrel nipple in the lowered position, and in the raised position it must pass clear of a correctly seated cap on the shot-barrel nipple. Pietta’s double-percussion warning (Volume 5) describes what happens when it does not. Prove this geometry in plastic first.
- Thumb projections. The patent’s “point d’appui” — small ears on each side of the head — make the selector usable with a thumb.26
- Trigger and sear. Cut the half-cock and full-cock notches on the hammer and the sear on the trigger; harden both; stone the engagement. Half-cock must hold: one catalogued original’s “will not hold at half cock.”28
- Hand. Mount it on the hammer, sprung against the ratchet. Its length sets the timing; leave it long and fit down.
- Cylinder stop. Pin or bolt, with return and tension springs and an adjusting screw as Pietta provides.24
- Mainspring. A flat spring, as on the originals and the Pietta. Making flat springs is a skill of its own (forge, grind, harden and temper); buying Pietta’s spring as a starting point and fitting it is reasonable.
- Safety. The originals and the Pietta have no safety position.24 A scratch builder may add one — a safety notch or a pin between chambers in the style of contemporary Colt and Remington guns — at the cost of authenticity. The design choice is the builder’s; the gun must still never be carried loaded.
8.15 The loading lever, done better
The originals’ lever failed because its handle was a hollow tube carrying the shot rammer (Volume 4).1918 A scratch builder can keep the appearance and fix the defect:
- make the tube from a stronger steel with a thicker wall, within the outside diameter of the pattern;
- make the shot rammer long enough to load the centre barrel properly — Otoupalik found the original “too short and impractical”18 — perhaps in two screwed sections that stow in the tube;
- give the retaining spring more engagement, since the lever “will consistently flip up and out of its spring clip” when the shot barrel is fired (Bodinson).19
Departures like these should be recorded in the gun’s paperwork; they are improvements, not reproduction.
8.16 Grips and furniture
Covered in §8.5. Add the lanyard ring — swivelling through the butt (First Model) or fixed (Second Model) — according to which original the build follows.21
8.17 Heat treatment and finish
- Harden the working surfaces of the lockwork (sear, notches, hand tip, ratchet driving faces, stop pin or bolt) and leave the bodies tough. The case-hardening methods and their trade-offs are in STEN Gun, Volume 9.
- Frame: colour casehardening gives the period look and a hard surface; it risks distortion, so finish-machine the critical bores after hardening if possible, or leave them for final reaming.
- Barrels and cylinder: rust blue (period) or hot blue; never in the bores or chambers.
- Small parts: straw temper colour, as on several originals (§8.3).
8.18 Inspection before any firing
There is no American proof house, and a home-built black-powder revolver has no published proof standard. Pietta’s guns are proved in Italy before sale; a scratch-built gun is not. Before any live firing:
- Material records: keep the certificates for the barrel, shot-barrel and cylinder steel.
- Dimensional check of every chamber, both bores and the cylinder bore against the CAD model.
- Chamber-to-bore alignment at all nine stops, with a close-fitting range rod through the barrel into each chamber. This is the single most important check on any revolver; a misaligned chamber shaves lead and throws it sideways.
- Cylinder gap between the cylinder face and the barrel, measured with feeler gauges at all nine positions.
- Timing: the stop engages as each chamber arrives in line, at all nine; the hand carries the cylinder fully home; the hammer holds at half and full cock; the head reaches both nipples and clears the shot-barrel cap in the revolver position.
- Wall thickness between chambers, between chambers and the outside of the cylinder, and between chambers and the central bore. Check it on the CAD model and on the part.
- Crack check of the cylinder, frame, shot barrel and hammer after hardening; magnetic-particle or dye-penetrant inspection if available.
Have a gunsmith inspect the finished gun before it is fired. This is not a formality: the gun has ten chambers’ worth of pressure vessels, all made in a home shop.
8.19 First firing
- Fire remotely. Clamp the gun in a padded rest, behind cover, and fire with a lanyard on the trigger for the first cylinder and the first centre-barrel shots.
- One chamber at a time at first, then two, then a full cylinder, inspecting after each.
- Charges. No published load exists for a scratch-built LeMat. The Pietta manual’s figures apply to Pietta guns; they are the only maker’s figures for a LeMat of the same calibres and are a reference, not a licence (Volume 5).24 Begin at the bottom of Pietta’s suggested range and do not exceed its maximum.
- Inspect after each stage: chambers, cylinder face, forcing cone, the shot barrel’s bearing surface, the hammer head, the latch. Any change in fit or any mark of gas cutting means stop.
- Black powder only, never smokeless (Pietta’s rule applies to any muzzleloading revolver).24
8.20 Honest difficulty assessment
This is harder than most percussion revolvers. A Colt-pattern revolver from scratch is a well-trodden project; the LeMat adds a second barrel that is also the cylinder’s bearing, nine chambers instead of six, a cylinder lock that fouls, a lever that breaks, and a hammer head with two positions that has to reach two nipples at different heights without touching the wrong one. The rifled barrel is best bought in. The flat springs and the lockwork fitting are hand work. Expect the geometry to need two or three plastic iterations before steel is cut. A non-firing model is the sensible first build; it proves everything except the pressure vessels.
The Mauser C96 dive’s estimate for a from-scratch functional C96, “realistically 100–300+ hours,” is a reasonable order of magnitude for a functional LeMat by a competent machinist, but it is the C96 dive’s estimate for a different gun and is offered here only as a comparison.23
8.21 What could not be verified
- Any dimensioned drawing of an original LeMat or of the Pietta.
- The originals’ or Pietta’s steel specifications, beyond “malleable iron” or “cast steel” frames (Edmunds; Girard) and Pietta’s “steel.”
- Pietta’s thread forms for barrel, shot barrel and nipples (must be measured).
- A LeMat kit or in-the-white gun from any maker (none found).
- A supplier of .44 rifled muzzleloading barrel blanks suited to the LeMat (not researched).
- The factory methods for the originals’ straw and case colours.
Sources
Footnotes
-
18 U.S.C. § 921(a)(3) and (a)(16), Legal Information Institute, Cornell Law School, https://www.law.cornell.edu/uscode/text/18/921, read 2026-10-18. ↩
-
26 U.S.C. § 5845(a), (e) and (g), Legal Information Institute, https://www.law.cornell.edu/uscode/text/26/5845, read 2026-10-18. ↩
-
F.lli Pietta, revolver catalogue (“Catalog 2025,” file dated 2026), pp. 43–49, read 2026-10-18. ↩ ↩2 ↩3 ↩4 ↩5
-
Pietta Firearms USA, LeMat product pages, read 2026-10-18. ↩
-
Rock Island Auction Company, auction 74, lot 3304, read 2026-10-18. ↩ ↩2 ↩3 ↩4
-
Rock Island Auction Company, catalogue 4090, book 1, p. 250, read 2026-10-18. ↩
-
Rock Island Auction Company, auction 69, lot 1166, read 2026-10-18. ↩ ↩2 ↩3 ↩4
-
Rock Island Auction Company, auction 64, lot 265, read 2026-10-18. ↩ ↩2 ↩3 ↩4
-
James D. Julia, Inc., lot 2383, Baby serial 31, read 2026-10-18. ↩ ↩2
-
James D. Julia, Inc., London serial 8074, read 2026-10-18. ↩ ↩2
-
James D. Julia, Inc., lot 4378, Krider serial 2, read 2026-10-18. ↩
-
James D. Julia, Inc., Second Model serial 1475, read 2026-10-18. ↩
-
Rock Island Auction Company, auction 80, lot 249, read 2026-10-18. ↩
-
Edward N. Simmons, ASAC Bulletin 22:33–41 (1970), read 2026-10-18. ↩
-
James D. Julia, Inc., pinfire serial 3023, read 2026-10-18. ↩
-
Joe Engesser, “The LeMat Revolver,” Rock Island Auction Company, read 2026-10-18. ↩ ↩2
-
Rock Island Auction Company, auction 69, lot 1202, read 2026-10-18. ↩
-
Frederick R. Edmunds, ASAC Bulletin 100:24–28 (2009), read 2026-10-18. ↩ ↩2 ↩3 ↩4 ↩5
-
Holt Bodinson, “The Awesome LeMat,” GUNS Magazine, 7 February 2014, read 2026-10-18. ↩ ↩2 ↩3 ↩4 ↩5
-
Alan Garbers, “The LeMat’s Grapeshot Revolver,” GUNS Magazine, 15 September 2021, read 2026-10-18. ↩ ↩2 ↩3
-
College Hill Arsenal, Second Model serial 1784, read 2026-10-18. ↩ ↩2 ↩3 ↩4
-
James D. Julia, Inc., lot 148, First Model serial 28, read 2026-10-18. ↩ ↩2
-
Mauser C96 dive in this collection, Volume 9, “Build Path C — From Scratch (9×19)” (§§ 9.5 and 9.7), /actual-firearms/pistols/mauser-c96/vol-9/. ↩ ↩2 ↩3
-
F.lli Pietta, instruction manual for muzzleloading percussion firearms, English edition, read 2026-10-18. ↩ ↩2 ↩3 ↩4 ↩5 ↩6 ↩7 ↩8 ↩9
-
A. Le Mat, US Patent 15,925, 21 October 1856, read 2026-10-18. ↩
-
A. Le Mat, US Patent 24,312, 7 June 1859, read 2026-10-18. ↩ ↩2 ↩3 ↩4
-
F. A. Le Mat, US Patent 97,780, 14 December 1869, read 2026-10-18. ↩
-
James D. Julia, Inc., London serial 8948, read 2026-10-18. ↩
Comments (0)