Ruger 10/22 · Volume 7
Keeping It Working — Field Strip, Detail Strip, Maintenance and Repair
Ruger's own procedures for both generations of rifle, what wears, how malfunctions are diagnosed, and what goes back to the factory
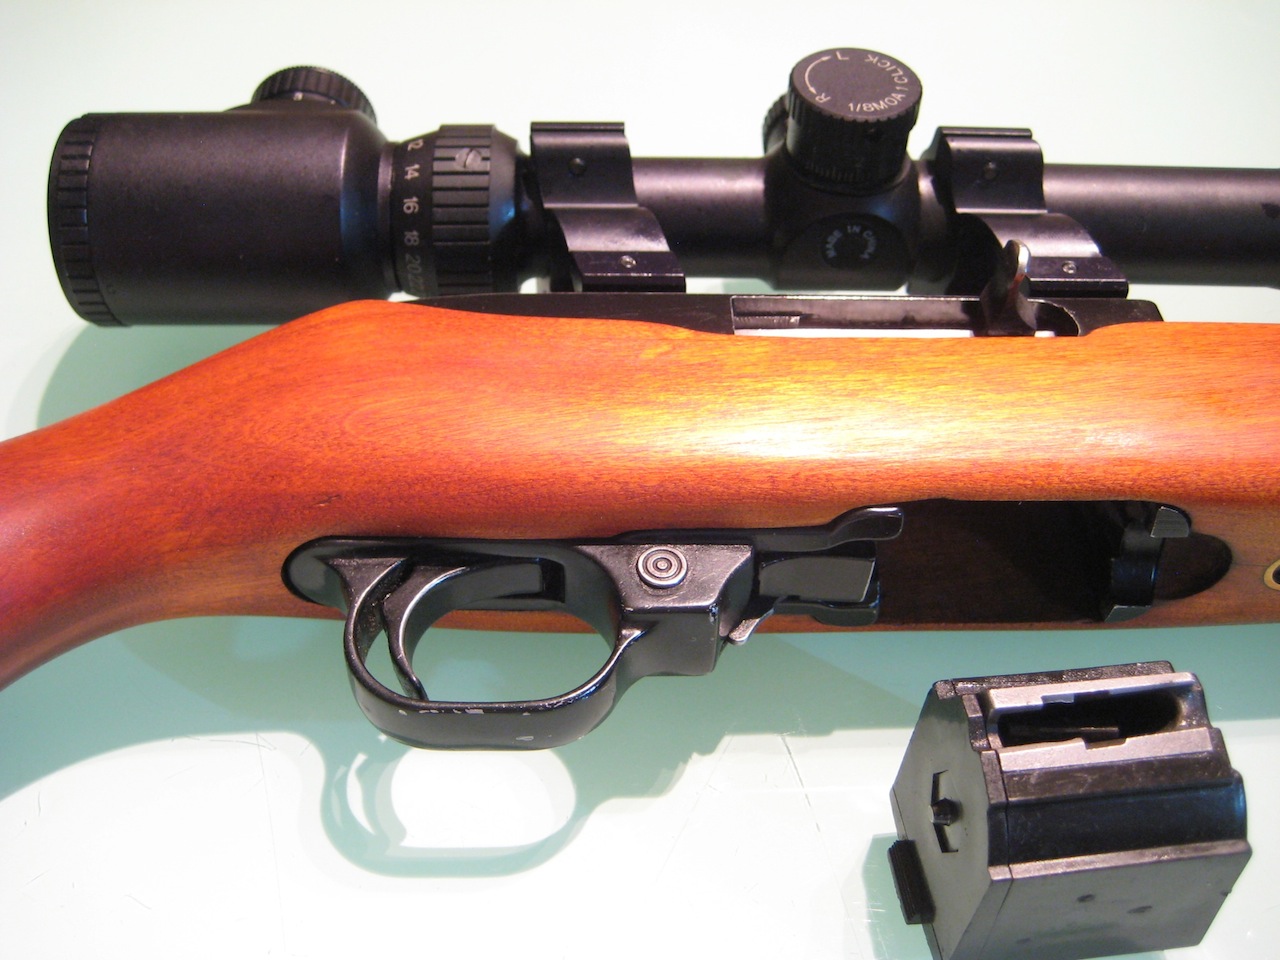
Everything in this volume is taken from Ruger’s own manuals and parts policy, and where Ruger is silent this volume says so rather than filling the gap. A 10/22 is simple enough that improvised procedures circulate widely; the manufacturer’s are short, specific and in two places surprising.
7.1 Which Manual Applies
Ruger now publishes two 10/22 manuals, and the difference matters for disassembly.
- PM058 (current edition B 4/2025 R40) covers the Takedown, Carbine, Tactical and Target LITE and the older line — every 10/22 below model number 32000.1 Both rifles documented in Volume 8 are covered by PM058.
- PM1269 (10/22 6/2026 R1) “applies only to 10/22 rifles with model numbers 32000 and higher” — the 2025 standard line with the match-type bolt lock and the rear cleaning port.2
The field strip is essentially the same in both. The bolt lock, the reassembly of the bolt and the cleaning of the bore differ, and both are noted below. Ruger also points owners to video demonstrations of disassembly, reassembly and cleaning at Ruger.com/TechTips.1
7.2 Unloading
Ruger: “This sequence must be followed exactly as spelled out. Failure to do so can result in the rifle’s chamber becoming unintentionally loaded with a cartridge!”2
- Muzzle in a safe direction, fingers outside the trigger guard. If the hammer is cocked, safety on.
- Remove the magazine. “Remember that even though the magazine has been removed, a cartridge remaining in the chamber can still be fired!”
- Retract the bolt and lock it open. “This should eject any cartridge in the chamber, but…”
- “Always visually double check the chamber to be certain it is empty.”
- “The only ‘safe’ rifle is one in which the bolt is open and the chamber and magazine are empty.”2
The order is not a formality. Ruger explains the failure it prevents: when a bolt is worked by hand “the extracted cartridge can be ‘ejected’ into the magazine area, instead of outside the rifle,” and “if an empty magazine is in the rifle when the bolt is being hand retracted to extract a cartridge, the cartridge may drop on top of the magazine. Then, when the bolt moves forward, the cartridge will be chambered again!”2
Cartridges come out of the rotary magazine by “pushing them lightly downward and forward with the thumb, forefinger, or the rubber eraser end of a pencil against the rim of the top cartridge. Do not use a loaded cartridge as a ‘tool’.“2
7.3 Field Strip
Ruger’s field strip for rifles before model 32000, step by step as the manual gives it.1 “This is the extent of disassembly required for routine inspection, cleaning and lubrication.”
- Remove the magazine, open the bolt and check the chamber, then let the bolt close. The rear sight leaf should be down and the hammer cocked.
- Loosen the barrel band screw and remove the band — “Does not apply to non-barrel band models such as the Sporter.”
- Loosen, but do not remove, the takedown screw. (PM1269 names the tool: a 5/32 in hex key.2)
- Centre the safety so that “an equal amount of the button is exposed on each side. If the safety is not in the middle when the barrel-receiver assembly is lifted out of the stock, the stock will be damaged.”
- Swing the barrelled action up and out of the stock. “Be careful the two receiver cross pins and bolt stop pin do not fall out” — the stock is what retains them.
- Safety on. Drift out the two receiver cross pins and lift the trigger guard assembly out. “It is recommended that the components of the trigger guard assembly not be disassembled from the trigger guard.”
That last instruction is where Ruger stops a routine strip. The trigger group is cleaned as an assembly, not taken apart.
7.4 Detail Strip: Bolt and Barrel
Removing the bolt (PM058, rifles before model 32000).1 Ruger: “although removing and installing the bolt (along with the cocking handle-recoil spring assembly) is simple, it must be done correctly.”
- Position the action upside down so the bolt is accessible.
- Drift out the bolt stop pin at the rear of the receiver. (On a rifle with a KIDD or Volquartsen buffer, the buffer is what comes out here.)
- Pull the cocking handle fully to the rear with the left hand and, holding it there, lift the front of the bolt with the right hand until it disengages from the handle.
- Remove the cocking handle assembly through the ejection port.
- Lift the bolt out; “if it does not come out readily, turn the rifle over and the bolt will drop out.”
PM1269 gives the same operation for newer rifles with the handle held rearward while the bolt is lifted out first, then the guide rod “maneuver[ed] … out of the ejection port” and removed from its pocket.2
Removing the barrel. PM058 does not describe barrel removal for a fixed-barrel rifle. PM1269 does:2 with a 5/32 in hex key, “remove the two barrel retainer screws from the barrel retainer v-block,” remove the block, then remove the barrel. It is a detail strip, not routine maintenance, and it is not needed to clean the bore.
Where Ruger stops. The manuals take disassembly no further than bolt, charging assembly, trigger housing out of the receiver, and barrel. They give no procedure for:
- disassembling the bolt (firing pin, firing-pin stop pin, extractor, extractor spring and plunger);
- disassembling the trigger housing (hammer, sear, disconnector, safety, bolt lock, ejector, magazine latch);
- disassembling the magazine, which Ruger says not to do (Section 7.8).
No Ruger armourer’s procedure for those operations was found for this dive, and none is reconstructed here. Aftermarket makers publish installation guides for their own parts — Volquartsen’s for its automatic bolt release, for example3 — and those are the sources to follow when fitting those parts. Ruger’s own position on the fire-control parts is that the sear, hammer and trigger are factory-fit (Section 7.11).
7.5 The Takedown
To separate a Takedown, per Ruger’s procedure, with the knob already adjusted:1
- Remove the magazine, lock the bolt open, check the chamber.
- Push the locking lever toward the muzzle.
- Rotate the barrel assembly counterclockwise.
- Pull the barrel assembly forward out of the receiver.
To reassemble: insert the barrel assembly, rotate clockwise until it locks, and dry-cycle the action two or three times with the magazine out, letting the bolt “slingshot” forward to “properly ‘seat’ the barrel assembly.” The first-time knob adjustment is in Volume 3 §3.5. Once the halves are apart, the stock is removed from the receiver half in the ordinary way (Section 7.3).
With the barrel half out, the chamber end of the barrel is exposed — which on a pre-32000 rifle is the only way to reach the chamber directly without pulling the barrel from its clamp.
7.6 Reassembly and the Function Check
Bolt and charging assembly (PM058):1 receiver bottom up; seat “the rear end (cone pointed) of the recoil spring guide rod in the mating recess near the rear right side of the receiver”; the spring “must be flat against the side and ‘bottom’ of the receiver”; hold the handle rearward and compress the spring (“the flat side of the screwdriver blade” is Ruger’s tool); lay the recess in the top of the bolt onto the mating part of the handle and “press down on the bolt until a ‘click’ is heard”; let the handle carry the bolt forward slowly; cycle a few times.
Trigger housing: install the bolt stop pin, then “lay the trigger guard in place and install the two receiver pins. NOTE: Be sure the ejector is held in the ejector slot as you set the trigger guard in place.”1
Stock: the reverse of the field strip — safety centred, action in, takedown screw hand-tight. PM1269: “Do not over tighten the takedown screw. Over tightening this screw may cause damage to your firearm.”2 The barrel retainer screws carry the same warning.
The function check — Ruger’s, done after any reassembly, empty and pointed safely:1
- Bolt: pull fully to the rear and release, three times. It “should operate smoothly and travel freely within the receiver without binding.”
- Safety: cock the rifle; safety on; pull the trigger — “the trigger should not move and the hammer should not fall.” Safety off; pull — listen for the hammer. Three times. The safety must click in both positions.
- Bolt lock: lock open and release, per the rifle’s release type.
“If any of the above function checks fail or if you are uncertain, please consult a competent gunsmith or contact Ruger Customer Service … before using the rifle.”1
7.7 Cleaning and Lubrication
Ruger’s cleaning rationale is the blowback argument from Volume 2: “Cleanliness is most important to the function of this blow-back operated autoloading firearm. Any failures to feed or extract rounds may be indications of a dirty chamber.” Excess “dirt, powder residue, or oil in the chamber will cause malfunctions and may result in potentially dangerous cartridge case ruptures.”1
When. “At regular intervals, or whenever the rifle has been exposed to sand, dust, extreme humidity, condensation, immersion in water, or other adverse conditions.”1 Ruger publishes no round-count interval for the rifle. The only figure found in a Ruger source is historical: the 1964 direction sheet, as the NRA reported it, suggested disassembly “after firing 500 rounds or so.”4
The procedure (both manuals):12
- Field-strip (Section 7.3).
- Solvent-wetted patch through the bore several times; then a solvent-wetted bristle brush “back and forth the full length of the bore as many times as necessary to remove grease and dirt from the bore and chamber”; dry patches; examine.
- Powder solvent on a patch or brush for “all components of the mechanism.”
- A dry patch through the bore, then “a patch that is very lightly oiled.” Wipe all surfaces, then wipe with a very lightly oiled cloth.
The bore on a pre-32000 rifle has no rear access: the manuals’ instruction is simply to run the rod “through the bore,” and on a fixed-barrel rifle that means from the muzzle, unless the barrel is removed. Model 32000 and later rifles have a receiver plug that allows cleaning from the breech.2 A Takedown’s barrel half can be cleaned from the chamber end when separated (Section 7.5).
Cleaners. “The use of caustic or acetone-based cleaners are not recommended”; test any cleaner on an inconspicuous area; never automotive or paint-stripping products.1 On stainless rifles the receiver and trigger housing are clear-coated aluminium: “Do NOT use abrasives on the clear coating.”1
Lubrication. “Only a light application of oil is needed to provide adequate lubrication of moving parts and to prevent rust. Excess accumulations of oil tend to attract particles of dust and dirt and may congeal in cold weather.” And the warning: “Do not spray or apply lubricants directly on ammunition” — a round whose powder is contaminated may fail to ignite while the priming pushes the bullet into the bore, and the next shot then fires into an obstruction.1 Ruger does not publish a lubrication-point diagram for the 10/22; the instruction is a light film on all moving parts.
Suppressed rifles foul the action faster, because a suppressor raises the back-pressure that blows residue back around the case; the fouling of the suppressor itself, and its cleaning interval, are the .22 Rimfire dive’s Volume 10 and How Suppressors Work subjects.
7.8 The Magazine
Ruger’s magazine rules, from PM1269:2
- Test the tension. Load one cartridge, press firmly on the top of the case, release quickly: “The cartridge should instantly and fully move in to the feeding position. If it does not, the magazine should be cleaned. If cleaning does not restore proper tension, do not use the magazine.” Then remove the test round.
- Clean by soaking, with a solvent that will not harm the plastic body or rust the metal, then “shake it vigorously (with the loading opening away from you)” to clear it; check rotor movement and tension afterwards.
- “Do not disassemble the magazine. Improper reassembly or improper tensioning of the rotor spring can cause a potentially dangerous malfunction. If you experience a problem with the magazine, don’t use it. Get a new one.”
- “Damaged, non-standard, or improperly assembled magazines should not be used.”
The feed lips are the rifle’s feed ramp (Volume 2 §2.5). A burred or bent lip is a feeding fault that no cleaning of the rifle will fix. Ruger’s malfunction list checks it explicitly: “the magazine throat … free of nicks and burrs and … not deformed.”2
7.9 Inspection and Wear
Ruger’s inspection rule: “Prior to each use, visually inspect the firearm to ensure no components are damaged, missing, loose, bent, cracked, chipped, or peened. If you observe excessive wear, you should stop using your rifle and contact customer service or a trained, certified gunsmith.”1 After each range session, or exposure to sand, dust or moisture, “clean and inspect.”1
Ruger publishes no replacement intervals for any 10/22 part — no round count for springs, extractor, firing pin or bolt stop pin. None is offered here. What can be said from the mechanism and the parts policy is which parts are exposed to wear, and what to look at:
Table 1 — Ruger publishes no replacement intervals for any 10/22 part — no round count for springs, extractor, firing pin or bolt stop pin. None is offered here. What can be said from the mechanism and the parts policy is which parts are exposed to wear, and what to look at
| Part | What to look for | Why |
|---|---|---|
| Extractor | Hook edge rounded or chipped; spring weak | Takes all the extraction load (Volume 2 §2.6); Volquartsen describes other makers’ extractors’ “edges roll[ing] over”5 |
| Firing pin | Tip rounded; binding in its channel; light or off-centre rim strikes | The pin crushes the rim on every shot |
| Chamber edge | Peening at the top rear of the chamber | A firing pin striking with no rim to cushion it — see Section 7.12 |
| Bolt stop pin or buffer | A factory pin marked or bent; a buffer’s tubing split or compressed | It is the decelerator’s cam (Volume 2 §2.4); the rubber or polyurethane of a buffer is a wearing material |
| Recoil spring | Bolt closes sluggishly; failures to feed that follow a spring change | Blowback timing depends on it |
| Magazine lips | Burrs, bends | They are the feed ramp |
| Safety | No click in either position | Ruger: stop using it and send it in |
| Fired cases | Bulged heads, splits | Ruger: “the firearm should be returned to the factory for inspection”2 |
7.10 Malfunctions: Diagnosis
Ruger’s own statement is the starting point: “Most malfunctions are caused by improper or damaged magazines, incorrect ammunition, or poor maintenance.”2 Its procedure, in order:
- If the rifle and magazine seem not at fault, try another type of ammunition.
- If that does not “at once” cure it: unload (magazine first), safety on; clean the magazine and “bolt mechanism, paying particular attention to removing accumulated grease … from the bolt face, the extractor, the chamber, and the feed ramp”; check rotor tension; check “the magazine throat … free of nicks and burrs”; remove excess oil and solvent; try again carefully, with eye and hearing protection and the face clear.
- If it still malfunctions, stop using the rifle and contact Ruger.2
Organised by symptom, with the Ruger instruction or the mechanism from Volume 2 behind each line:
Table 2 — Organised by symptom, with the Ruger instruction or the mechanism from Volume 2 behind each line
| Symptom | Check first | Then |
|---|---|---|
| Failure to feed | Magazine: tension test; lips and throat for burrs; a different magazine | Chamber and feed area for grease; ammunition type; recoil spring if recently changed |
| Failure to extract | Chamber fouling; extractor and its hook clean | Extractor spring and plunger; extractor hook worn (a replacement part, Volume 4 §4.4) |
| Failure to eject | Ejector in its slot (the commonest reassembly error); bolt worked briskly when hand-cycling | Ejector worn or bent |
| Light strike / misfire | Ammunition lot; firing-pin channel fouled | Pin tip worn; pin binding; a replacement pin |
| Misfire or unusual report | Stop. Wait at least 30 seconds, then unload and check the bore for an obstruction with a rod | ”Do not ‘shoot out’ a bore obstruction”2 |
| Bolt will not stay open / releases on its own | Which release is fitted; the release installed correctly | Ruger: the bolt lock “is NOT a safety device” and can release if the butt is jarred |
| Bulged or split case heads | Stop firing | Ruger: return to the factory for inspection; on a rifle with a non-factory bolt, a gunsmith’s headspace check |
| Safety moves too easily / no click | Stop using the rifle | Ruger: return for repair |
Clearing a jam. Ruger’s specific instructions for a rimfire jam are worth repeating because they are about a cartridge that can fire outside the chamber: remove the magazine if possible; lock the bolt open “with the bolt stop before attempting to clear the jam,” since “drawing the bolt fully to the rear may bring the jammed cartridge along”; keep the face away from the ejection port; and “use only wood ‘tools’ so that a cartridge will not be ignited if you strike a primer … A 3/16” wood dowel rod with a point on one end is useful.”2 And the warning behind it: a rimfire round whose rim is struck while it is binding can fire before it is chambered, and “the cartridge case will rupture and its fragments will fly out of the firearm.” Never force a binding round home by striking the bolt or handle.2
7.11 What the Owner Fixes, and What Goes Back
The owner’s bench. Everything in Sections 7.2–7.8, plus replacing drop-in parts with their makers’ instructions: bolt releases, buffers, extractors, firing pins, bolts, handles and guide rods, complete trigger units, stocks, barrels. Ruger’s own position on parts it sells: “It is the purchaser’s responsibility to be absolutely certain that any parts ordered from the factory are correctly fitted and installed … The purchaser and installer of parts must accept full responsibility for the correct adjustment and functioning of the firearm.”1
Factory-fit parts. Ruger marks certain parts as fitted only at the factory, “on an exchange basis only. We will not return the replaced parts.” In the current parts list those are the sear, hammer and trigger, and, on the Takedown, the joint insert.2 Ruger will not sell these to an owner for self-fitting. The practical alternative is a complete aftermarket trigger unit (Volume 4 §4.7), which replaces all three at once, fitted by its maker.
What Ruger will and will not do. Ruger repairs 10/22s at its Newport, New Hampshire service department with a Repair Authorization Number obtained first; “all work performed is subject to a minimum labor charge,” and “custom gunsmithing service or nonstandard alterations are NOT AVAILABLE from Ruger Customer Service Departments.” Ruger asks that optics, slings, cases and “custom accessories” not be sent with the rifle.1 A rifle substantially built up with aftermarket parts is, in practice, a gunsmith’s job rather than Ruger’s — and Ruger’s manual carries a general warning against it: “Do not alter any part or add or substitute parts or accessories not made or sold by Sturm, Ruger & Co., Inc.”1
Shipping. Ruger’s manual states that federal law does not prohibit an individual from shipping a rifle to the manufacturer for repair, that rifles may go by U.S. Mail, and that the owner must check that state or local law will allow the rifle and its magazines to be received back; otherwise a dealer should ship it.1
Parts availability. The receiver is never sold. Everything else in the parts list is orderable from Ruger by part name, model and full serial number, subject to the factory-fit rule.1 The aftermarket (Volume 4) covers every wearing part in the bolt and trigger group.
7.12 Storage
Ruger: firearms should not be stored loaded; use the supplied locking device; and “Do not store the rifle in a leather case or scabbard. Leather attracts moisture, even though it may appear to be dry.”2 For a stainless rifle in long storage, “coat it with a light film of oil or preservative”; a hard paste wax is an alternative for external surfaces in use, kept out of the mechanism and bore.1
A note on dry firing. A rimfire’s firing pin, with no cartridge rim in front of it, can strike the edge of the chamber. Ruger’s two manuals treat this differently. PM058’s unloading section says the rifle “can be ‘dry fired’ for practice as long as it is empty and pointed in a safe direction,” while its own function check says “Do not dry fire the rifle” at the step where the hammer is cocked.1 PM1269 resolves it: the rifle “can be dry fired in moderation to perform basic function checks,” but “a snap cap should be used for extensive dry-fire practice to prevent damage to your firearm and its internal components.”2 The newer manual’s instruction is the one to follow.
7.13 Bibliography
Footnotes
-
Sturm, Ruger & Co., Instruction Manual for Ruger 10/22 Autoloading Rifles, PM058, B 4/2025 R40: General Information pp. 12–13; Takedown pp. 16–17; unloading and dry fire p. 24; Disassembly and Reassembly pp. 28–29; Check Your Rifle’s Function pp. 31–32; Care and Cleaning pp. 34–35; Service and Parts Policy, Shipping, Ordering Parts pp. 42–43; alterations warning p. 12. Image-only PDF read by optical character recognition. ↩ ↩2 ↩3 ↩4 ↩5 ↩6 ↩7 ↩8 ↩9 ↩10 ↩11 ↩12 ↩13 ↩14 ↩15 ↩16 ↩17 ↩18 ↩19 ↩20 ↩21 ↩22 ↩23 ↩24
-
Sturm, Ruger & Co., Instruction Manual for Ruger 10/22 Autoloading Rifle, PM1269, 10/22 6/2026 R1: To Unload pp. 23–24; To Extract and Eject pp. 24–25; To Clear a Malfunction and Minimize Malfunctions pp. 25–27; Disassembly and Reassembly pp. 28–35; Magazine Inspection and Care p. 39; Care and Cleaning pp. 39–40; Storage p. 47; Parts List pp. 50, 53. https://ruger-docs.s3.amazonaws.com/_manuals/Ruger_1022.pdf (accessed 2026-09-19). ↩ ↩2 ↩3 ↩4 ↩5 ↩6 ↩7 ↩8 ↩9 ↩10 ↩11 ↩12 ↩13 ↩14 ↩15 ↩16 ↩17 ↩18 ↩19 ↩20 ↩21 ↩22
-
Volquartsen Firearms, installation guide, 10/22 automatic bolt release. https://volquartsen.com/howto/install_1022_auto_bolt_release (accessed 2026-09-19). ↩
-
NRA Technical Staff, “Ruger Model 10/22 Carbine,” The American Rifleman, September 1964, reprinted 23 October 2014. https://www.americanrifleman.org/articles/2014/10/23/throwback-thursday-ruger-model-1022-carbine-sept-1964-the-american-rifleman/ (accessed 2026-09-19). ↩
-
Volquartsen Firearms, Exact Edge Extractor. https://volquartsen.com/departments/internal-parts-for-1022-and-magnum/inventory_configurations/811 (accessed 2026-09-19). ↩
Comments (0)