The AR-15 in 5.56 · Volume 5
Building One From Parts — Carriers, Triggers, Gas Blocks and the Order of Assembly
An AR-15 is the easiest centrefire rifle in the world to build and one of the easiest to build slightly wrong. The parts interchange, the tools are cheap, and nothing needs fitting. That combination means a first build almost always works, and it also means that the handful of things which genuinely matter get skipped, because nothing punishes skipping them immediately.
This volume is about the decisions that have consequences: the bolt carrier group, the trigger, the gas block, and the checks a builder must not skip. It does not re-derive headspace — the Headspace dive owns that material, and section 5.6 links to it rather than repeating it badly.
5.1 What a Build Actually Consists Of
The work divides cleanly along the receiver split described in Volume 2.
The lower is the firearm, acquired through a dealer. Completing it means installing the fire control group, the safety selector, the bolt catch, the magazine release, the pistol grip, the buffer retainer and spring, the receiver extension and the stock. A complete lower, such as the Smith & Wesson one documented here, arrives with all of that done.
The upper is not a firearm and is assembled or bought outright. Completing it means installing the barrel, the barrel nut, the gas block and gas tube, the handguard, the forward assist, the ejection port cover, and then dropping in the bolt carrier group and charging handle.
The two halves then pin together. There is no fitting, no headspacing of the receiver to the barrel, and no timing — the barrel nut indexes to the gas tube hole and that is the whole alignment problem.
5.2 The Bolt Carrier Group
The carrier group is the single component where spending more money buys the most, and also the component most heavily marketed on properties that do not matter.
5.2.1 What it has to survive
Every firing cycle, the bolt locks into the barrel extension, absorbs the full chamber pressure through seven lugs, is rotated out under residual pressure, and is slammed back and forward. The parts that break are, in order: the bolt itself, usually at the cam pin hole or at a locking lug; the extractor spring, which goes soft; and the gas rings, which wear.
Two quality indicators are worth knowing because they are real process steps rather than adjectives.
MPI — magnetic particle inspection — is a crack-detection process applied to the finished bolt. A bolt marked MPI has been individually inspected for flaws that are invisible to the eye.
HPT — high pressure test, or proof — means the bolt has been fired with a deliberately overpressure proof cartridge and then inspected.
A bolt marked MPI/HPT has been individually tested twice. That is a meaningfully different article from an untested one, and it is the specification worth paying for. The owner’s build records show attention to this: the bolt in the .450 build documented in that record is noted as “MPI marked Bolt,” which is the right thing to have looked for.
5.2.2 Coatings, and what they actually buy
This is where the marketing is thickest. Four finishes are in general circulation.
Phosphate (parkerised). The service standard. A porous conversion coating that holds oil well — which is its real virtue, since it is a lubricant reservoir rather than a lubricant. Cheap, durable, and completely adequate.
Black nitride. A diffusion surface treatment rather than a coating, as Volume 3 described for barrels: nitrogen driven into the surface at 550 to 570 °C in a salt bath, producing a hard case that is part of the parent metal.1 It is dimensionally stable because nothing is added on top, it is slick, and carbon does not key to it as readily as to phosphate. The Black Rain Ordnance carrier in the owner’s build records is a black nitride part.
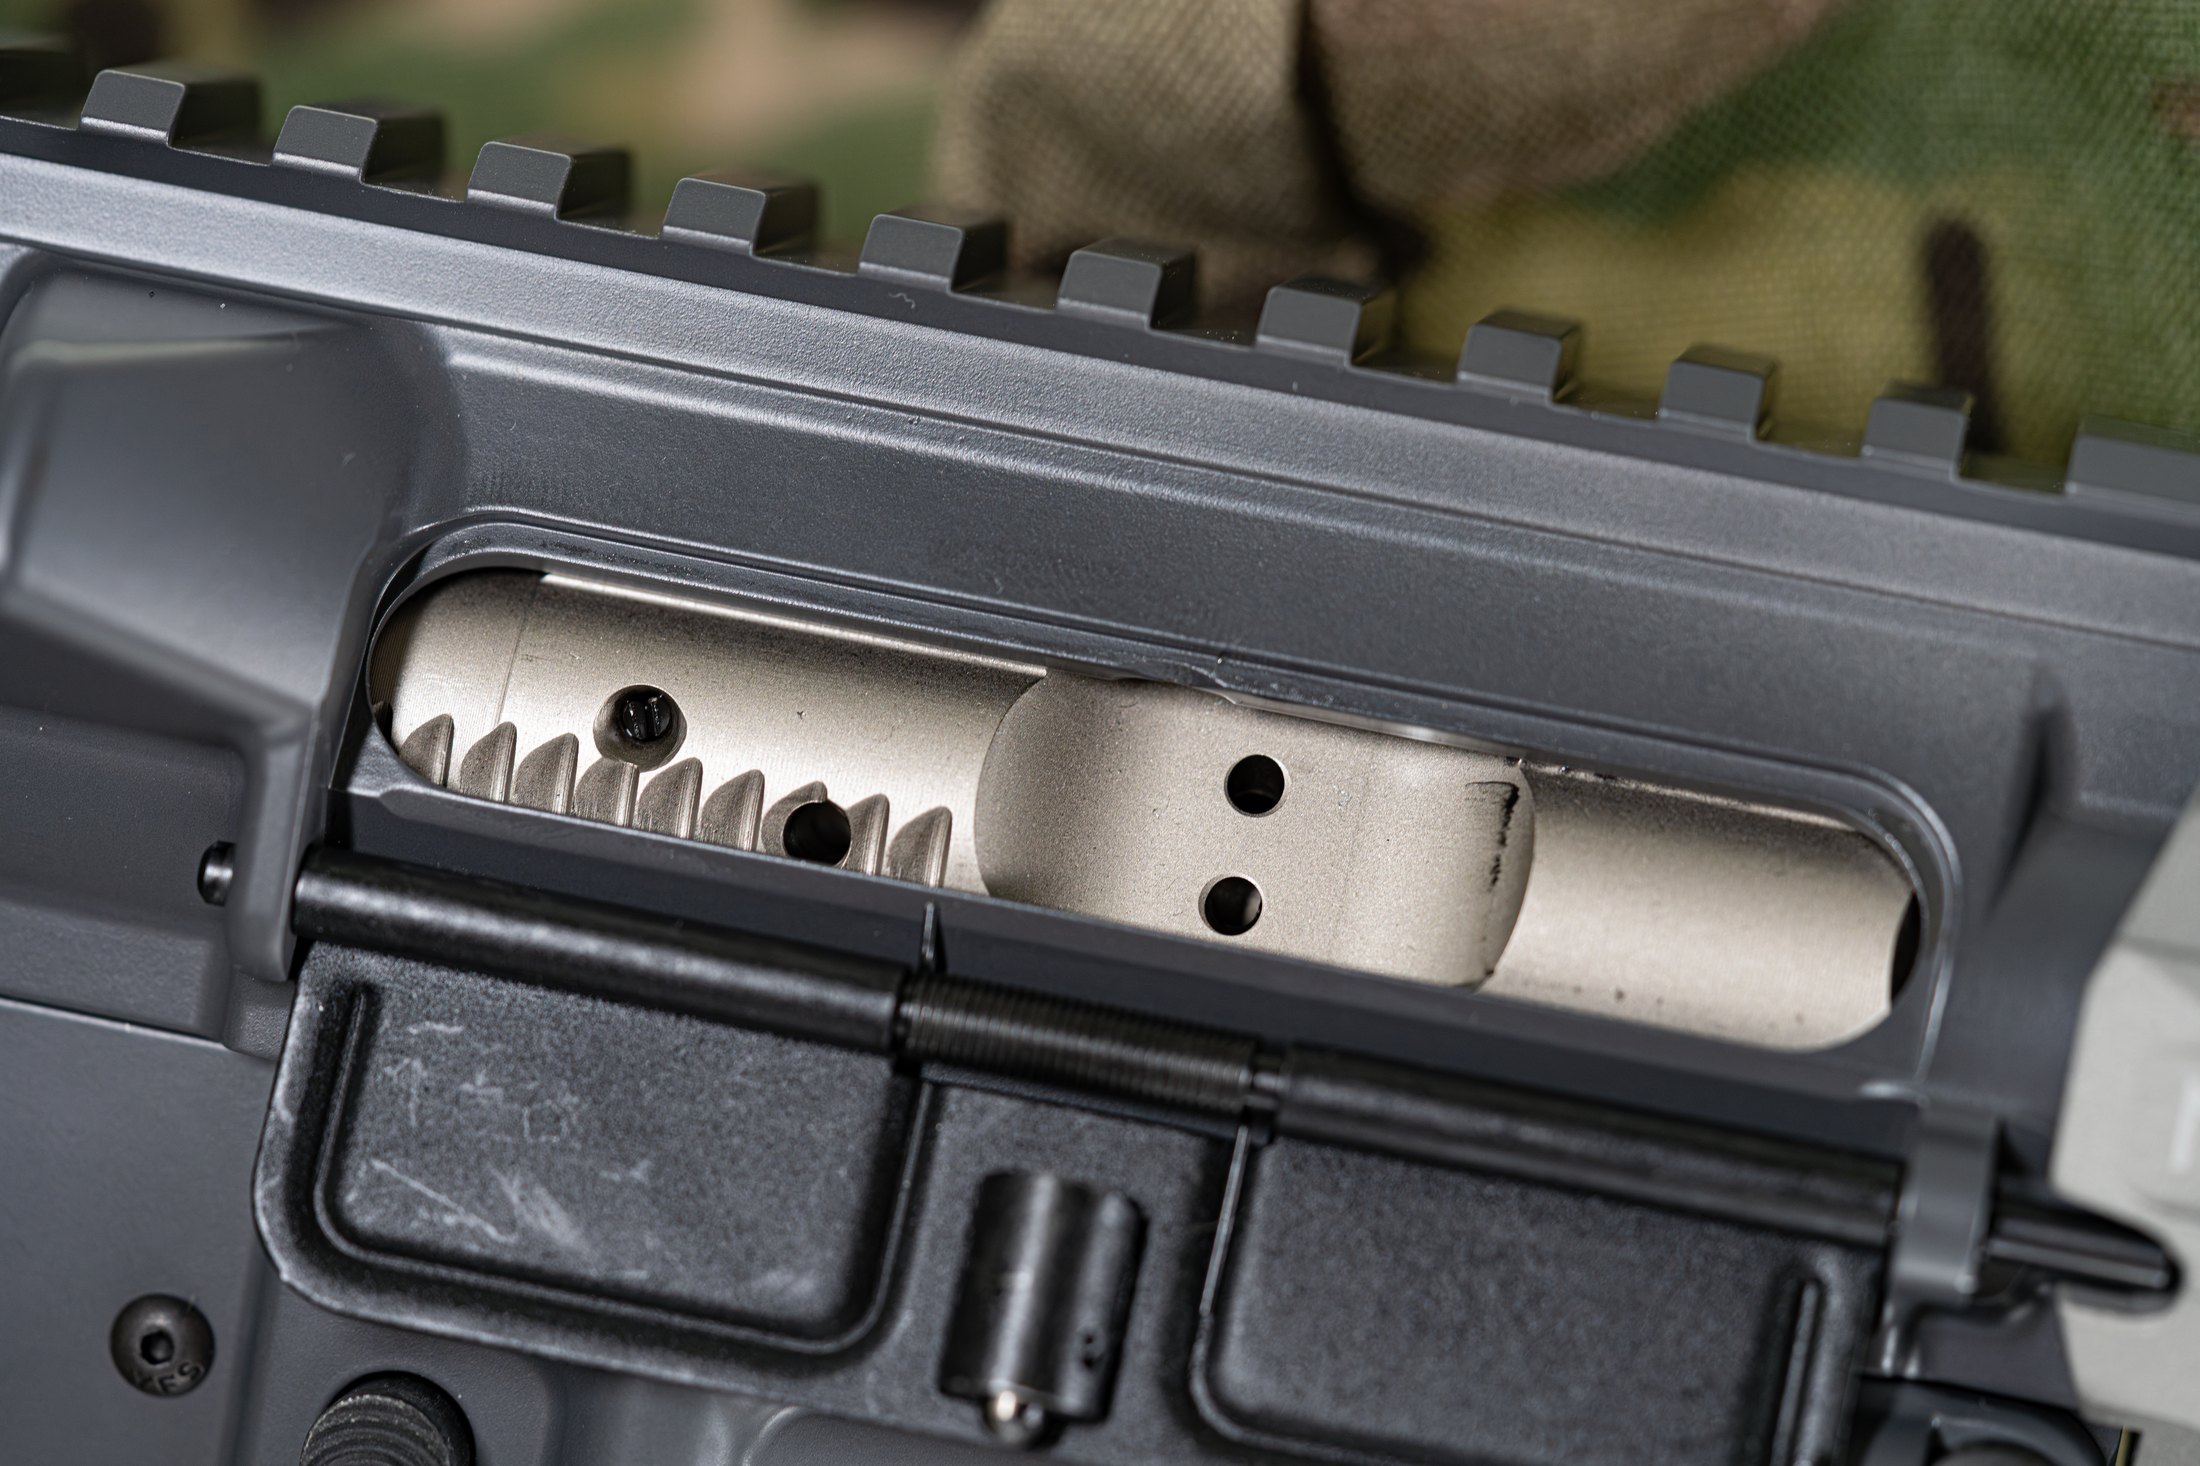
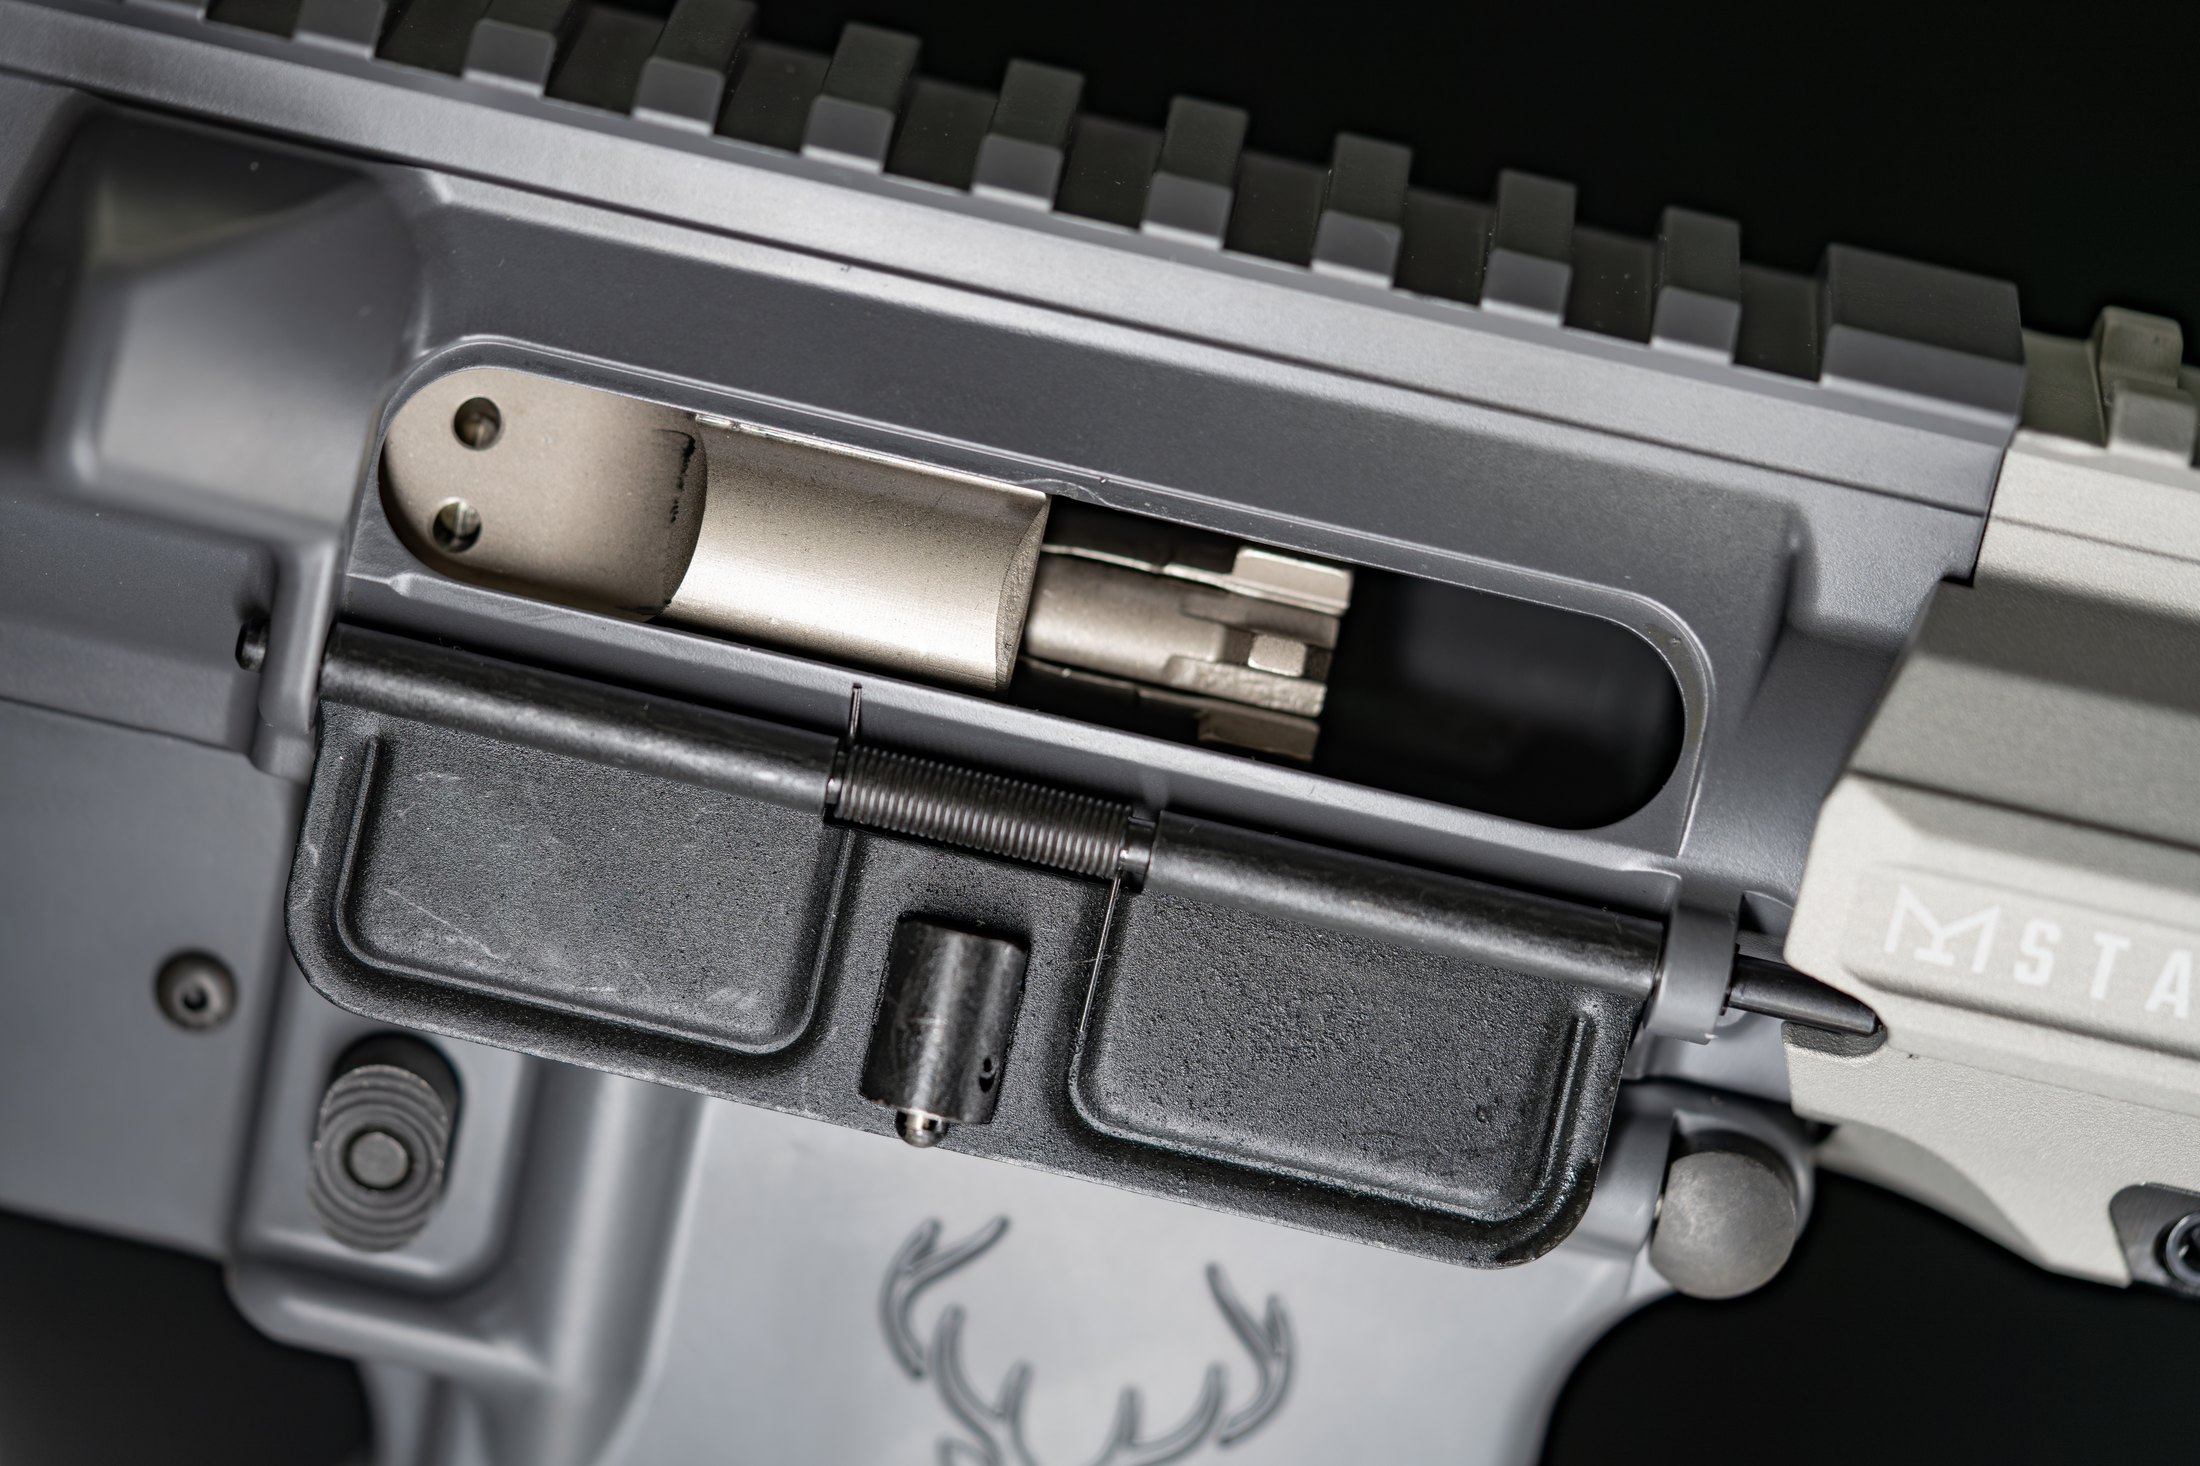
Nickel boron. The finish sold by FailZero under the name EXO, and the one the owner’s records specifically identify. FailZero describes EXO as a nickel boron coating developed by its parent company UCT Coatings, and makes four claims for it: that it provides “a permanent dry lubricity to metal surfaces,” that it allows “lube-free mission critical parts,” that it “improves corrosion and wear resistance,” and that it gives “cleaner operation for superior reliability” and “simplifies cleaning and maintenance.”2
Chrome. Less common on carriers; very slick, very visible.
5.2.3 An honest assessment
FailZero publishes no hardness figure and no friction coefficient. The company’s own page was checked directly for this dive and carries none.2 Every quantitative claim encountered for nickel boron in the retail market traces back to vendor copy rather than to published test data, and this dive prints no numbers for it.
What can be said on the mechanism, and it is not nothing. Volume 1 established from the technical literature that direct-gas operation “increases the amount of heat that is deposited in the receiver while firing, which can burn off and cover up lubricants,” and that the characteristic failure of the platform is running dry rather than running dirty.3 A finish whose central claim is dry lubricity addresses precisely that failure mode. The argument for nickel boron is therefore coherent rather than merely decorative: it is insurance against the specific way this design stops.
Against that: a properly lubricated carrier group in a properly maintained rifle does not care what it is coated with, and a coating is not a substitute for the oil. The strongest defensible statement is that nickel boron makes the rifle easier to clean and more tolerant of neglect, that this is a real benefit and a modest one, and that it does not make a good carrier group out of a bad bolt. A phosphate carrier with an MPI/HPT bolt is a better purchase than a nickel boron carrier with an untested one.
One practical drawback worth knowing: the pale finish shows carbon immediately, so a nickel boron carrier always looks filthier than it is.
5.3 Triggers
The standard fire control group is a deliberately heavy single-stage trigger with a long, gritty pull. It was designed to be safe in the hands of conscripts wearing gloves and it does that job well. It is also the single largest obstacle between most AR-15s and the accuracy their barrels are capable of.
Single-stage triggers have one continuous pull to the break. Two-stage triggers have a light take-up followed by a distinct wall, and then a short crisp break. Two-stage triggers suit deliberate shooting; single-stage triggers suit speed. Neither is better in general.
Drop-in cassettes house the hammer, trigger, disconnector and springs in a self-contained housing that drops into the fire control pocket and is retained by the standard pins. They are the reason trigger replacement on this platform is a fifteen-minute job. The caveat from Volume 2 applies: a cassette needs a fire control pocket machined to depth with a flat floor, and a receiver with a tool-path step in it will not seat one squarely.
The owner’s build records list a Black Rain Ordnance BRO-DIT single-stage drop-in trigger at a 3.5 lb pull for the Black Rain build. That part number is reported here as it appears in those records; Black Rain’s current catalogue was checked during this dive and the specific BRO-DIT, BRO-MLR, BRO-MUR-2 and BRO-SPEC15-BCG part numbers in those records could not be located in the current product listing. The records are a decade old and the maker has restructured its range. They are evidence of what was bought, not a current catalogue entry, and this dive does not present them as one.
5.4 Gas Blocks
The gas block clamps or pins to the barrel over the gas port and directs gas into the gas tube. It does one job and the only thing that matters is that it does it in line.
Alignment is the whole problem. A gas block whose port does not sit concentrically over the barrel’s gas port throttles the system. The symptoms are short-stroking, failure to lock back on an empty magazine, and erratic ejection — and they are routinely misdiagnosed as a weak buffer spring, bad ammunition or a dirty rifle. The check is simple and is worth doing before the handguard goes on: with the block fitted and the tube out, a light held at the muzzle end or a probe through the tube hole will show whether the two ports line up.
Set-screw blocks locate on a dimple or flat in the barrel and are secured with two screws. Adequate, and the commonest type. The screws want thread locker and they want checking after the first range session.
Clamp-on blocks grip the full circumference and are less dependent on the barrel being dimpled.
Pinned blocks are taper-pinned to the barrel. This is the service method and the most secure; it is also permanent.
Low-profile versus railed. A low-profile block sits under a free-float handguard and carries nothing. A railed block presents a short Picatinny section at the gas block position, which was the standard way of mounting a front sight or accessory before free-float handguards became universal. The owner’s records list a PRI gas block with a single Picatinny rail for the Colt carbine, sourced from MidwayUSA. PRI is a real and well-regarded maker — Volume 3 records that the Mk 12 Mod 0 used PRI Gen III free-float tubes in service4 — but the specific gas block part in those records could not be confirmed against PRI’s own current catalogue for this dive, and is reported as a record rather than a verified current product.
Adjustable blocks allow the gas flow to be restricted. Volume 3’s arithmetic is the argument for them: going from a 0.062 to a 0.070 inch port increases port area by 27 percent,5 so the system is extraordinarily sensitive to small changes, and a barrel that arrives over-ported has no other remedy. An adjustable block is the correct answer to a rifle that ejects brass violently forward, batters cases, or is being run suppressed.
5.5 Buffers and Springs
The buffer and spring are the other half of the gas system and are usually ignored.
Buffers come in weights — carbine, H, H2, H3 — increasing in mass by adding tungsten weights in place of steel ones. A heavier buffer slows the carrier, softens the impulse, and is the cheapest correction for an over-gassed carbine. It is also the first thing to try when a rifle short-strokes after the gas block alignment has been confirmed, because a buffer that is too heavy produces exactly that symptom.
5.6 Headspace — What a Builder Must Check
Headspace on an AR-15 is a property of the barrel extension and the bolt together, not of the receiver. The receiver merely holds them. This is why a barrel and bolt bought as a matched pair from a reputable maker are normally gauged together before shipping, and why mixing a bolt from one source with a barrel from another is the case that warrants checking.
The check itself is the standard one: the rifle should close on a GO gauge and should not close on a NO-GO gauge, with the extractor and ejector removed from the bolt so that neither interferes with the reading.
This dive does not re-derive the subject. The Headspace dive is fourteen volumes built on ANSI/SAAMI Z299.4-2015 and covers the gauges, the procedure, and the considerably more useful business of measuring the actual number rather than accepting a pass/fail verdict. Three of its findings bear directly on an AR build and are worth carrying across as pointers rather than restatements:
- SAAMI defines only a minimum and a maximum chamber. There is no FIELD gauge anywhere in the standard, and the two largest gauge makers put their third gauge in different places — so one rifle can be serviceable to one maker’s gauges and condemned by another’s.
- SAAMI measures headspace from the bolt face, which on this platform means the measurement belongs to the bolt as much as to the barrel.
- Forster and Manson disagree about whether 5.56 NATO and .223 Remington differ in headspace at all, as Volume 4 section 4.4 records.
A builder who buys a matched barrel and bolt, and who gauges the result before firing it, has done what this platform requires.
5.7 Assembly Order
The order below puts the fiddly, spring-loaded operations before the ones that would make them harder to reach.
Lower receiver
- Magazine catch and button.
- Bolt catch — the roll pin is the awkward one; a punch and a strip of tape on the receiver will save the anodising.
- Trigger guard.
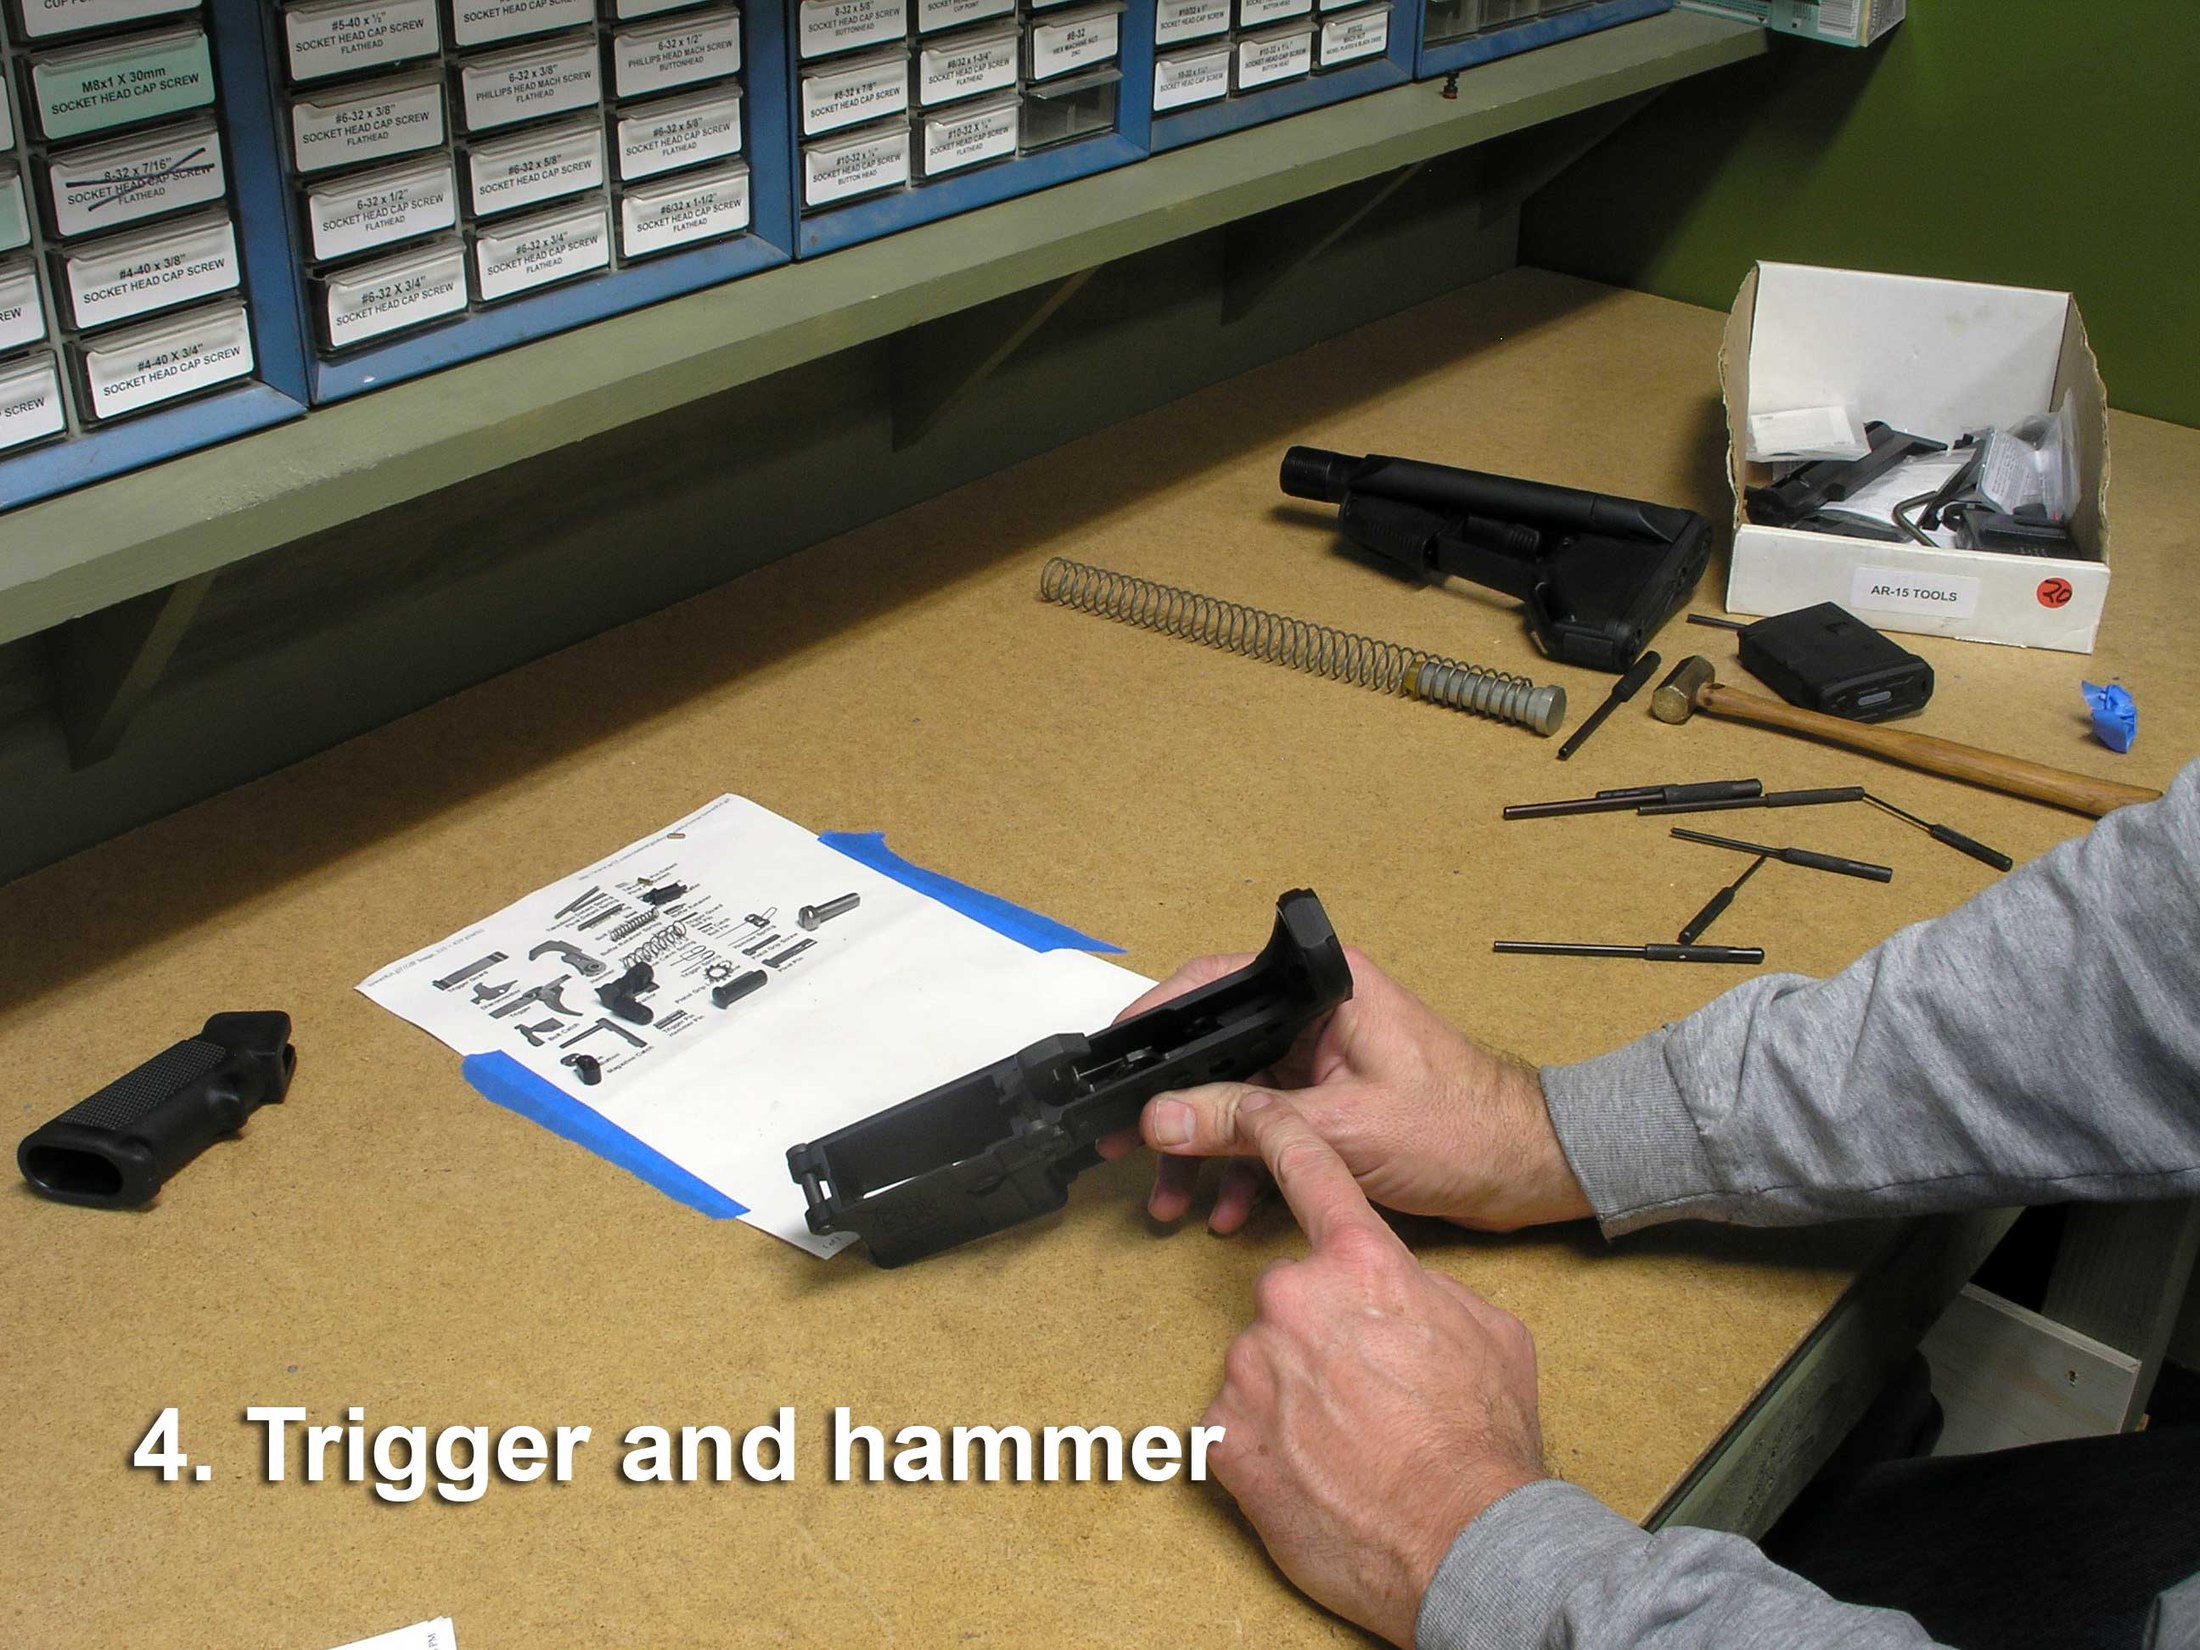
- Fire control group: hammer, trigger, disconnector, then the pins. Function-check before proceeding.
- Safety selector and its detent and spring, which are retained by the pistol grip — so the grip goes on immediately after.
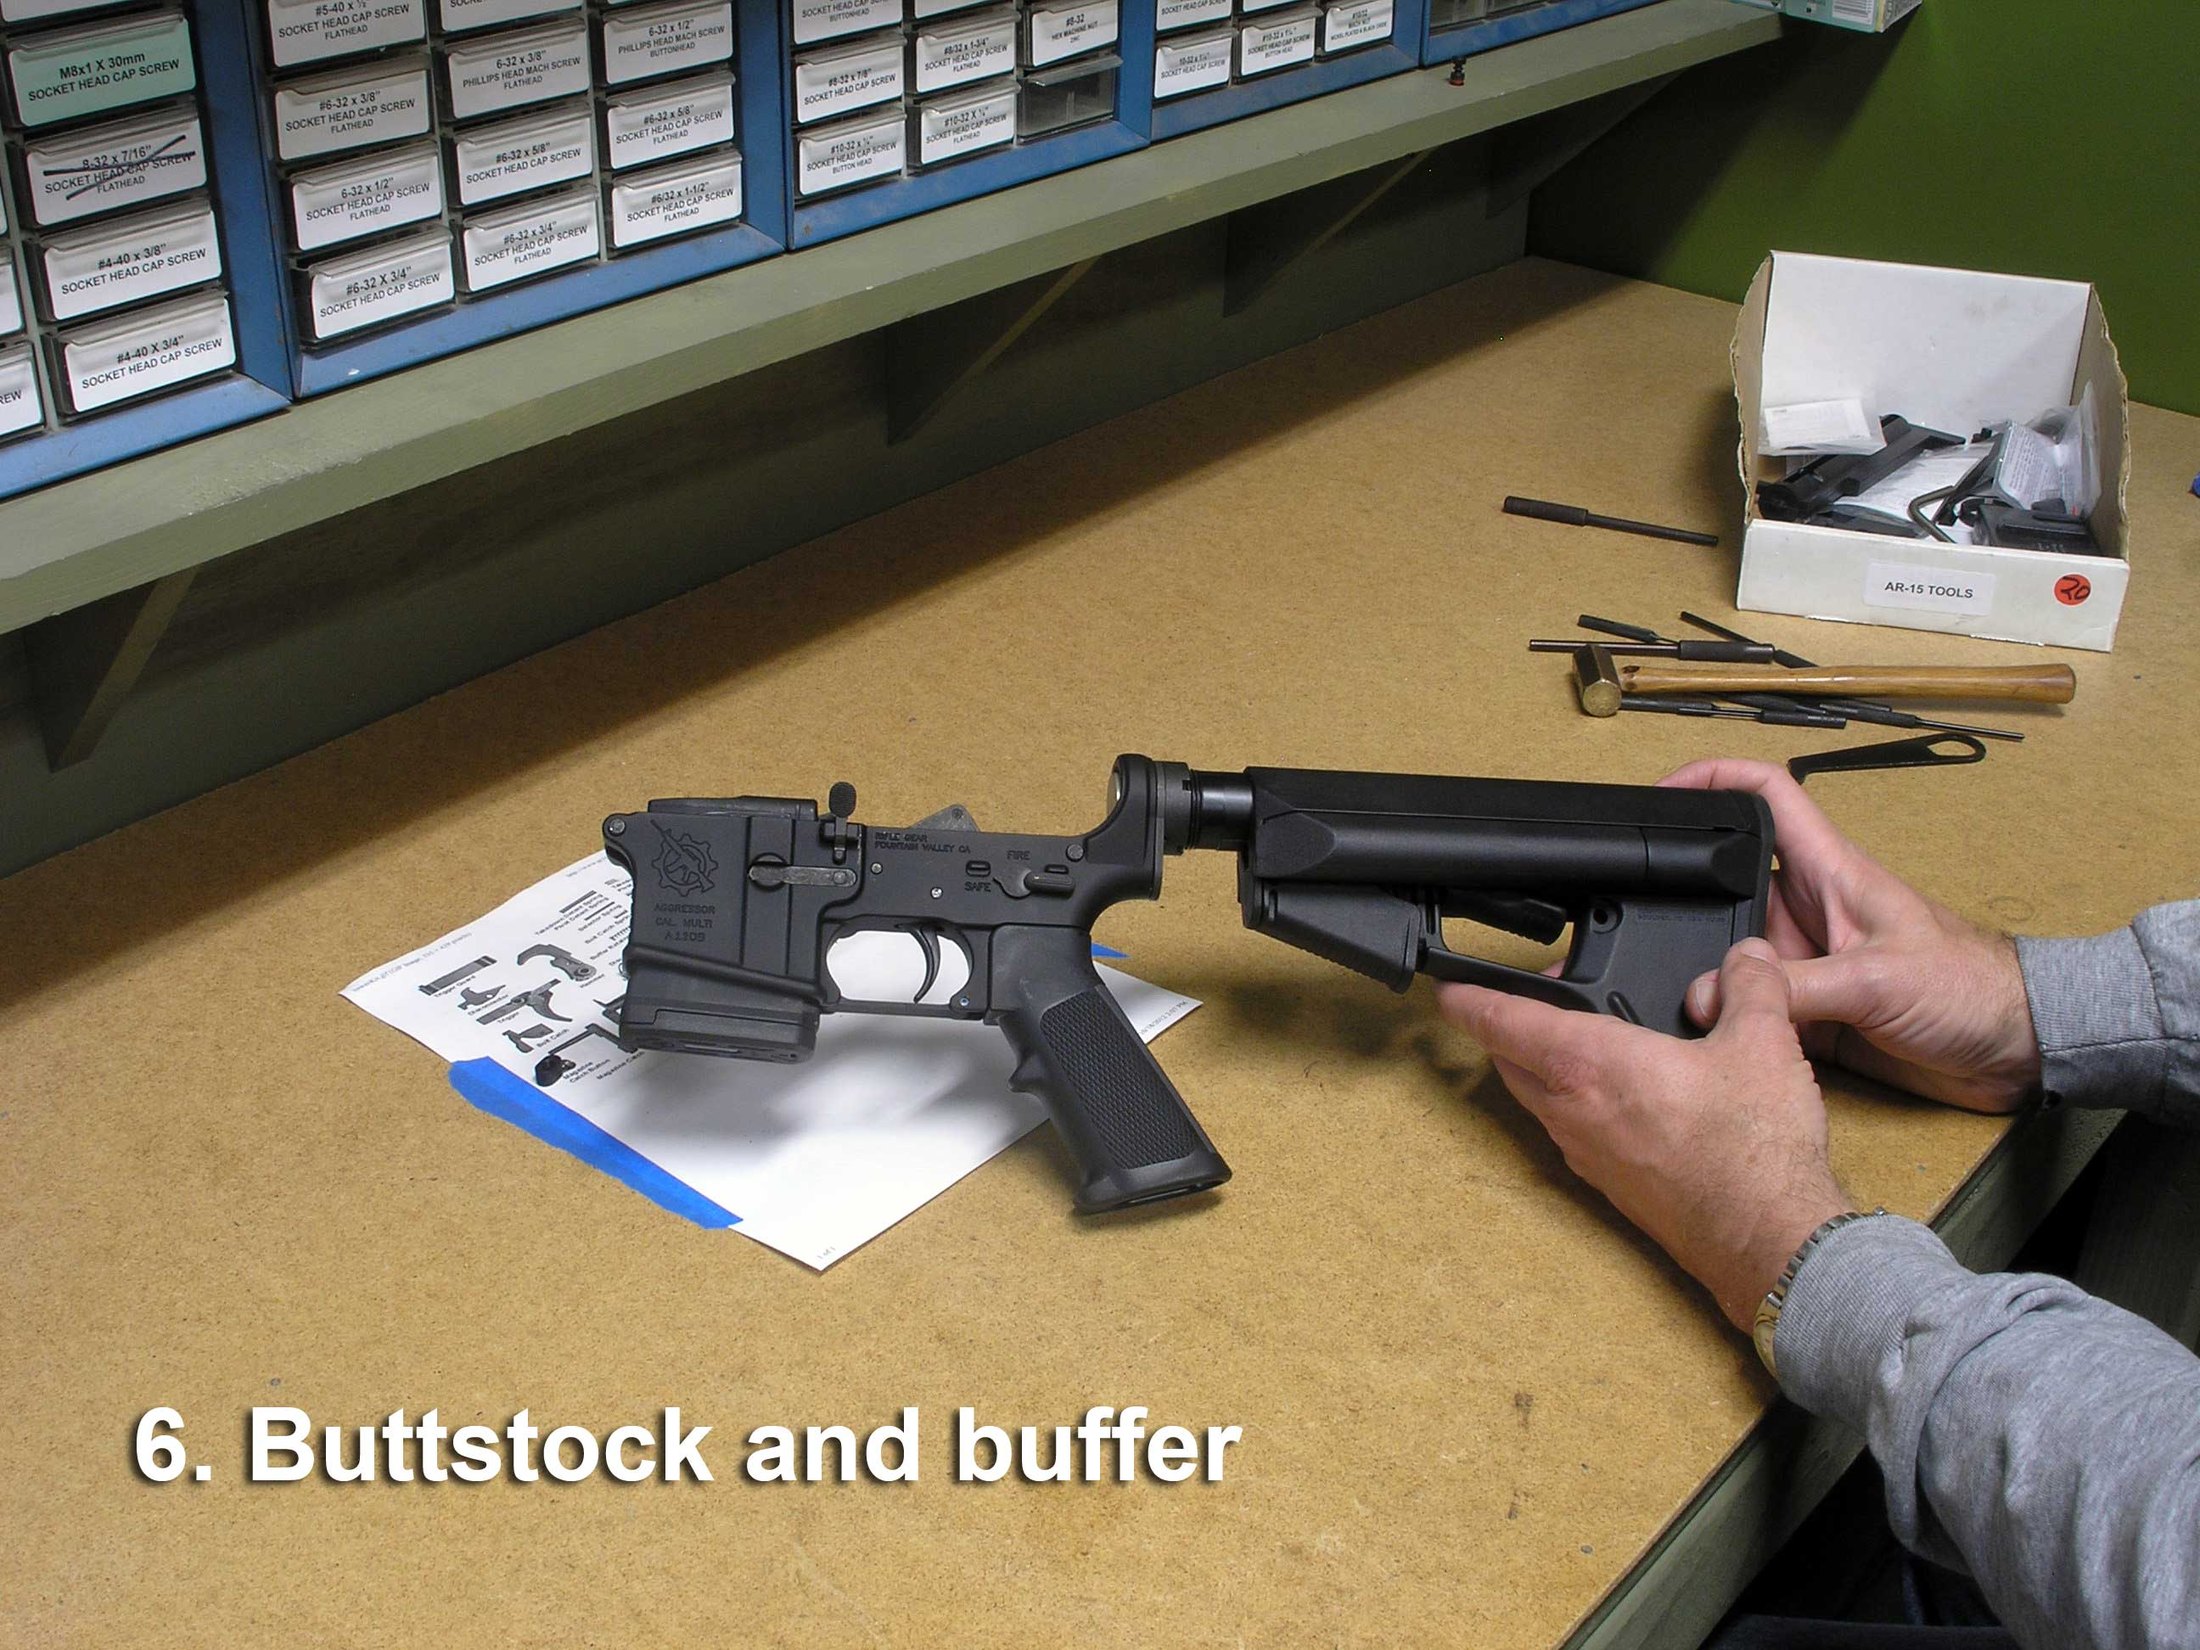
- Buffer retainer and spring, held down while the receiver extension is threaded in far enough to capture it. This is the step to do deliberately.
- Receiver extension, castle nut, end plate, stock. Stake the castle nut.
Upper receiver
- Forward assist and ejection port cover.
- Barrel into the receiver, indexing pin into its slot.
- Barrel nut, greased, torqued, and then advanced to the next alignment that clears the gas tube hole.
- Gas tube into the gas block, roll pin fitted; gas block onto the barrel; alignment checked per section 5.4.
- Handguard.
- Muzzle device.
Together
- Bolt carrier group and charging handle in.
- Pin the halves together.
- Headspace check per section 5.6.
- Full function check.
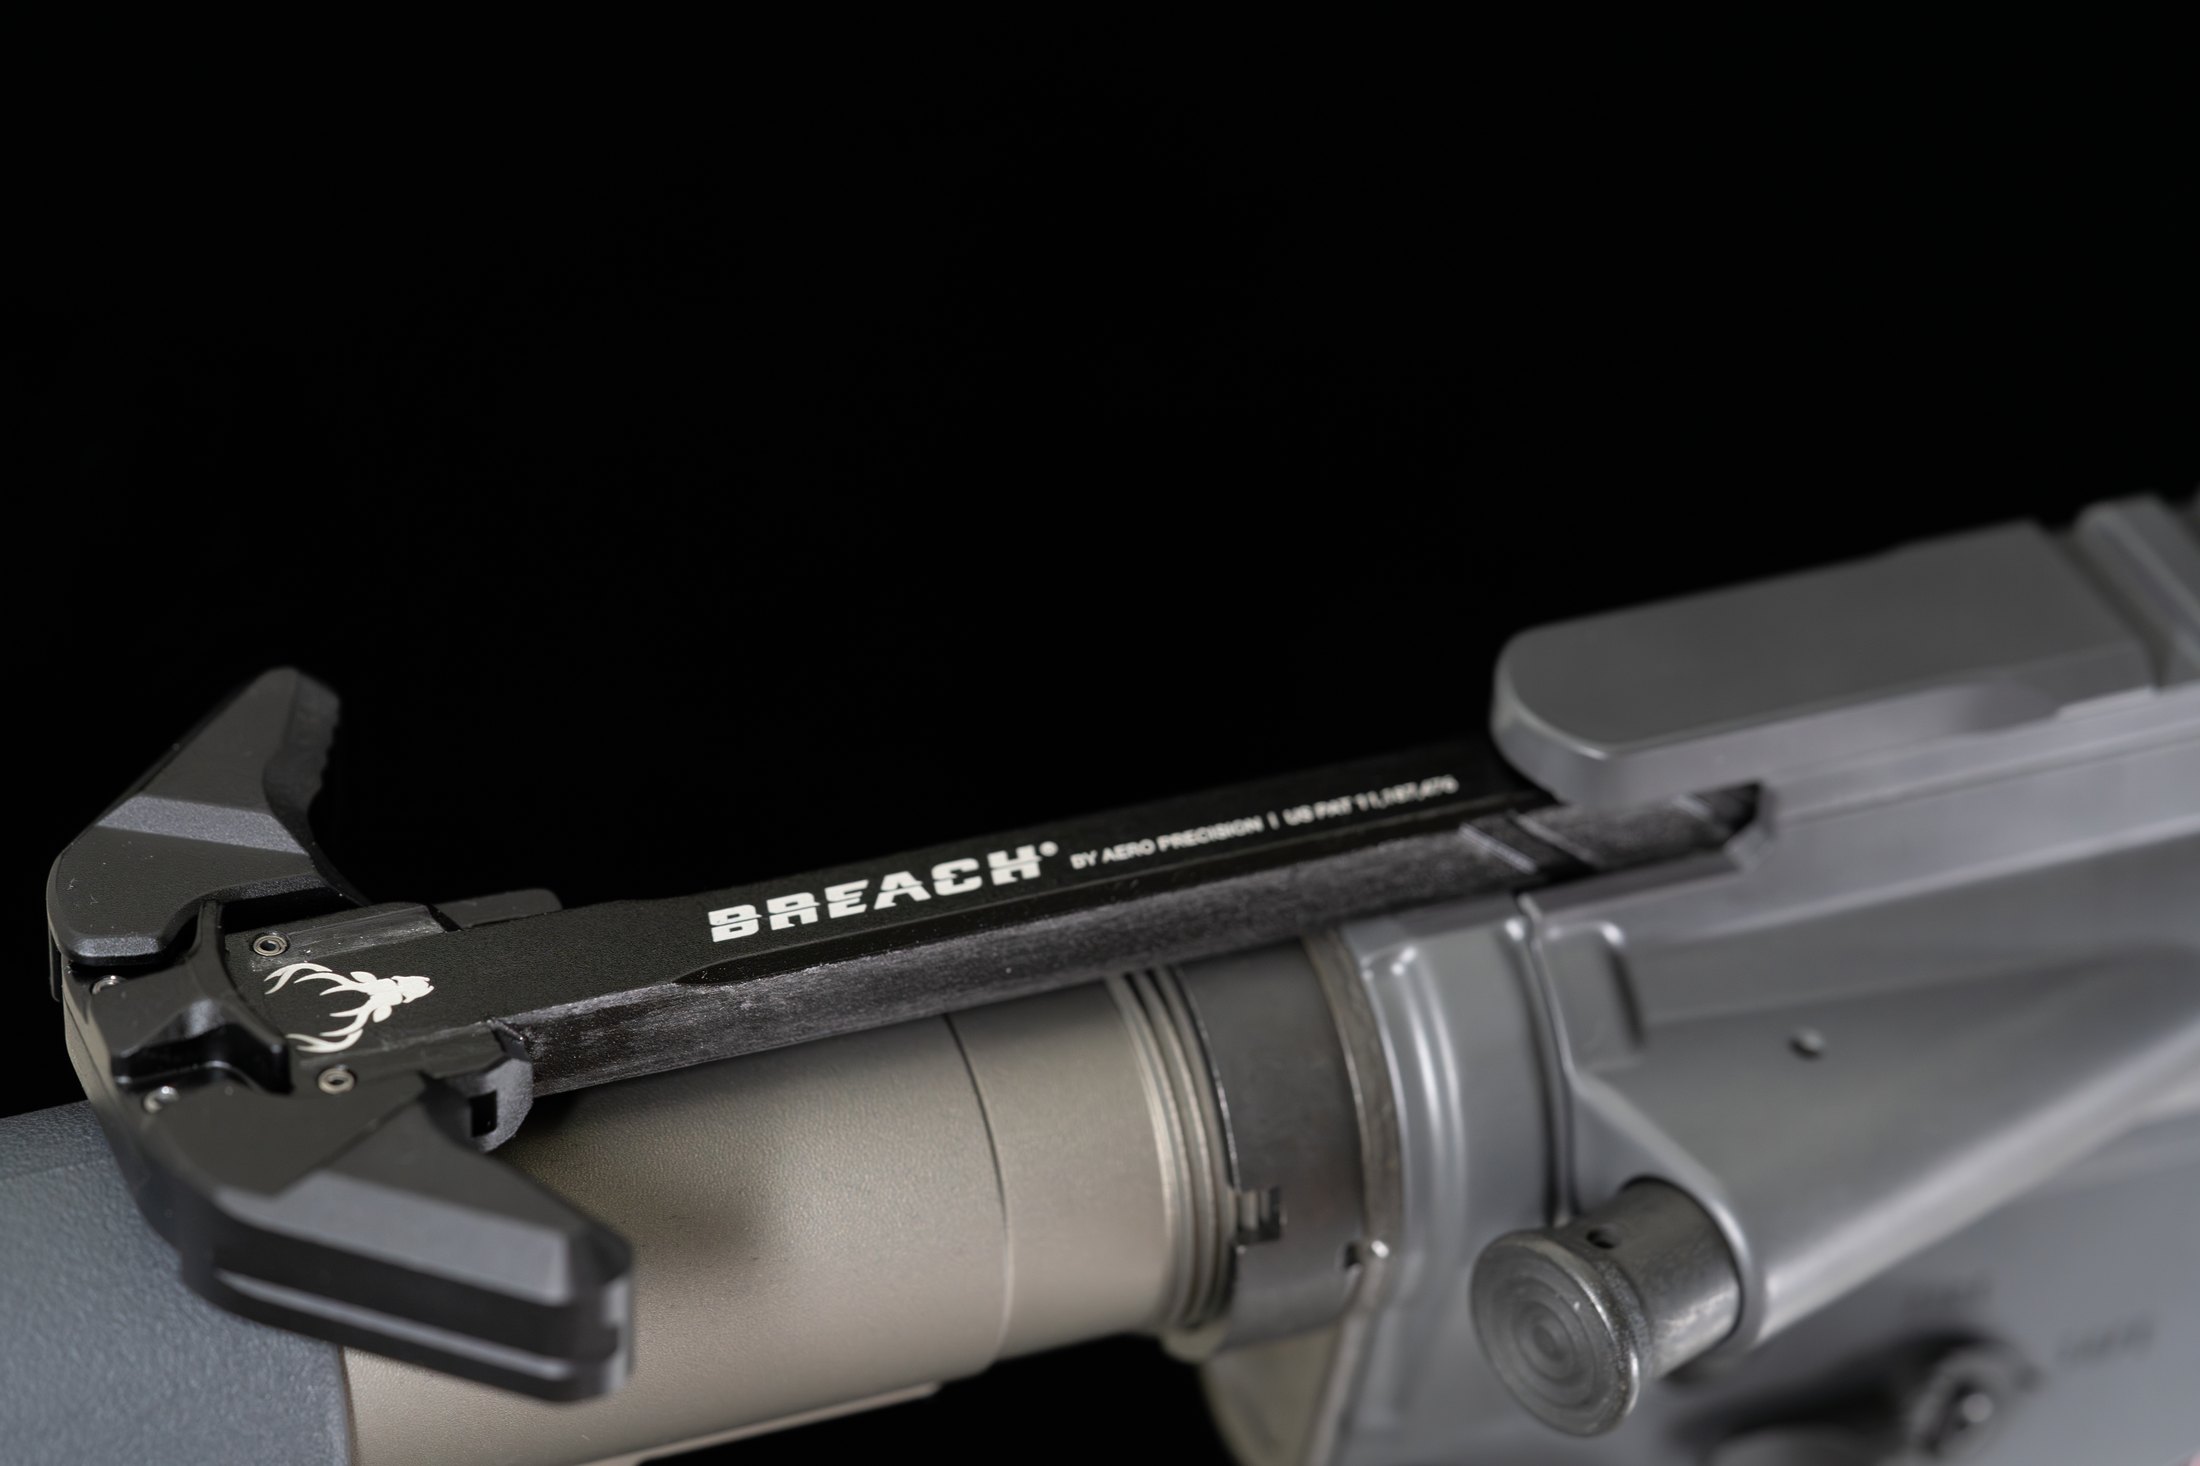
5.8 The Things That Actually Go Wrong
Ranked by how often they are the real cause when a fresh build misbehaves.
Gas block misalignment. By a wide margin the most common. Section 5.4.
Gas rings installed with the gaps aligned. The three rings should have their gaps staggered. Aligned gaps leak.
Castle nut not staked. It backs off, the end plate rotates, and the takedown detent spring launches itself.
Barrel nut under-torqued, which lets the barrel shift, or over-torqued to reach gas tube alignment, which distorts the receiver threads.
The wrong buffer weight for the gas system, per section 5.5.
A carrier key not properly staked. The two screws holding the gas key to the carrier are staked in place at manufacture. Unstaked or poorly staked screws loosen, the key leaks, and the rifle short-strokes. This is worth inspecting on any carrier before it is used, including a new one.
5.9 The Function Check
Performed on an empty rifle, with the magazine out and the chamber visually and physically confirmed clear, before it is ever loaded.
- Charge the rifle. Set the selector to SAFE. Pull the trigger — the hammer must not fall.
- Set to FIRE. Pull the trigger — the hammer falls.
- Hold the trigger to the rear. Cycle the charging handle. Release the trigger slowly — an audible click as the disconnector hands the hammer to the trigger sear.
- Pull the trigger again — the hammer falls.
- Check that the bolt locks back on an empty magazine and that the bolt catch releases it.
- Check magazine retention and free drop.
A rifle that fails step 3 has a disconnector problem and must not be fired.
Footnotes
-
“Nitriding”, English Wikipedia, consulted 2026-09-17, for the 550–570 °C salt-bath nitrocarburising temperature range and the description of nitriding as a diffusion case-hardening process rather than an applied coating. ↩
-
FailZero, failzero.com, consulted 2026-09-17, for the description of EXO as a nickel boron coating developed by parent company UCT Coatings and for the quoted claims regarding permanent dry lubricity, lube-free operation, corrosion and wear resistance, and cleaning. No hardness or friction figures are published on that page. ↩ ↩2
-
“Gas-operated reloading”, English Wikipedia, consulted 2026-09-17, for the statement that direct impingement operation deposits heat in the receiver which can burn off and cover up lubricants. ↩
-
“Mk 12 Special Purpose Rifle”, English Wikipedia, consulted 2026-09-17, for the PRI Gen III free-float tubes fitted to the Mk 12 Mod 0. ↩
-
“CQBR”, English Wikipedia, consulted 2026-09-17, for the gas port opening from 0.062 to 0.070 inch on the 10.3-inch barrel. The 27 percent port-area figure is this dive’s own arithmetic from those diameters. ↩
Comments (0)