The Rifle Shoppe Ketland Blunderbuss · Volume 4
Cleaning Up Castings & Building the Lock
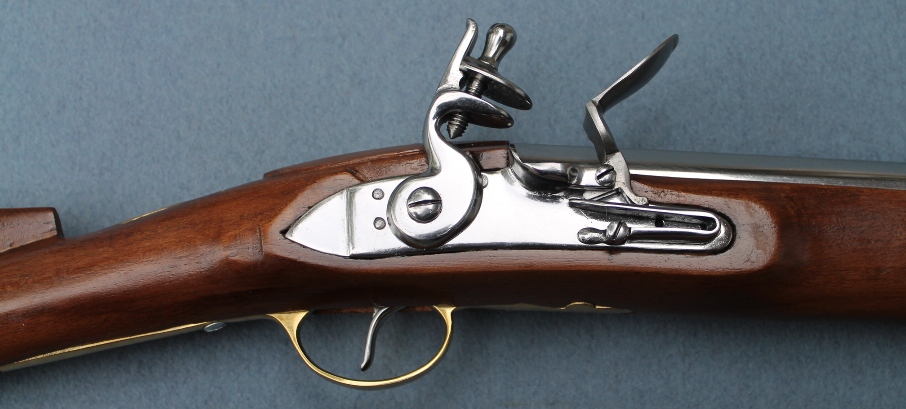
The 821 arrives as investment castings, and the first real work of the build is turning raw cast parts into clean, crisp, fitted components. This is bench gunsmithing, not assembly, and it is where the fidelity of the set is either honored or thrown away by a hasty file. This volume covers cleaning up the castings, and then the pivotal question of the whole project — building the 613 lock from castings, or the case for paying the extra $300 to skip it.
4.1 What investment castings arrive looking like
Investment casting (the lost-wax process The Rifle Shoppe uses) produces parts that are dimensionally close to correct and faithful in shape — that is the point of the process and the reason the set is faithful to the original. But every casting comes off the tree with two things you must remove: a sprue stub where molten metal entered the mold, and mold flash or a parting line where the mold halves met. There is also a slightly grainy or matte cast surface texture over the whole part. None of this is a defect; it is simply the state raw castings are in, and dressing it is expected work.
The tools are ordinary gunsmithing hand tools: a set of files — flat, half-round, and needle files — draw-filing being the workhorse; scrapers for flats and hollows; stones and abrasive paper in descending grits for finish; and a bench vise with soft jaws. Work slowly and preserve the original lines. The cardinal rule of casting cleanup is that you are removing sprue and flash, not reshaping the part. The buttplate, guard, and sideplate carry the Ketland’s period profile; your job is to make the surface clean and the edges crisp while leaving that profile exactly where the mold put it. It is far easier to file away a correct line than to put it back.
4.2 Dressing the furniture and barrel
Start with the least critical castings to build your feel — a ramrod pipe, the sideplate. Cut the sprue stub down close with a saw or a coarse file, then draw-file the area smooth so it disappears into the surrounding surface. Knock down the parting line the same way, following the part’s contour rather than flatting across it. Bring flats up with progressively finer files and then paper on a hard backer; bring curved surfaces up with a half-round file and scraper. The goal at this stage is a clean, uniform surface ready for final polish in Volume 6 — not a mirror yet, but true and crisp.
The barrel gets the same treatment on its exterior: dress the casting texture and any parting line along its length, keeping the flats flat and the flare fair, while leaving the bore alone — it is finished at .75. Take special care at the breech and around where the tang and touch-hole will sit; those areas must be clean and true because they are load-bearing and because inletting (Volume 5) references them.
4.3 Building the 613 lock from castings
If you bought the $1,195 set, the lock is a bag of castings and you are now a lockmaker. The 613 is a conventional English flintlock, and building it means fitting a mechanism that must do three mechanical jobs reliably: hold at half-cock (the safety notch) without slipping, hold at full-cock and release crisply when the trigger trips the sear, and throw a hard, consistent shower of sparks off the frizzen.
The sequence, in broad strokes:
- Dress every casting — lockplate, cock, tumbler, sear, bridle, frizzen, and springs — as above, cleaning sprue and flash.
- Fit the tumbler to the plate and bridle so it turns freely with no end-shake, and cut or clean the half- and full-cock notches to crisp, correctly angled bearing surfaces. Notch geometry is the difference between a lock that holds and one that slips off half-cock — a dangerous fault.
- Fit the sear so its nose engages both notches fully and releases cleanly, and set the sear spring for a positive but not brutal trigger pull.
- Fit and time the frizzen and frizzen spring so the frizzen holds closed over a primed pan, snaps open crisply under the cock’s blow, and presents its face square to the flint’s edge for a full scraping strike.
- Fit the mainspring for enough power to spark hard without overstressing the mechanism.
Then the part that gates the whole thing: hardening. The tumbler notches, the sear nose, and the frizzen face must be hardened (and the frizzen properly so, to spark) while springs must be tempered to spring temper, not left dead-soft or run brittle. Getting the heat-treat right on these parts — the correct hardness in the right places, drawn to the right temper — is the single most consequential skill in lock-building. A frizzen too soft will not spark; notches too soft will round and the lock will fail to hold cock; a spring run wrong will take a set or snap. This is entirely doable with the right setup and experience, and it is enormously satisfying, but it is not a first-time-at-the-forge job to bet a $1,195 set on.
4.4 The case for the assembled lock
Which is exactly why the $1,495 set exists. Paying the extra $300 for the assembled 613 lock buys a mechanism that is already fitted, timed, hardened, and sparking — built by people who build these locks routinely. You still inlet and hang it (Volume 5), but you never risk the heat-treat, and you eliminate the one sub-assembly most likely to turn a beautiful gun into a frustrating one.
The honest recommendation: if you have built and hardened a flintlock before, own or can borrow the heat-treat setup, and want the full builder’s experience, take the castings and the $300 saving. If you have any doubt about hardening a sear and a frizzen correctly, buy the assembled lock. On a set this expensive and this labor-intensive, a working lock for $300 is the cheapest insurance in the project — and it lets you spend your bench time on the inletting, which is where this build is truly won or lost.
Sources
General flintlock lock-building and casting-cleanup practice (draw-filing, notch geometry, frizzen hardening and spring tempering); The Rifle Shoppe catalog (cat. 821, series 613 English lock, castings or assembled).
Comments (0)