Savage 93R17 (.17 HMR) · Volume 5
Keeping It Working — Field Strip, Cleaning a .17 Bore, Maintenance and Repair
Savage's own takedown, the bolt it forbids the owner to open, the fourth-power law behind the .17 cleaning-rod problem, and the line between the bench and the factory
5.1 Keeping It Working — Field Strip, Cleaning a .17 Bore, Maintenance and Repair
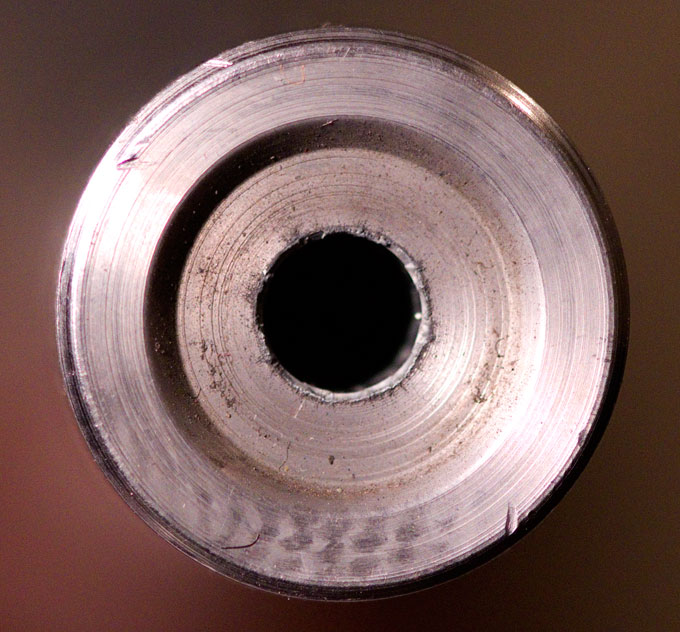
Savage draws a sharp line in its documents between what the owner of a Model 93 does and what a gunsmith or the factory does. The owner removes the bolt, removes the stock, adjusts the AccuTrigger within its limits, cleans the bore from the chamber end, inspects, and replaces a short list of parts. Everything else, including any disassembly of the bolt, is outside the line. This volume follows that line exactly, gives every step Savage publishes, and says plainly where the maker publishes nothing.
The mechanism these procedures act on is described in Volume 4. General rimfire handling, including jam-clearing and the misfire discipline that applies to every rimfire, is covered in the hub’s Ruger 10/22 dive, where Ruger’s own instructions are quoted; they are referred to rather than repeated here.
5.1.1 The field strip
Savage publishes two field-stripping operations for the Model 93: removing the bolt, and removing the stock. There is no further level of owner disassembly.
5.1.1.1 Removing and refitting the bolt
From Savage’s 2022 service article for the Mark I, Mark II, Rascal, Model 93/93R17 and B Series, and the manual:12
- Confirm the rifle is unloaded and remove the magazine.
- Open the bolt.
- Move the safety forward to the fire position. (At FULL SAFE the trigger is locked, and the trigger is the bolt stop.)
- Press the trigger and hold it fully rearward.
- Draw the bolt rearward out of the receiver.
To refit:
- Check that the bolt handle has not rotated out of position while the bolt was out. With the bolt handle in line with the cutout in the receiver, the firing pin should be at top centre.
- Hold the bolt in that alignment and slide it into the receiver with the trigger held fully rearward.
- If it does not go in easily, take it out and recheck the alignment. It is never forced.
- Return the safety to FULL SAFE and refit the magazine.
Before refitting, confirm that the four digits engraved on the bottom of the bolt match the last four digits of the receiver’s serial number, and never have two Savage rimfires apart at once.2
5.1.1.2 Removing and refitting the stock
The manual’s procedure for the Mark I, Rascal, Mark II and Model 93:2
- Remove the detachable magazine.
- Lift the bolt handle and draw it fully rearward.
- Look and feel to be sure the chamber is empty.
- Turn the rifle upside down, muzzle pointed away.
- With a 9/64-inch hex key (5/32-inch for a thumbhole stock), loosen and remove the screws securing the stock. The manual says two; Savage’s 2022 service article says three action screws and a 5/32-inch key (Volume 4 §4.9 sets the sources out side by side).
- Lift the barrelled action out of the stock.
To refit: place the action in the stock, refit the screws, and tighten “only to secure the stock”, not enough “to indent the stock or MAGAZINE RETAINING PLATE”. Savage’s three published torque figures are 15 in·lb (service FAQ), about 18 in·lb (manual), and 18–20 in·lb on the front two screws with the rear trigger-guard screw “just finger tight” (2022 article); they are not averaged here. Then cycle the bolt several times, and with the rifle empty check both safety positions: at FULL SAFE “the trigger should have no movement when pulled.”234
5.1.2 The detail strip: what Savage says not to do
A full detail-strip procedure would normally follow here. Savage publishes none for the Model 93, and it tells the owner not to perform the most important part of one.
- The manual: “DO NOT DISASSEMBLE THE BOLT ASSEMBLY.”2
- The service desk: the rimfire bolt is “designed so that [it does] not have to be broken down and cleaned”; if it must be disassembled for repair, Savage “recommends that it be done by a licensed gunsmith who is familiar with the product”.4
- The parts policy: “Only the parts indicated may be purchased by an individual. All other parts/subassemblies are either ‘factory fit’ or available to qualified gunsmiths only.”2
No bolt or trigger-group disassembly sequence is reproduced in this dive. Sequences for the Mark II and Model 93 circulate widely; none was traceable to Savage, and a plausible-looking procedure for a striker assembly under spring load is worse than none. What a correct procedure would have to account for, from what Savage does publish:
- The striker is under spring pressure inside the bolt (“the internal hammer is restrained within the bolt assembly”), so any bolt disassembly releases a compressed spring.
- The bolt is fitted to the receiver. Parts exchanged between bolts, or a bolt reassembled with a part out of position, change a factory-fitted assembly.
- The AccuTrigger’s safety depends on the AccuRelease blocking the sear. Savage attaches the condition “when maintained and regularly serviced” to that protection, and it treats the trigger’s internals as outside owner service, other than the pull-weight adjustment.
5.1.3 Cleaning a .17 bore
5.1.3.1 Savage’s procedure
The manual’s cleaning procedure is short, and each step matters:2
- Prepare “a suitable surface, adequate ventilation, correct caliber cleaning rod, brush, patches, powder solvent, and oil.”
- Remove the bolt.
- Lay the rifle horizontally with the ejection port facing down.
- “ALWAYS STARTING FROM THE CHAMBER END, PUSH THE CLEANING ROD THROUGH THE BORE AND OUT THE MUZZLE END.”
- Brush with a small amount of powder solvent, several passes.
- Change to a patch tip; push clean patches through from the chamber end, several times.
- One patch saturated with gun oil, then one dry patch “to remove the excess oil”.
- Check the bore “to be sure there are no obstructions (i.e. pieces of cleaning patch, etc.)”.
- Verify that the safety works.
“A very thin film of oil is sufficient protection — do not over oil.”
The instruction to clean from the chamber end is the reason a bolt action is the easiest rimfire of all to clean well: with the bolt out, the rod enters straight in line with the bore, and nothing is dragged across the crown. The ejection-port-down position lets solvent and debris run out of the action rather than into the trigger.
5.1.3.2 The .17 cleaning-rod problem, quantified
The difficulty every .17 owner meets is the rod. A cleaning rod for a .17 bore has to be thin enough to pass through a .17 bore with a patch around its jag, and a thin rod is a flexible one. How much more flexible is a matter of simple mechanics, not opinion.
A rod’s stiffness in bending, and the load at which a slender rod pushed from one end bows sideways (its Euler buckling load), both scale with the second moment of area of its cross-section, which for a round rod goes as the fourth power of its diameter. If a .17 rod is made in the same proportion to its bore as a .22 rod is to a .22 bore, the ratio of their stiffnesses is:
(0.172 ÷ 0.224)⁴ ≈ 0.35
using the nominal .172-inch and .224-inch bullet diameters as the scale. A .17 rod is about a third as stiff as the equivalent .22 rod, and bows at about a third of the push. A rod long enough for a 21-inch barrel from the chamber end is also a long, slender column, and buckling load falls with the square of length as well. The calculation is this dive’s, and its one assumption, rod diameter proportional to bore, is stated; no maker’s rod dimensions were obtained.
What follows from that:
- The rod bows, and a bowed rod rubs. Pushed hard, a thin rod bends inside the bore and bears on the lands along its length. This is the mechanism behind the standard advice to use a coated, one-piece rod: a coating is softer than the barrel steel, and a one-piece rod has no joints to catch or to kink.
- Push gently, with short strokes and the rod supported near the action. Buckling load rises sharply as free length falls; holding the rod close to where it enters the receiver reduces the length that can bow.
- A bore guide earns its keep on a .17. A guide in the receiver centres the rod at the entry point and keeps a flexing rod off the chamber throat. On a bolt action it is easy to fit, because the bolt is out.
- A pull-through avoids the problem altogether. Anything pulled through the bore is in tension, and a cord cannot buckle. Pulled from the chamber end toward the muzzle it also keeps the direction Savage specifies.
- Undersize patches. A .17 bore takes a very small patch; a patch that is too large is what makes the rod push hard enough to bow.
No cleaning-product model numbers or prices are given in this volume; the principles above apply to any maker’s rod, guide and cord.
5.1.3.3 What is in the bore
The .17 HMR fires jacketed bullets (Volume 2), not the bare, wax-lubricated lead of most .22 LR. Its bore fouling is therefore powder residue and jacket material rather than lead and lubricant, and a rimfire cleaning habit built around .22 LR is aimed at the wrong deposit. Savage’s own procedure specifies only “powder solvent”; its service desk, when quoting a break-in regime from Precision Shooting magazine, includes a copper solvent step between powder-solvent passes.4 That regime is presented by Savage as one school of thought, and it is centrefire-oriented; it is noted here only because it is the one place Savage’s documents mention copper solvent at all.
How often. Savage declines to set an interval: “It is difficult to establish a time period or number of rounds … As a general rule, ‘more often’ is much safer than ‘not enough’.”2 Its break-in answer opens with “Although there may be different schools of thought on barrel break-in”, and no break-in is required by the manual.4
5.1.4 The outside of the rifle, and the stock
- The bolt. “A light coat of oil on the outside of the bolt is sufficient for maintenance of the bolt.”4 It is not flushed or soaked, because it is not to be disassembled and a solvent-flooded striker assembly cannot be dried out by the owner.
- Metal surfaces. Wipe off debris; “Apply a thin coat of gun oil on all cleaned metal surfaces”; lightly oil interior surfaces where accessible.2
- The stock. Laminate or walnut, the stock is finished wood. The manual’s only stock instruction is to examine it and its sling studs. Solvent should not be left to pool in the barrel channel or the action inlet; the ejection-port-down cleaning position exists partly to prevent that.
5.1.5 The inspection routine
Savage’s maintenance section is the closest thing it publishes to a schedule, and it gives the checks rather than intervals.2
Table 1 — 5.5 The inspection routine
| When | Check | From Savage’s manual |
|---|---|---|
| Every time the rifle is prepared for use | The two-position safety works; the bolt handle or cap does not hit the safety when closing the bolt | ”This is an important step that should be done every time the firearm is prepared for use.” |
| With the bolt out | Bore clear, with no nicks, scratches, rust or pitting | ”look down the barrel” |
| With the bolt out | Barrel outside: run the fingers along it for bulges or damage | |
| With the bolt out | Bolt head, extractor and other surfaces for damage or excessive wear | |
| With the stock off | AccuTrigger and its adjustment spring for damage or debris (twigs, grass) | |
| Periodically | Stock and sling studs; scope rings tight; action screws tight after the stock is refitted | |
| After any cleaning | Bore clear of patch fragments; safety operational |
The parts that wear, on Savage’s own list, are the extractor and the trigger surfaces (“with any mechanical device, surfaces will wear with use”). Savage publishes no replacement intervals for either, and none is invented here.
5.1.6 Malfunctions: the symptom, and Savage’s answer
Every row below cites what Savage’s documents say about the symptom. Where Savage says nothing, the row says so.
Table 2 — 5.6 Malfunctions: the symptom, and Savage's answer
| Symptom | Likely cause | What to do |
|---|---|---|
| Click, no shot, with the blade not fully pressed | Sear blocked by the AccuRelease | Not a malfunction. Raise and lower the bolt handle to recock; place the finger squarely on the blade.2 |
| Gas or powder residue from the bolt area | ”What is known as ‘BLOW BACK’” — an ammunition problem in Savage’s framing | Stop; Savage recommends “trying a different brand of ammunition”. Inspect the fired case. Eye protection always.2 |
| Bolt will not go back into the receiver | Bolt rotated out of alignment while out | Realign: handle in line with the receiver cutout, firing pin top centre; insert with the trigger held back.1 |
| Bolt will not come out | Safety at FULL SAFE, so the trigger cannot move | Safety to fire, trigger fully rearward, draw the bolt.1 |
| Bolt handle strikes the safety on closing | Wear, damage, or a non-standard part | Stop using the rifle and have it checked; Savage makes this the first pre-use check.2 |
| Trigger moves at FULL SAFE | Safety not functioning | Stop using the rifle; to Savage or a gunsmith. The manual’s reassembly test requires no trigger movement at FULL SAFE.2 |
| Barrel off-centre in the stock | Recoil lug position, on 93s that have one | Loosen the lug, reposition it left or right; if still off-centre, contact Savage.4 |
| Magazine seats loosely or will not latch | Not published by Savage | Check the latch clicks home. Savage’s warning against overtightening the screws enough to indent the magazine retaining plate suggests the plate is where to look; this is an inference, not a Savage statement. The magazine, retaining clip and plate are owner-purchasable parts.2 |
| Failure to extract | Not published by Savage | Clean the chamber and extractor; the extractor and its spring clip are owner-purchasable parts. A chamber that still grips cases is a gunsmith job. |
| Misfire | Savage’s list: defective primer, powder issues, bullet seating, barrel bulge (a general, centrefire-oriented list) | Keep the muzzle safe and wait before opening; then treat as in the hub’s Ruger 10/22 dive, which quotes Ruger’s rimfire misfire procedure. Do not fire again until the bore is known to be clear.4 |
| Anything that “does not sound, feel, or look right” | — | Savage’s standing instruction: stop and have a qualified gunsmith look at it.2 |
5.1.7 Repair: what the owner fixes, and what goes to Savage
5.1.7.1 The owner’s parts
Savage’s manual lists, for the Model 93, the parts an individual may buy. Everything else is “factory fit” or sold to qualified gunsmiths only, and “some parts may require fitting.”2
Table 3 — The owner's parts
| Item | Part |
|---|---|
| 7 | Magazine retaining clip/spring |
| 10 | Detachable box magazine |
| 16B | Rear sight assembly |
| 16D | Elevator |
| 17B | Front sight blade |
| 18 | Stock assembly |
| 19A | Trigger guard |
| 19B | Trigger guard screw |
| 19I | Magazine plate |
| 19K | Action stud |
| 32 | Cartridge guide |
| 33 | Extractor |
| 33A | Extractor spring clip |
| 60 | Push nut washer |
| 504 | Scope base |
| 506 | Scope base screws |
| 529 | Swivel studs |
Savage sells these through its online PartFinder, which asks for the rifle’s serial number, or by telephone; the manual notes a minimum order and about two weeks for delivery.2 The serial number is needed because parts are matched to the rifle’s configuration, and the service desk’s answer on stocks says the same: “contact us … with the serial number of your firearm to find out what is available.”4 AccuTrigger adjustment tools are sold separately.4
The extractor is the one working part of the action the owner may replace. That is a meaningful allowance, and it matches Savage’s inspection list, which names the extractor among the surfaces to check for wear. A worn or damaged extractor typically shows up as cases left in the chamber. Savage’s note that parts “may require fitting” applies; a replacement that does not snap a case out cleanly is a gunsmith’s fitting job, not a reason to file on the bolt.
5.1.7.2 What goes to a gunsmith or to Savage
- Anything inside the bolt. By Savage’s own instruction.
- The AccuTrigger’s internals, and any change to the pull beyond the adjustment spring’s limits. Savage’s only permitted alteration is the adjustment.
- The barrel. Savage “does not sell barrels” and publishes a rebarrelling service only for centrefires (Volume 4 §4.8). A damaged rimfire barrel is a question for Savage’s service department first.
- A bolt whose number does not match the receiver, a safety that does not block the trigger, or a bolt that catches the safety.
- Threading the muzzle for a suppressor (Volume 6).
Sending it to Savage. Savage’s service desk states that no return authorisation number is needed: include a brief note describing the problem with a name, address and telephone number, and ship the rifle to Savage’s service department in Westfield, Massachusetts.4 How a rifle is lawfully shipped is a matter of current federal and carrier rules and is not set out here.
Warranty. The manual’s limited warranty covers the original owner, with proof of purchase, for one year, and excludes improper maintenance, “alterations/modifications performed without the written authorization of Savage Arms”, normal wear, corrosion, and barrel obstructions. It also excludes ammunition not made to SAAMI/ANSI specification, which rules out anything non-factory; rimfire ammunition cannot be reloaded in any case.2
5.1.8 What could not be verified
- A bolt or trigger detail-strip procedure. Savage publishes none and forbids the owner the bolt.
- Replacement intervals for the extractor or any other part.
- The correct action-screw torque for the rifle documented here; three Savage figures conflict.
- Rod, jag and patch dimensions for .17 cleaning equipment; the stiffness comparison in §5.3 assumes only that rod diameter scales with bore.
- Current parts availability and prices. Savage’s PartFinder was not queried for this rifle.
5.1.9 Bibliography
Footnotes
-
Savage Arms blog, “How to Remove the Bolt in a Savage Bolt Action Rimfire Rifle”, 31 March 2022, as archived 20 March 2025. ↩ ↩2 ↩3
-
Savage Arms, instruction manual for the Mark I, Rascal, Mark II, Model 93 and B.MAG rimfire bolt actions, savagearms.com/DAM/assets/pdf/Manuals/manual_rimfire_boltaction.pdf, as archived 19 December 2022. §1 safety rules and the prohibition on alteration other than AccuTrigger adjustment; §3 installing the bolt; §4 “blow back”; §5 stock removal, AccuTrigger adjustment and stock installation; §6 parts policy and Model 93 parts list; §14 maintenance timeframes, routine inspection, cleaning and care, “DO NOT DISASSEMBLE THE BOLT ASSEMBLY”; §15 statement of limited warranty. ↩ ↩2 ↩3 ↩4 ↩5 ↩6 ↩7 ↩8 ↩9 ↩10 ↩11 ↩12 ↩13 ↩14 ↩15 ↩16 ↩17 ↩18 ↩19
-
Savage Arms blog, “How to Adjust the AccuTrigger on Bolt Action Rimfire Rifles”, 16 August 2022, as archived 1 September 2024. ↩
-
Savage Arms service FAQ, service.savagearms.com/hc/en-us/articles/, as archived 2020–2024: bolt disassembly (214237103); stock hex size (214237363); action screw torque table (214238343); model 93 recoil lug (214238263); break-in, quoting Precision Shooting (214238323); misfires (214237963); stocks for rimfires (214239423); spare AccuTrigger tool (214239663); barrels (214238523); service returns (214238603, 214239903). ↩ ↩2 ↩3 ↩4 ↩5 ↩6 ↩7 ↩8 ↩9 ↩10
Comments (0)