Flux Raider · Volume 5
Installing, Keeping and Repairing a Raider X
The published installation and removal sequence, the function check that tests the chassis safety, cleaning and lubrication, fasteners, known failures, and Flux's warranty and parts service
Flux Defense’s written instruction for installing a pistol in a Raider X is one sentence: “You will install your FCU and slide into the chassis the same way you would a standard grip module.”1 Its maintenance instruction is two sentences. Flux supports the chassis mainly through installation videos and a support address.
The detailed procedures exist, but they are SIG Sauer’s. SIG publishes an operator’s manual for the P320-FLUX pistols titled SIG P320 Raider X Operator’s Manual (P/N 1304128-01 REV 02), and it contains a numbered installation and removal sequence, a cleaning section with a part headed “Raider X Grip Module Assembly,” an eighteen-step function check that exercises the chassis’s own safety and magazine releases, and instructions for the stored hex key, the battery tray, the side rails and the stock.2 It is written for SIG’s factory pistols, which use the same chassis (Volume 1), and it is the procedure followed here. Where Flux’s pages add to it or differ from it, that is said.
The P320’s own field strip and grip-module change, from SIG’s M17 manual, are in the SIG P320-M17 dive, Volume 8. The chassis version differs from the grip-module version at two steps, and both are about the chassis safety and the brace.
5.1 Before Anything: Unload, and Safety to FIRE
SIG’s manual opens its maintenance chapter with its standard warning to “VISUALLY AND PHYSICALLY CONFIRM THE PISTOL IS UNLOADED AND CLEARED,” and refers the reader to the P320 operator’s manual for the unload procedure. Then comes the step that has no equivalent on a grip-module pistol, given as a caution in capitals:2
“IT IS VERY IMPORTANT TO PLACE THE SAFETY ON FIRE WHENEVER INSTALLING OR REMOVING THE FCU. FAILURE TO DO SO CAN CAUSE DAMAGE TO THE FCU AND/OR CHASSIS.”
The safety meant is the chassis’s ambidextrous safety (Volume 3), not a thumb safety on the FCU — which a Raider X pistol does not have (Volume 4).
5.2 Removal — SIG’s §7.1, Verbatim
- “Unload/Clear pistol. See your P320 Operator’s manual for unload/clear procedures.”
- “Rotate safety lever from SAFE to FIRE to facilitate removal of FCU.”
- “Extend brace by pushing down on the release lever on right side of chassis.”
- “Lock slide to the rear by pulling slide rearward and pushing up on slide catch lever.”
- “Rotate takedown lever clockwise until it stops.”
- “Pull slide slightly rearward to disengage slide catch lever while maintaining control of slide assembly.”
- “Guide the complete slide assembly (slide, barrel, recoil spring, and guide) forward and off the frame. Set aside for further disassembly.”
- “Remove takedown lever from chassis by rotating it as you pull it out.”
- “Pull FCU out from chassis.” CAUTION: “NO FURTHER DISASSEMBLY OF THE FIRE CONTROL UNIT (FCU) IS AUTHORIZED.”
- “Push recoil spring guide forward slightly and lift from rear to remove recoil spring guide assembly from slide.”
- “Remove barrel from slide by pulling it upward slightly and to the rear.”
“This level of disassembly is sufficient to allow a thorough cleaning after firing.”2
Why the brace comes out first. The manual does not say. The FCU leaves the chassis rearward and upward, pivoting on its front; with the brace collapsed, the brace, its end cap and the collapsed rails occupy the rear of the chassis. Extending the brace clears that space. That is the evident reason and is given as such, not as SIG’s.
For a slide with a loose-spring guide rod. SIG’s steps 6, 7 and 10 assume SIG’s captive recoil-spring assembly. A solid rod with a loose spring, such as the one on the build documented in the SIG P320-M17 dive, Volume 6, must be controlled as two parts when the slide comes off; the manual’s warning — “SLIDE IS UNDER SPRING TENSION. MAINTAIN POSITIVE CONTROL DURING SLIDE REMOVAL” — applies with more force, not less.
5.3 Installation — SIG’s §7.4, Verbatim
- “Verify that barrel is clear of all foreign matter.”
- “Insert barrel into slide.”
- “Insert recoil spring guide assembly into slide.”
- “Extend brace by pushing down on the slide release arm on right side of chassis.”
- “Rotate safety lever on chassis from SAFE to FIRE as FCU will not install correctly if left on SAFE.”
- “Insert FCU into the rear of chassis. You may need to maneuver the slide catch lever on the FCU past the brace release arm on the chassis.”
- “Press down on frame rails and pivot FCU into position.”
- “Insert takedown lever (chamfered side as shown) through the chassis and Fire Control Unit, locking FCU in place. Push it in until it snaps in place, then rotate it clockwise until it stops.”
- “Guide slide onto frame rails from the front.”
- “Retract slide fully to the rear. Engage slide catch lever to lock slide in the open position.”
- “Rotate takedown lever counterclockwise until horizontal.”
- “Press slide catch lever to release slide.”
- “Rotate safety lever back to SAFE.”2
Three notes on it.
- Step 4 calls the brace release “the slide release arm”; step 3 of the removal calls the same part “the release lever.” It is one lever — the brace release on the right side above the grip. The inconsistency is SIG’s.
- Step 6 is the one SIG qualifies. The FCU’s slide catch lever and the chassis’s brace release arm are neighbours (Volume 3), and the FCU has to be worked past the arm rather than forced.
- Step 8’s “chamfered side as shown” refers to a photograph in the manual; the lever has an orientation, and the manual’s picture is the reference for it.
Flux’s videos. Flux’s installation page carries a section headed “RAIDER X P320” and its product page links a “RAIDER X Complete Compatibility Guide - SIG P320” video on Flux’s YouTube channel; the product text says, as the MP17 pages did in 2019, “Caution: Watch instruction video before installing.”34 The videos are the maker’s own instruction; the written sequence above is quoted because it is the one that can be cited step by step.
5.4 The Function Check — the Only Published Test of the Chassis Safety
SIG’s §8.0 gives an eighteen-step function check to be performed “after the completion of maintenance and after each cleaning and assembly of the pistol.” It differs from the P320’s ordinary check because it exercises every chassis control. Verbatim, with the magazine and safety steps grouped:2
Magazines.
- “Ensure magazine is removed and pistol is unloaded and cleared.”
- “Insert an empty magazine into rear magazine well until it locks into place. You should hear an audible click.”
- “Push magazine release slider on left side of chassis forward to release magazine. It should fall free.”
- “Reinsert empty magazine into rear magazine well until it clicks in place. Press magazine release button on right side of chassis to release magazine. It should fall free of magazine well.”
- “Insert empty magazine into front storage magazine well.”
- “Press front magazine release button halfway to release front magazine.”
- “Insert two empty magazines into both forward storage and rear magazine wells.”
- “Press front magazine release fully to drop both magazines at the same time.”
Slide. 9. “Insert empty magazine into rear magazine well and pull back on slide to lock it to the rear.” 10. “Press down firmly on slide release lever. Slide should return to closed position. You may need to drop the empty magazine to facilitate as it can be very difficult to release slide on an empty magazine. Loaded magazines will not have this difficulty.”
Chassis safety and trigger. 11. “Push up on the manual safety lever to engage the safety.” 12. “Press the trigger. The striker should NOT be released. Release the trigger.” 13. “Press down on the manual safety lever to disengage the safety.” 14. “Press the trigger to the rear and HOLD. The striker should release and you should hear and feel an audible click.” 15. “With the trigger still pressed to the rear, pull the slide completely to the rear and release.” 16. “Release the trigger. You should hear and feel a light, audible click as the striker resets.” 17. “Press the trigger. The striker should release and you should hear and feel an audible click.” 18. “Pull back on slide and release, then push up on the manual safety lever to engage the safety.”
The check repeats SIG’s warning: “AFTERMARKET TRIGGERS SHOULD NOT BE USED WITH A P320 EQUIPPED WITH A FLUX RAIDER X GRIP MODULE, AS THEY MAY INTERFERE WITH PROPER OPERATION OF THE MECHANICAL SAFETY.”
Steps 11 and 12 answer a gap the SIG P320-M17 dive, Volume 8 recorded: working only from the M17 manual and Flux’s pages, it found no published check of the Raider X’s safety and set out the logical equivalent. SIG’s Raider X manual publishes exactly that check. On a chassis whose trigger or safety has been changed — or one on which one side of the safety has been replaced with a delete button — step 12 is the step that matters. If the striker releases with the chassis safety engaged, the pistol is not to be loaded.
Step 10 describes normal behaviour, not a fault: SIG says outright that releasing the slide on an empty magazine “can be very difficult.”
5.5 Deploying and Collapsing the Brace
From Flux’s FAQ and SIG’s §4.3:12
- Deploy: push the pistol out to arm’s length, press the brace release lever (right side, above the grip) with the index finger, or the thumb for a left-handed shooter. “Be mindful of the brace/stock deploying straight back towards you.” If it stops short, “pull it rearward until you hear an audible click.” SIG: “ENSURE BRACE IS FULLY EXTENDED AND LOCKED IN POSITION PRIOR TO FIRING THE PISTOL.”
- Collapse: “hold the release lever down, and smack the brace/stock with your opposite hand. Be sure to fully compress the stock back into the ejection spring until you hear an audible click.”
- Clearance: SIG warns to “ENSURE THE TRAVEL OF THE BRACE WILL NOT BE OBSTRUCTED BY CLOTHING OR ANY OTHER EQUIPMENT.”
A brace that is not fully locked is the failure the 2021 Raider Fix addressed (Volume 1); the audible click in both directions is the check.
5.6 Fasteners, Thread-Locker and Torque
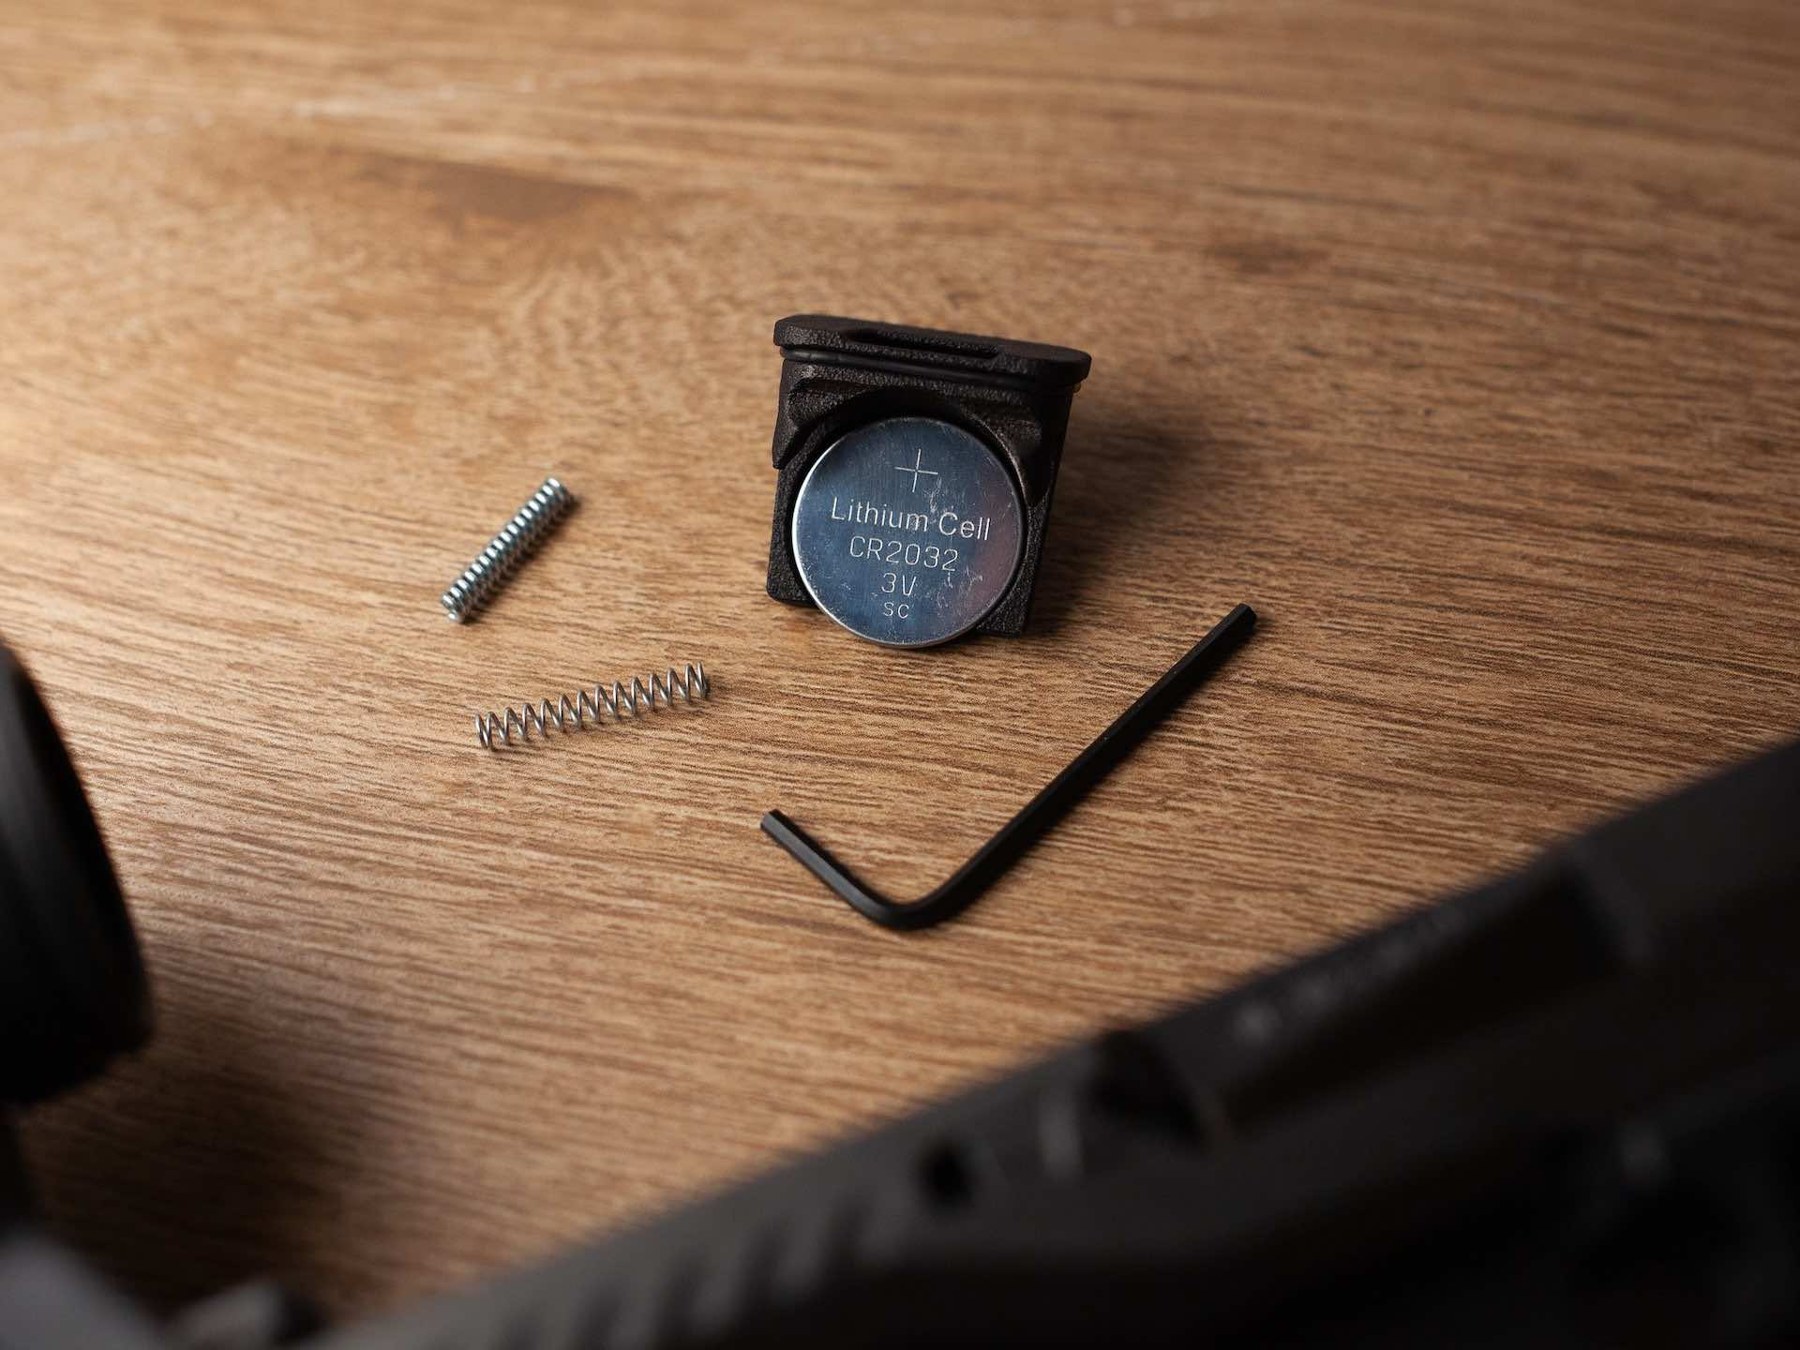
The chassis uses 5/64-inch hex fasteners throughout, and carries its own key: “There is a convenient 5/64” hex key stored in the Raider X chassis for maintenance purposes. To access it, extend the brace and you will see it at the back end of the chassis. To pull it out, use your finger (or a 9mm casing if it’s too tight).”2 Flux’s Extra Parts Kit includes a spare “Raider takedown allen wrench,” and Tactical Development notes that the key Flux supplies “may be very tight do to custom size of allen.”56
What the makers publish about the fasteners, all of it:
Table 1 — What the makers publish about the fasteners, all of it
| Fastener | Instruction | Source |
|---|---|---|
| Side M1913 rail screws | ”Place a drop of threadlocker on each of the rail screws.” “Tighten screws. Do not overtighten.” Rails are “side specific and are marked.” | SIG §11.0 |
| SBR stock screws (two) | “Install the two stock screws using the hex wrench. Do not overtighten.” | SIG §12.0 |
| Brace screws (two) | removed with the 5/64 in. key when swapping to a stock | SIG §12.0 |
| LORA lower rail (accessory) | “tighten screw to 20in.lbs.” | Flux, LORA listing |
| Ejection-spring bolt | not an owner adjustment: “Never tamper with tightening of screws or try to modify brace – ejection spring is under tension … Always send brace back to Flux Defense LLC for any adjustment or calibration” | Flux, Terms7 |
No torque value is published for any fastener on the chassis itself, and none is given here. The only torque figure anywhere in the Raider X line is Flux’s 20 in-lb for an accessory, and it is not transferable to the chassis’s own screws. The makers’ “do not overtighten” is the whole instruction: these screws run into a polymer body or into inserts moulded into it, and the moulded-in insert that replaced a pressed-in nut on the Raider X (Volume 2) is not something to test with a long driver. Thread-locker is specified only for the side-rail screws; nothing on either maker’s pages specifies it elsewhere.
5.7 Cleaning and Lubrication
Interval. SIG: “Clean and lube before or after every day the pistol is fired or at a minimum of every 500 rounds.” Flux: “We recommend disassembling your slide and FCU for traditional handgun cleaning from time to time,” and “You should clean your Raider setup as you would any other handgun.”21
The chassis. SIG’s section on the “Raider X Grip Module Assembly,” verbatim:2
- “Wipe the frame and grip module assembly with a soft cloth.”
- “Use cotton swabs to clean hard to reach areas. Pay special attention to the frame rails, takedown lever, and slide catch lever.”
- “Lubricate the frame rails with a light coat of CLP.”
- “Apply CLP to accessible functioning parts.”
- “Clean the magazine well of any dirt, dust, or residue with a soft cloth.”
Flux adds one point that SIG does not: “we suggest applying a drop of lubricant inside the ejection rail channels on the Raider X on occasion.”1 The ejection rails are the two steel extension rails that carry the brace; their channels are what the brace slides in on every deployment. Neither maker gives an interval beyond “on occasion.”
The slide and barrel. As for any P320, with two chassis-specific notes in SIG’s text: “Do not lubricate the striker assembly” (SIG’s caution warns of light strikes), and “The compensator (if installed) does not need to be removed for routine maintenance and cleaning” — for a compensated barrel, “push barrel forward in the slide to allow space to run rods and patches through the barrel.”2
Magazines. Both wells hold magazines, and SIG’s manual notes that “Most stoppages are directly related to the magazine,” advising owners to number their magazines “so you can identify a magazine that is related to a stoppage.”2
Suppressed use makes the chassis dirtier than the pistol would be alone. Flux: “Shooting suppressed can result in more gas being blown back towards you,” and it sells a replacement end cap for suppressor users that “cuts off the gasses escaping directly backwards from the slide.”18
Finish. Flux’s warranty excludes “Painting or cerakoting the chassis,” and Tactical Development’s magazine extension warns that “Cerakote or other finish added to your Raider may make this not seat full.”19 The chassis is cleaned, not refinished.
5.8 Wear, Inspection and Spares
Flux’s position on wear is unequivocal: “The Raider platforms do not have any parts that should be continually replaced due to wear. However, if you need parts, please contact our support team.”1 No replacement interval is published for any chassis part, and none is invented here.
What the record does identify is where problems have occurred, and so what is worth inspecting at each cleaning:
Table 2 — What the record does identify is where problems have occurred, and so what is worth inspecting at each cleaning
| Point | Why | Check |
|---|---|---|
| Brace lock and release lever | the 2021 “collapsing under recoil” failure; the Raider X’s “Increased rail-lock spring force” | brace clicks home at both ends; will not collapse under hard hand pressure when locked |
| Ejection spring and its bolt | the Raider X moved the bolt’s anchor to a moulded-in insert; Flux’s terms forbid owner adjustment | brace deploys fully and briskly; bolt not backing out |
| Extension rails and channels | carry the brace; Flux asks for lubricant there | no burrs, no binding, a drop of lubricant |
| Magazine catches and dual release | four of Flux’s sixteen Raider X changes; stronger catch spring | SIG function-check steps 2–8 |
| Chassis safety | blocks the trigger from outside the FCU | SIG function-check steps 11–12, every time |
| Takedown-lever bore | passes through chassis and FCU | lever snaps in and rotates to the stop |
Flux sells three spares directly:51011
- Extra Parts Kit, $7.99: “Spare battery tray (battery not included), Raider takedown allen wrench, replacement springs,” for “the Flux Raider X and MP17 Raider.” Which springs is not stated.
- Miscellaneous Parts, listed at $1.00 with the instruction “contact support.”
- Brace kits, stocks and gas caps as separate items (Volume 6).
5.9 Repair: Malfunctions, Diagnosis and Who Fixes What
The manual’s framework is SIG’s: a stoppage is cleared by the operator; a malfunction — “a failure of a part rendering the firearm inoperable” — goes to “an authorized SIG SAUER Armorer.”2 On a chassis build that line needs to be drawn between the two companies, because the FCU and slide are SIG’s and the chassis is Flux’s.
Table 3 — Repair: Malfunctions, Diagnosis and Who Fixes What
| Symptom | Likely area | Source of the diagnosis | Who fixes it |
|---|---|---|---|
| Brace collapses under recoil | brace lock / lever | Flux Raider Fix notice, 2021 | Flux (lever kits were sent free to all original-Raider owners); an original Raider without the fix should be referred to Flux |
| Brace deploys weakly or not fully, especially after a brace or stock swap | rails and brace out of tune; ejection spring | Flux brace-kit pages: “installing the brace will change the performance of the spring loaded ejection … the rails and brace will need to be tuned to work together” | Flux — “we are offering an install and tune up service”; the bolt is not an owner adjustment |
| Magazine will not drop free | aftermarket magazine tolerance; finish added to chassis | Flux support: aftermarket magazines “may not drop free easily from the magwells” | owner: use SIG magazines |
| Magazine over-inserts | original Raider | Raider X change 1 added an “Overtravel stop” | not applicable to the X |
| Slide will not release on an empty magazine | normal | SIG function check step 10 | none needed |
| Striker releases with chassis safety on | trigger not SIG pattern, or safety damaged | Flux and SIG trigger warnings | stop; restore a SIG trigger; Flux support for the chassis |
| Short-stroking, failure to feed, stovepipes when suppressed | spring and booster tuning | Flux FAQ: “Short stroke/failure to feed/stovepipes can happen if your Raider is not tuned well”; “a nicely broken in 14lbs spring” | owner, at the bench; see the P320-M17 dive, Volume 6 |
| Rails collapse after fitting the slide-drop lever | the optional lever | Flux: “may cause your brace/stock rails to collapse under recoil if not installed and tuned correctly” | remove the lever; Flux support |
| Any FCU, slide or barrel fault | the pistol | SIG manual | SIG — but SIG’s warranty is void on a pistol in an aftermarket chassis (below) |
What the bench can do. Clean, lubricate and inspect; replace side rails, pedals, gas caps, braces and stocks with the maker’s parts; restore a SIG trigger; tune recoil springs; run the function check. What goes back to Flux: anything involving the ejection spring bolt or the brace calibration, per Flux’s own terms, and any structural damage to the moulding. What goes to SIG: the FCU, which SIG’s manuals reserve to its armorers beyond the grip-module swap.
5.10 Warranties, Returns and the Rebuild Service
Flux. “All Flux Defense products are backed by a lifetime transferable warranty covering defects in materials and workmanship.” It is voided by modifications “including (but … not limited to): Cutting or altering the optic mount; Removing safety notches; Painting or cerakoting the chassis.” And: “A rebuild service is available for modified units that fall outside warranty terms.”1 The support page names the rebuild service at a product URL (fluxdefense.com/product/flux-brace-stock-tune) that returned an error when checked on 19 September 2026; a 2022 capture of Flux’s store lists “LH Brace/SBR Stock Install and Tune (Brace/Stock not Included)” at $35.00, which is the nearest dated price located.1213
The warranty is transferable, which matters for a second-hand chassis — as does the fact that the 2021 Raider Fix kits were promised “INCLUDING THOSE THAT PURCHASED SECONDHAND.”14
Returns are within 30 days, need an RMA from [email protected], and exclude used or altered items; a 5 % restocking fee applies to cancellations. Flux’s list ends with a line that dictates how a chassis is sent for service: “Do not send firearms, FCUs, or ammunition.”1 A chassis goes to Flux empty.
SIG. SIG’s manual for the Raider X is candid about SIG’s side: “Installation of any aftermarket parts will void the warranty of your SIG SAUER firearm,” and its parts policy repeats that “THE USE OF AFTERMARKET PARTS IS NOT AUTHORIZED AND WILL VOID THE WARRANTY.”2 The chassis is an aftermarket part on any P320 SIG did not ship in one. The exception is SIG’s own P320-FLUX LEGION and TACOPS, sold as complete pistols under SIG’s “Infinite Guarantee” (Volume 7 weighs that in donor choice).
References
Footnotes
-
Flux Defense, “Frequently Asked Questions,” items 25–27, 33–36, 47, 49–51, 54 and 55. https://fluxdefense.com/frequently-asked-questions (accessed 2026-09-19). ↩ ↩2 ↩3 ↩4 ↩5 ↩6 ↩7 ↩8 ↩9
-
SIG Sauer, SIG P320 Raider X Operator’s Manual: Handling & Safety Instructions, P/N 1304128-01 REV 02 (©2024): §4.1, §4.2, §4.3, §7.0–7.4, §8.0, §9.0, §11.0, §12.0, §14.0. https://www.sigsauer.com/media/sigsauer/resources/FLUX_RAIDER_BRACE_OPERATORS_MANUAL_1304128-01_REV_02_WEB_UPDATE_1.pdf (downloaded 2026-09-19). ↩ ↩2 ↩3 ↩4 ↩5 ↩6 ↩7 ↩8 ↩9 ↩10 ↩11 ↩12 ↩13
-
Flux Defense, “Installation Videos.” https://fluxdefense.com/install (accessed 2026-09-19); video “RAIDER X Complete Compatibility Guide - SIG P320,” Flux Defense channel, https://youtu.be/0WfANJLx7Ho (title read 2026-09-19 from YouTube’s oEmbed record). ↩
-
Flux Defense, “RAIDER X FDE KIT – M17/P320,” SKU 161-00024. https://fluxdefense.com/shop/raider-x-kit-m17-p320 (accessed 2026-09-19). ↩
-
Flux Defense, “Extra Parts Kit,” SKU 165-00014, $7.99. https://fluxdefense.com/shop/extra-parts-kit (accessed 2026-09-19). ↩ ↩2
-
Tactical Development, “Forward Operating Pedal for Flux Raider,” installation note. https://tactical.dev/products/forward-operating-pedal-for-flux-raider (as recorded by the SIG P320-M17 dive’s research, 2026-09-19). ↩
-
Flux Defense, “Terms and Conditions,” product-safety paragraph. https://fluxdefense.com/terms (accessed 2026-09-19). ↩
-
Flux Defense, “Gas Cap,” SKU 165-00015. https://fluxdefense.com/shop/gas-cap (accessed 2026-09-19). ↩
-
Flux Defense, “Tactical Development Spare Mag Extension – Raider X,” SKU 162-00119. https://fluxdefense.com/shop/spare-mag-extension-raider-x (accessed 2026-09-19). ↩
-
Flux Defense, “Miscellaneous Parts (contact support),” SKU MISCPARTS. https://fluxdefense.com/shop/misc-parts (accessed 2026-09-19). ↩
-
Flux Defense, “RH Brace Kit – Raider X P320,” SKU 165-00002, and “LH Brace Kit – Raider X P320,” SKU 165-00013, $49.99 each; tuning caution quoted. https://fluxdefense.com/shop/rh-brace-kit-raiderxp320 ; https://fluxdefense.com/shop/lh-brace-kit-raiderxp320 (accessed 2026-09-19). ↩
-
Flux Defense, “Support,” items 5 and 8. https://fluxdefense.com/support (accessed 2026-09-19). ↩
-
Flux Defense store, related-products listing on “RAIDER SAFETY DELETE – PRE ORDER,” Internet Archive capture of 13 August 2022. https://web.archive.org/web/20220813064207/https://fluxdefense.com/product/raider-safety-delete ↩
-
Flux Defense, “Raider Fix Info,” Internet Archive capture of 4 September 2021. https://web.archive.org/web/20210904214915/https://www.fluxdefense.com/raiderfix ↩
Comments (0)